

| Subject | Canadian Armoured MG Carrier |
|---|---|
| Scale | 1:35 |
| Company | Copper State Models |
| Ref. # | CSM 35006 |
Just because I thought that it would look unique and eye-catching. That's in case your first thought was "why has he put it on a wooden box?!"
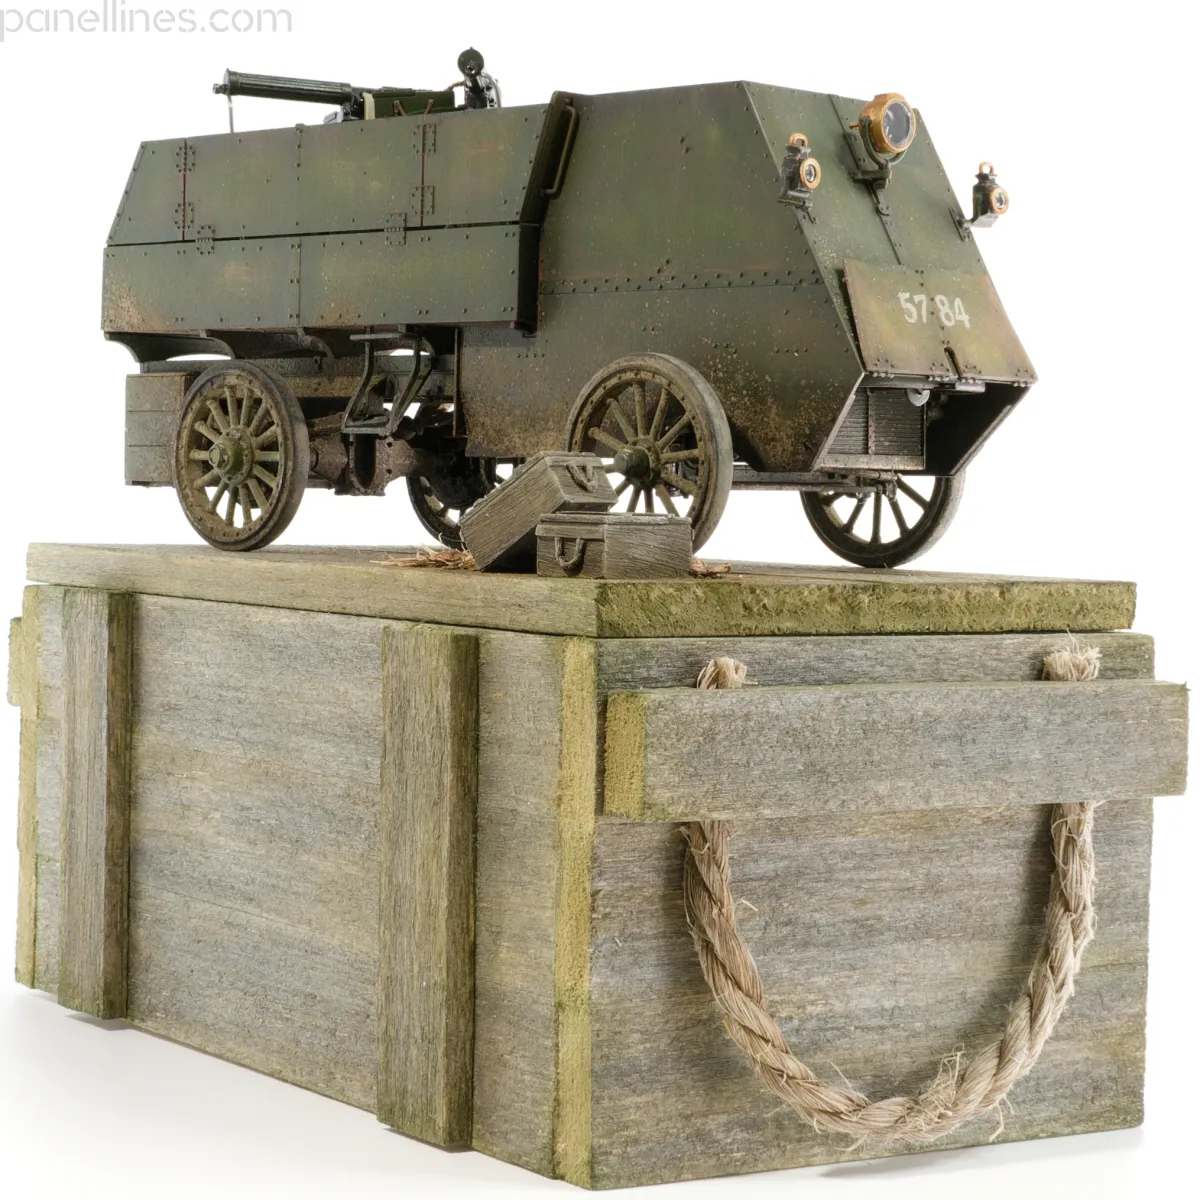
The base
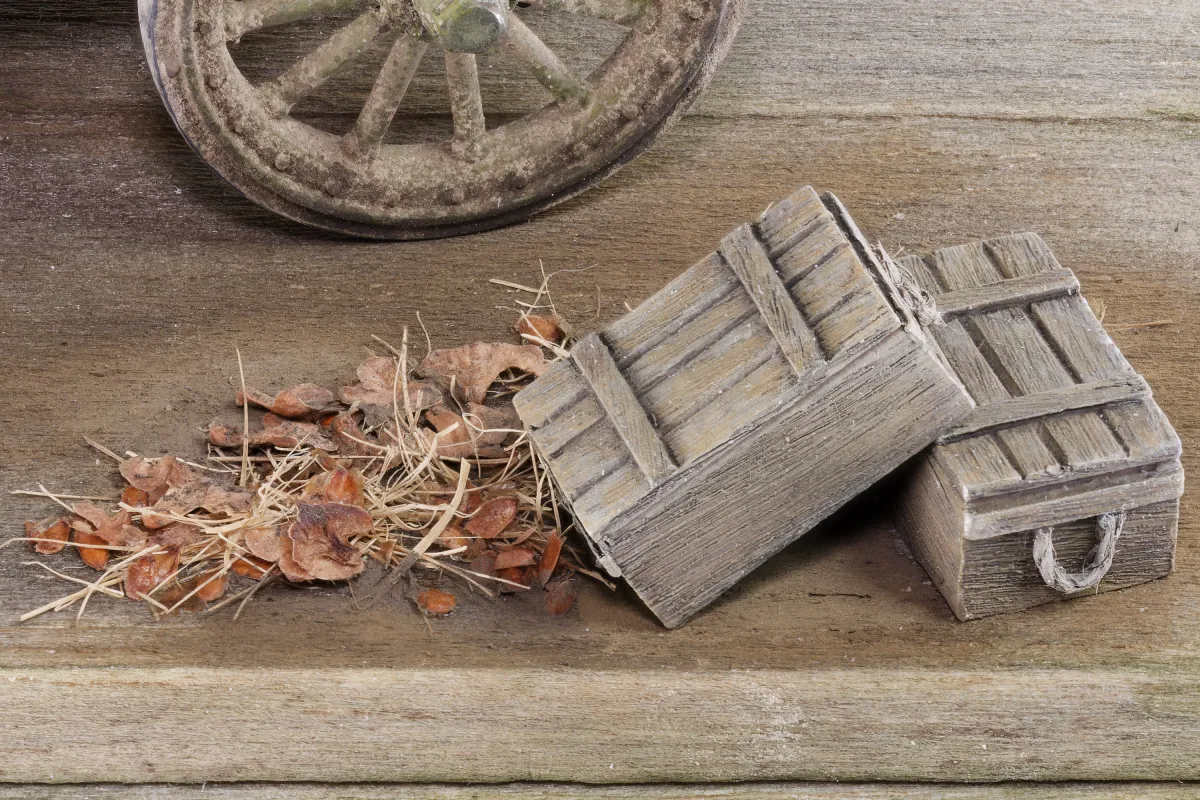
I wanted a mount of some kind because it's a small model, about 5" (13cm) long. I had intended to make groundwork based on the box art — also influential in my choice of finish — but my skill wasn't up to the task when I made this a couple of years ago. So I had a rethink and, while staring at the two resin crates which were about to head for the spares box, I pictured what the model would look like on top of one and had a daft idea.
I looked for photos of contemporary ration crates or ammo boxes, but I didn't find anything quite right. So I sketched what was in my mind, scaled the dimensions up roughly, and began with a basic box shape made from insulation board. Around that, I glued strips of balsa. The rope came from my shed. I had intended to add small tacks as nails, but I couldn't find any which were right, so I sort of forgot about that. If I happen to see the perfect thing, they can always be added.
The balsa was painted in a suitably dirty grey acrylic mix, then washed in several layers with green, brown, and black inks. A dab of Slimy Grime enamel here and there and it was done.
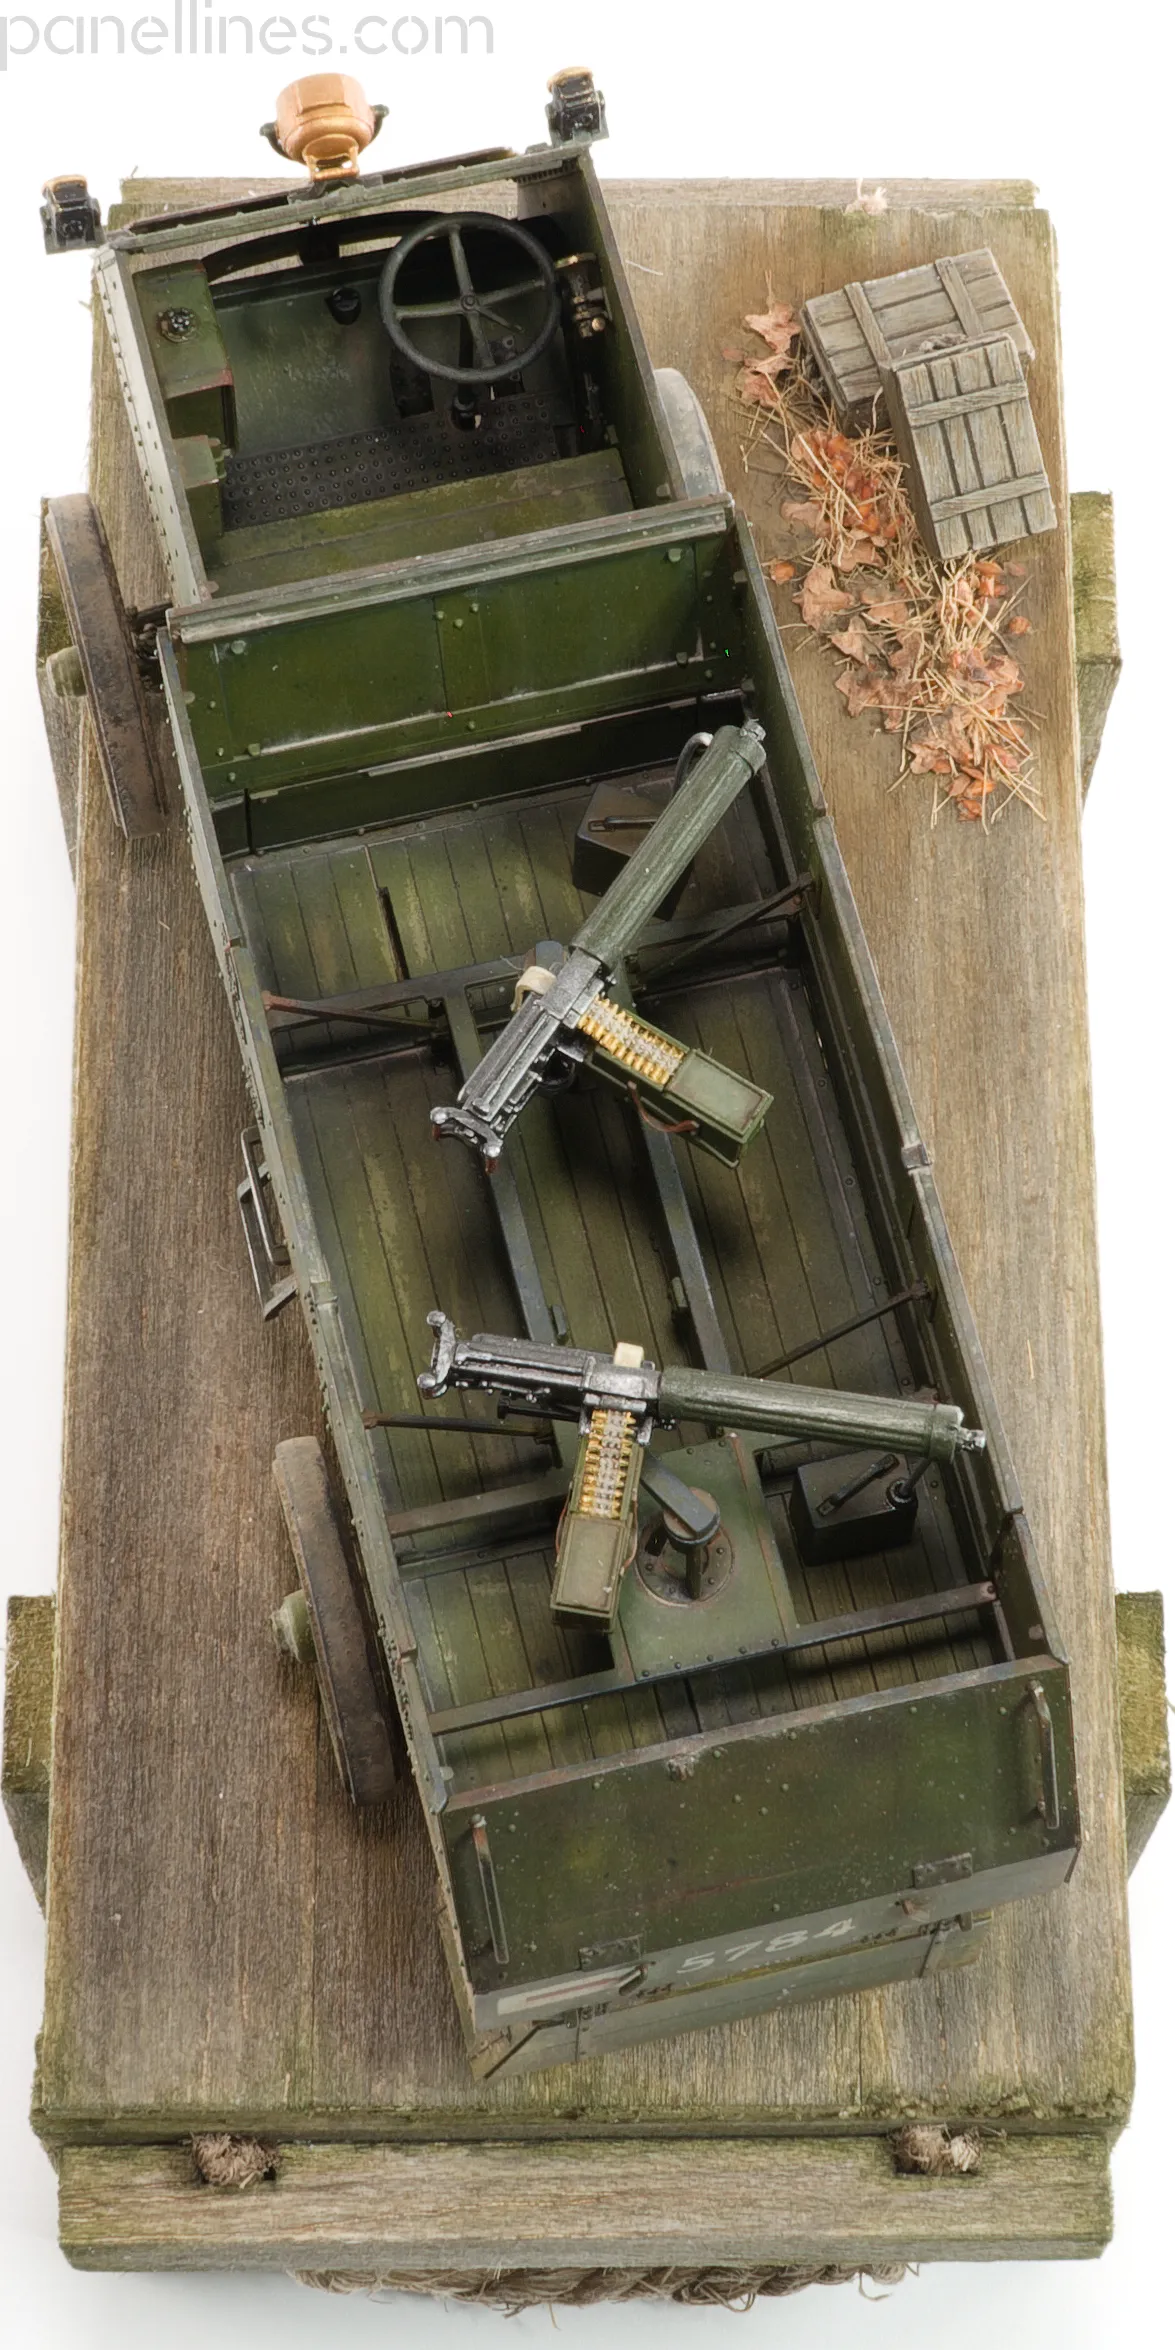
Just one thing was missing, and that was something in scale other than the model itself. So the crates got a reprieve and were joined by some seagrass trimmings and dried birch seeds to provide a hint of time and place.
The model
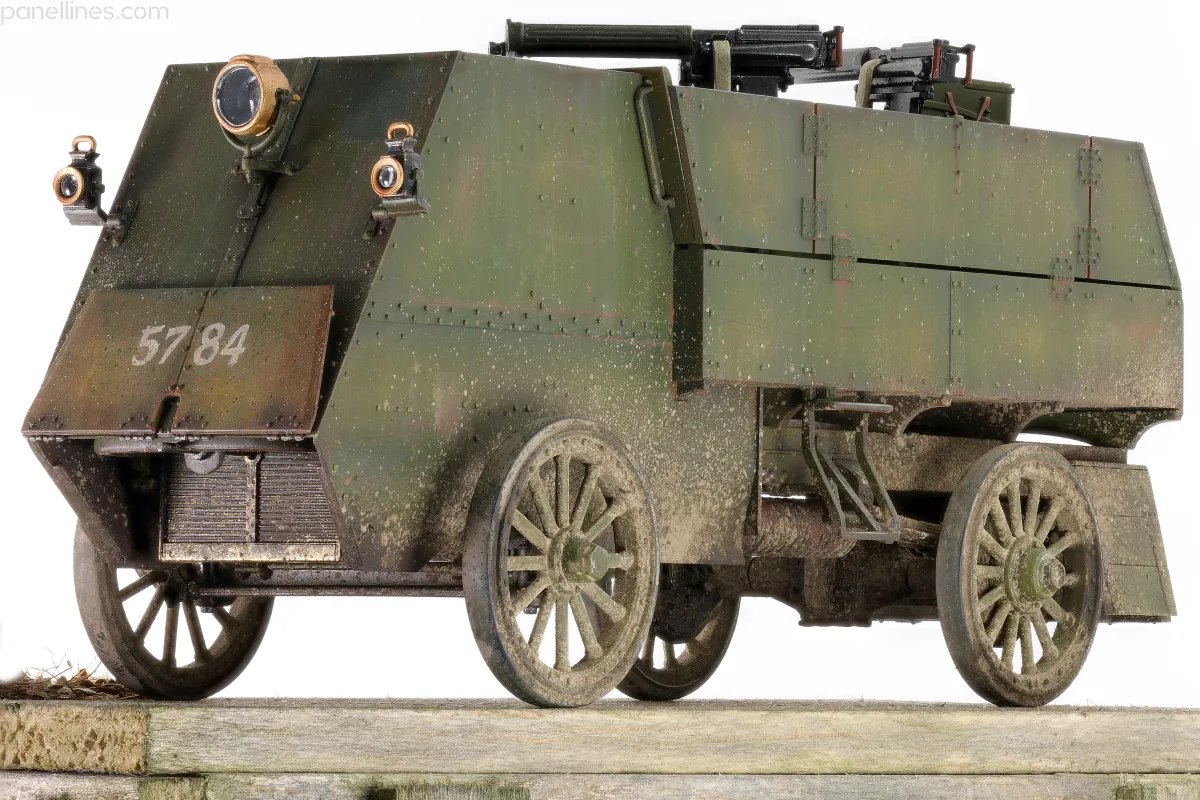
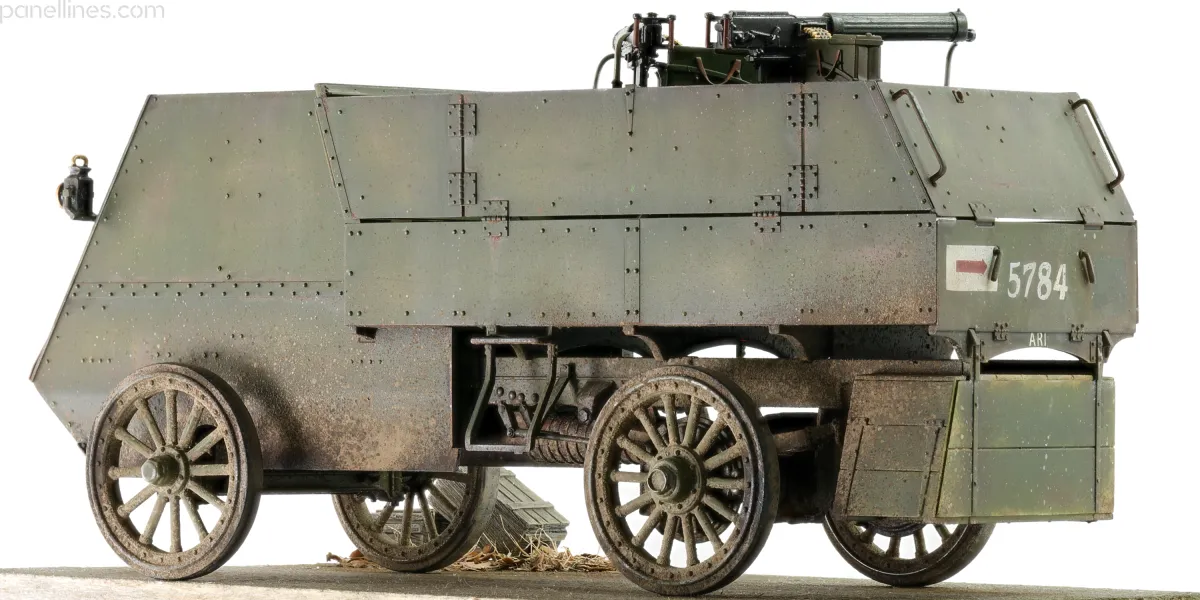
Copper State Models has gained a good reputation for quality; based on this, I think that it's mostly deserved. I had some minor difficulty with alignment where you might reasonably anticipate challenges with a truck model, such as the chassis-to-body alignment and the fit of the side panels to the internal frame. I had to accept a slight misalignment on one edge of the rear panel.
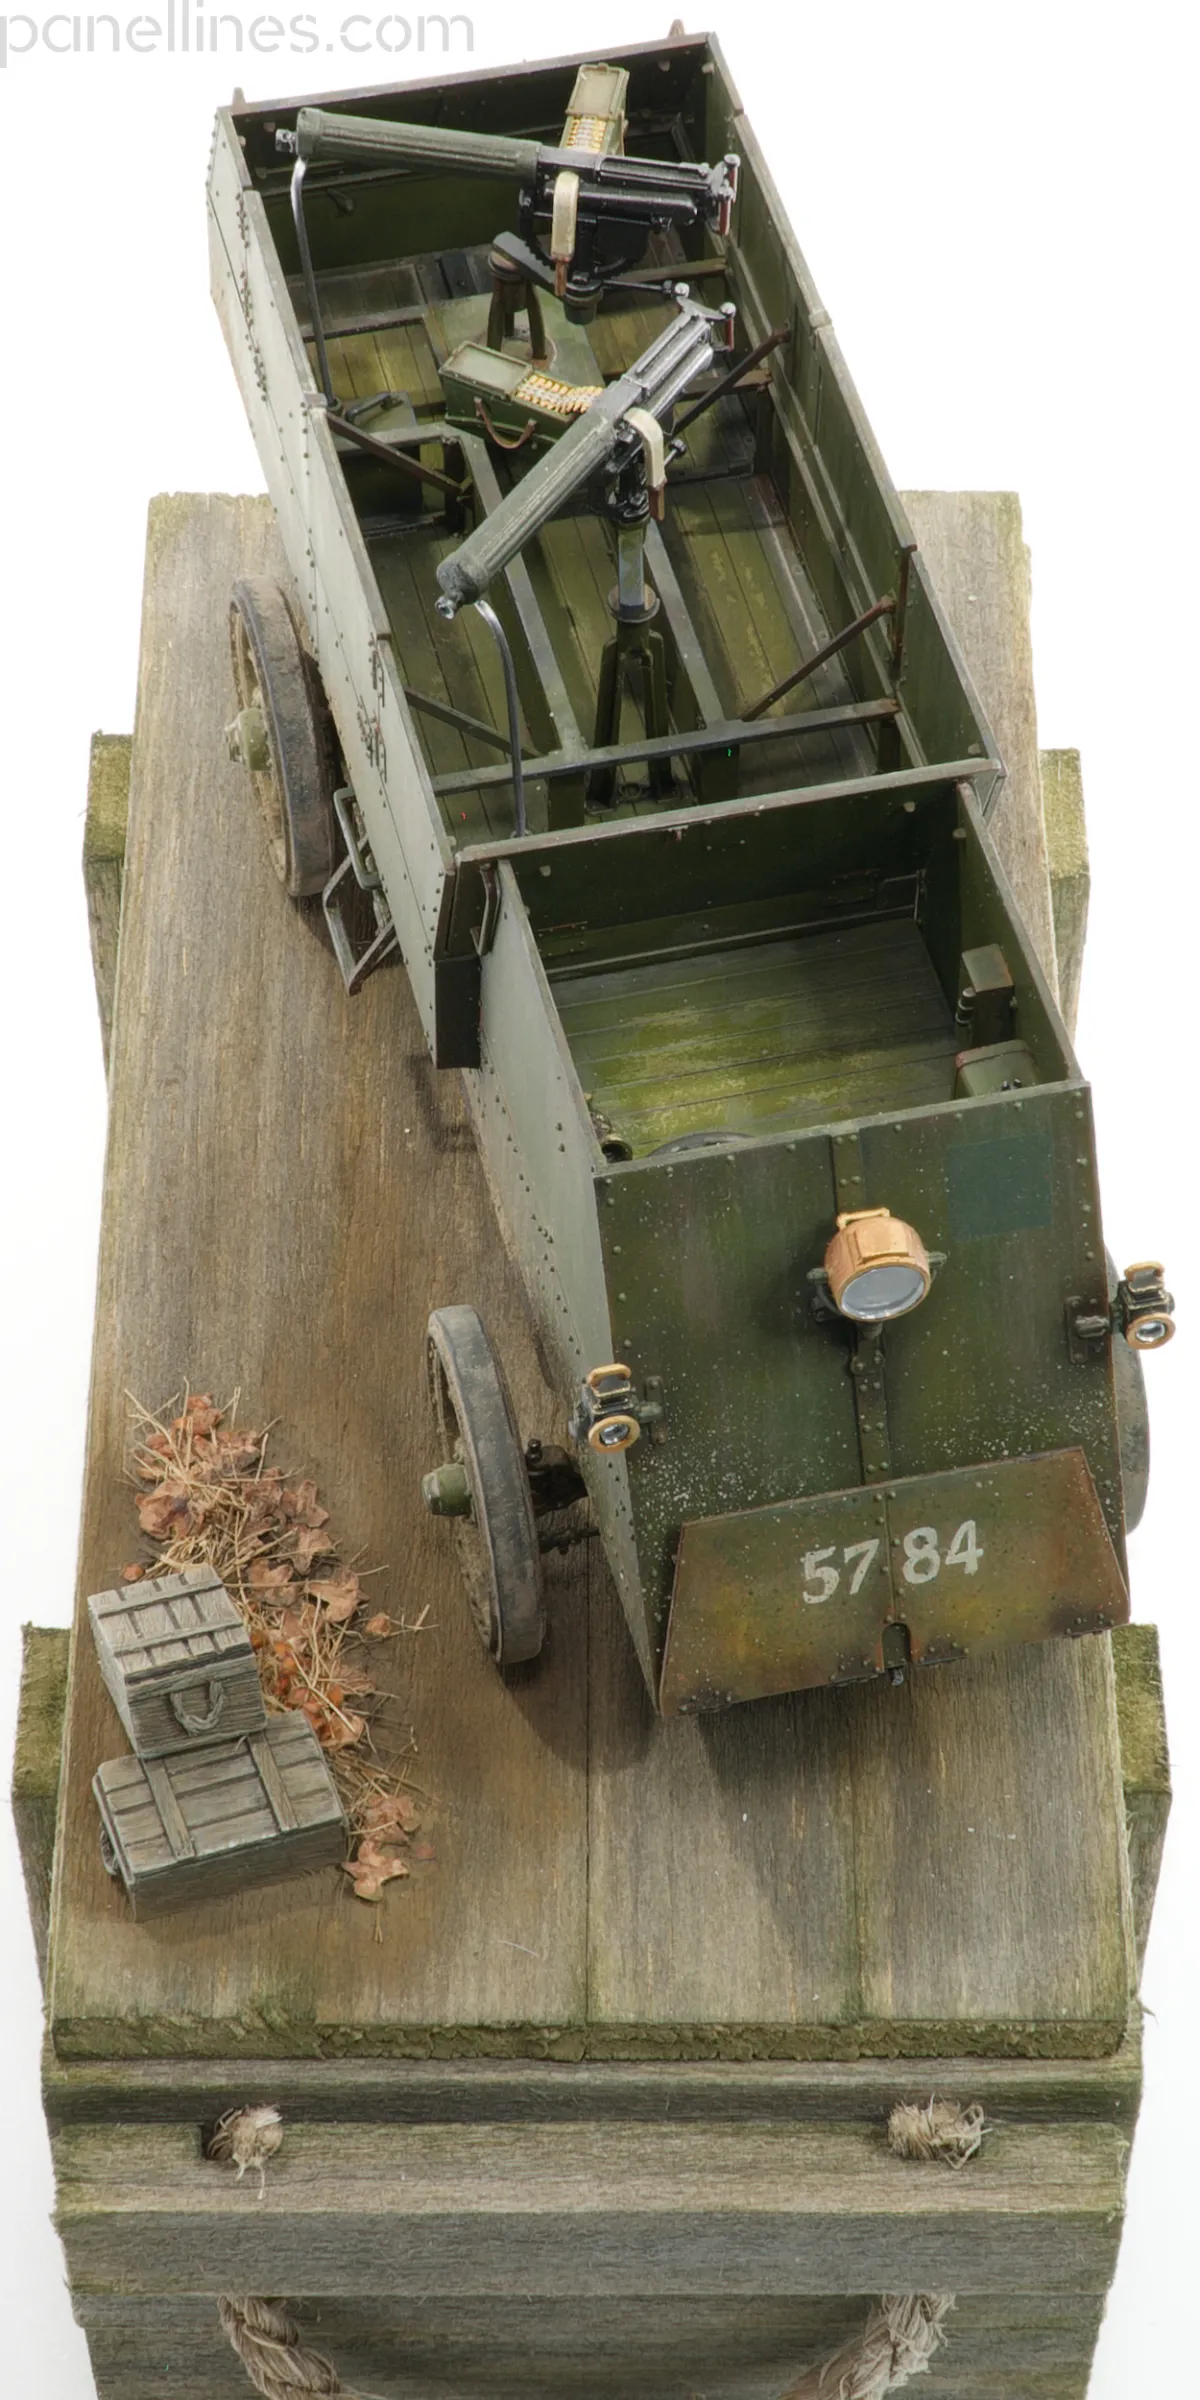
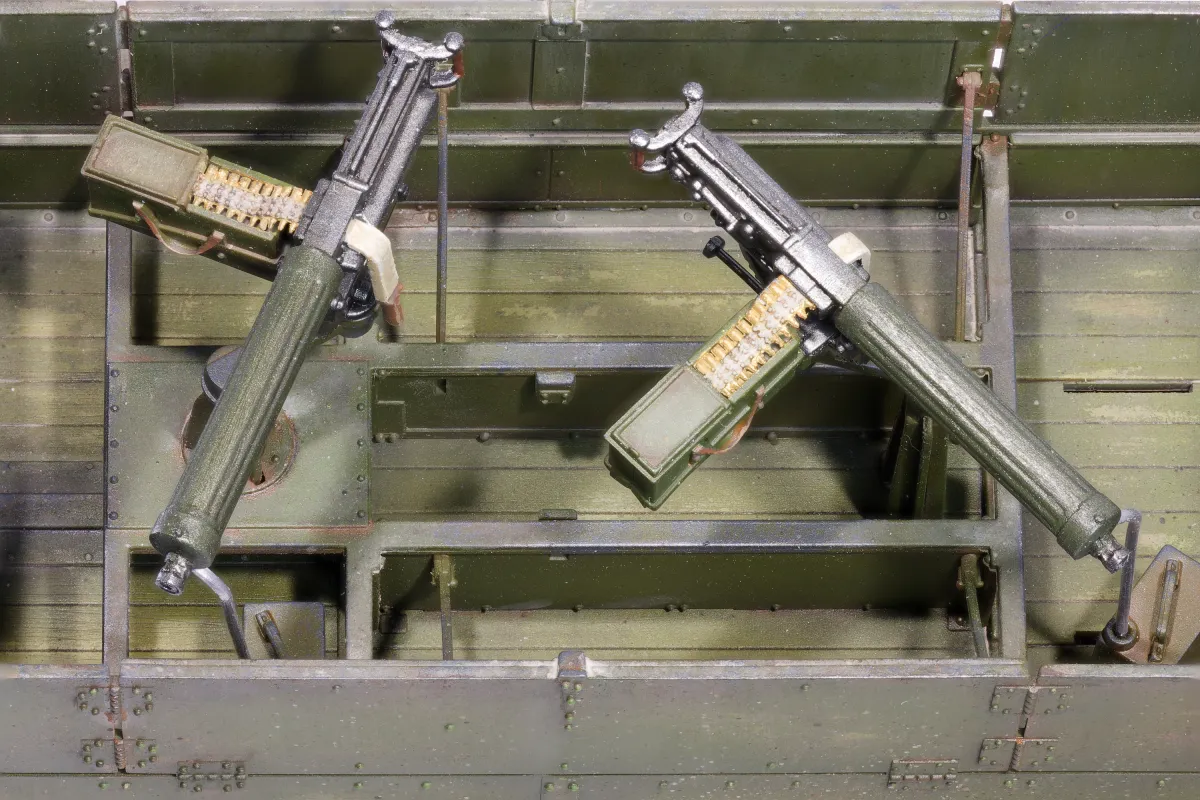
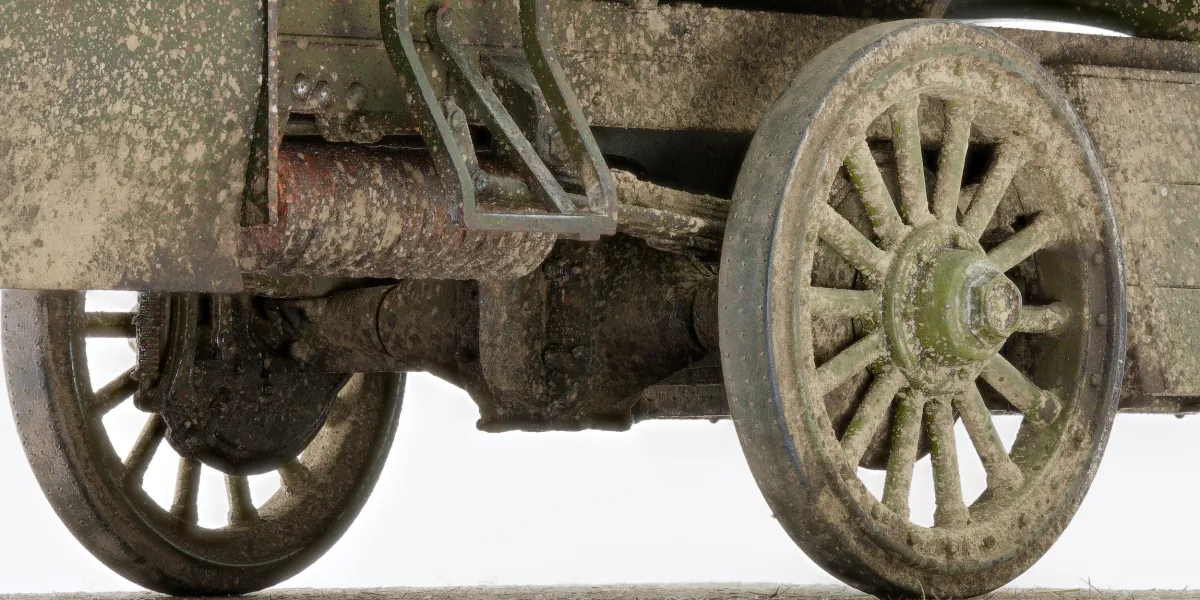
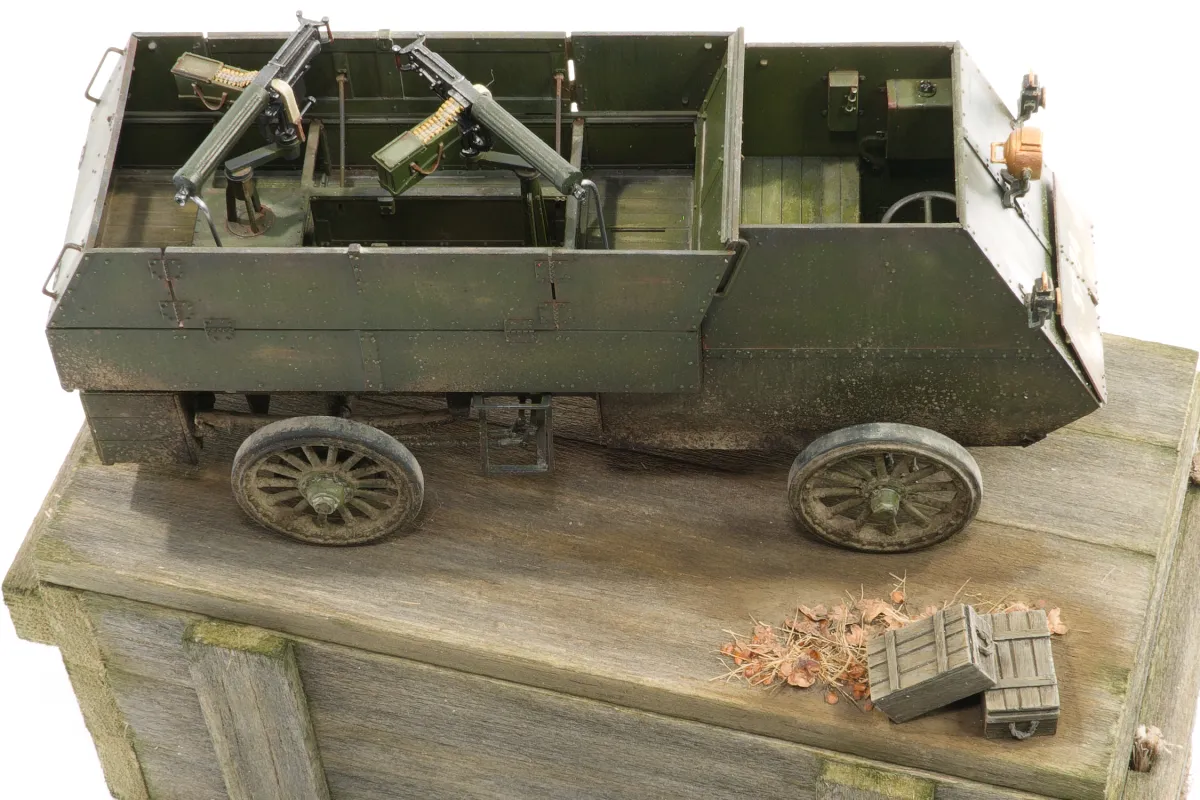
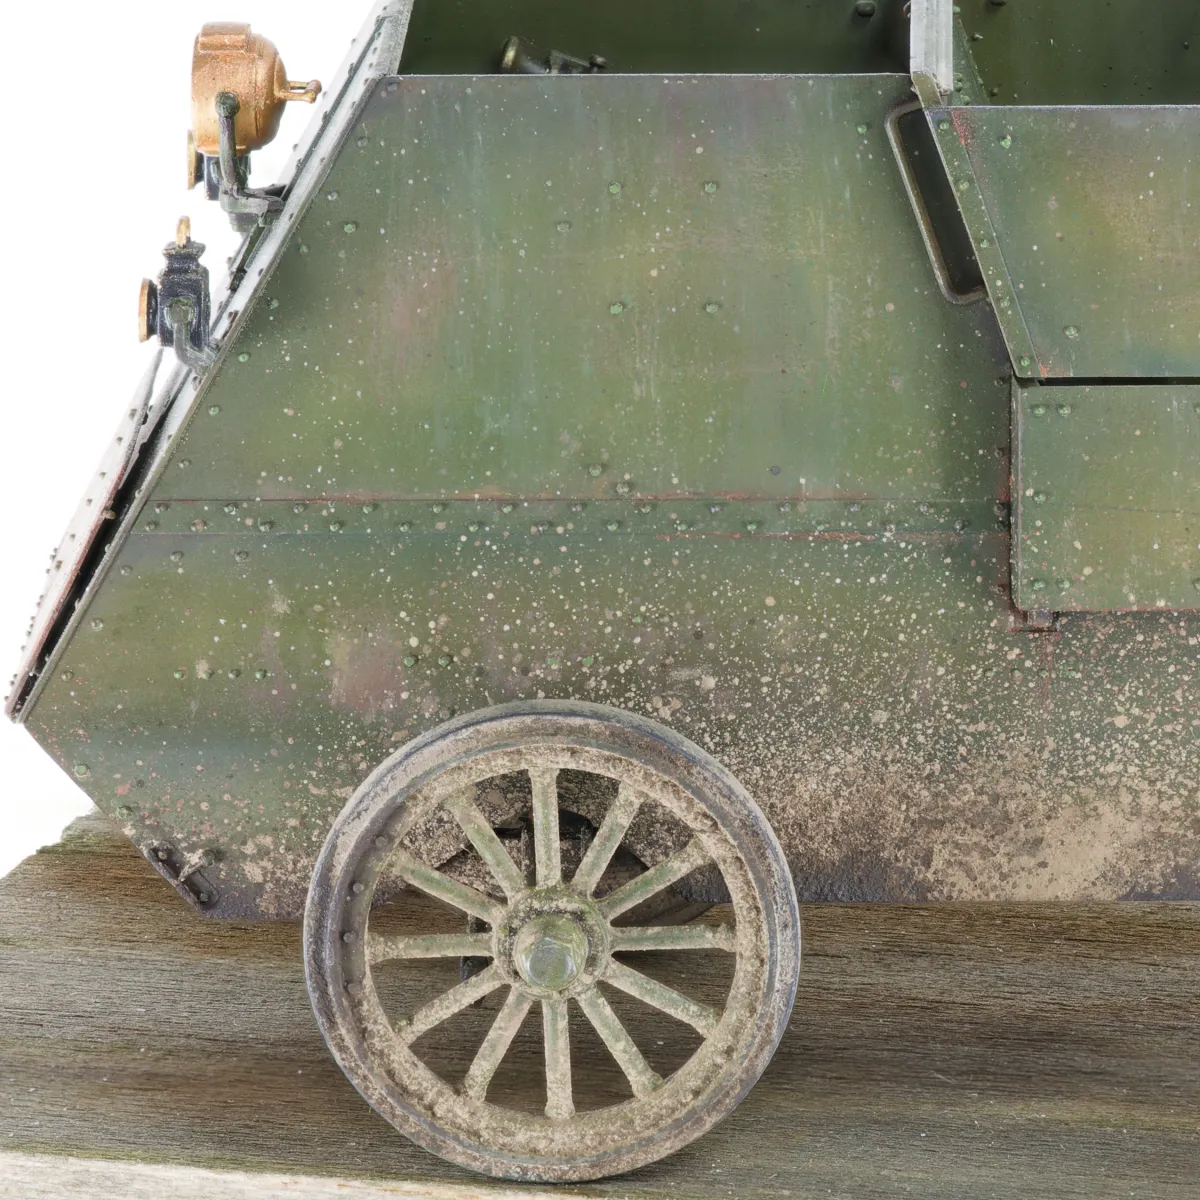
There is no photo-etch. Generally, I mark down kits for its absence unless it's completely redundant. In this case, the kit would have gained from PE parts in a couple of areas, such as the MG belt pull-throughs. In light of photographic evidence, I think that I really should have modified or replaced these thick plastic parts; but they look just about acceptable at display distance. The handles of the water containers are not as bad, but PE would have been better.
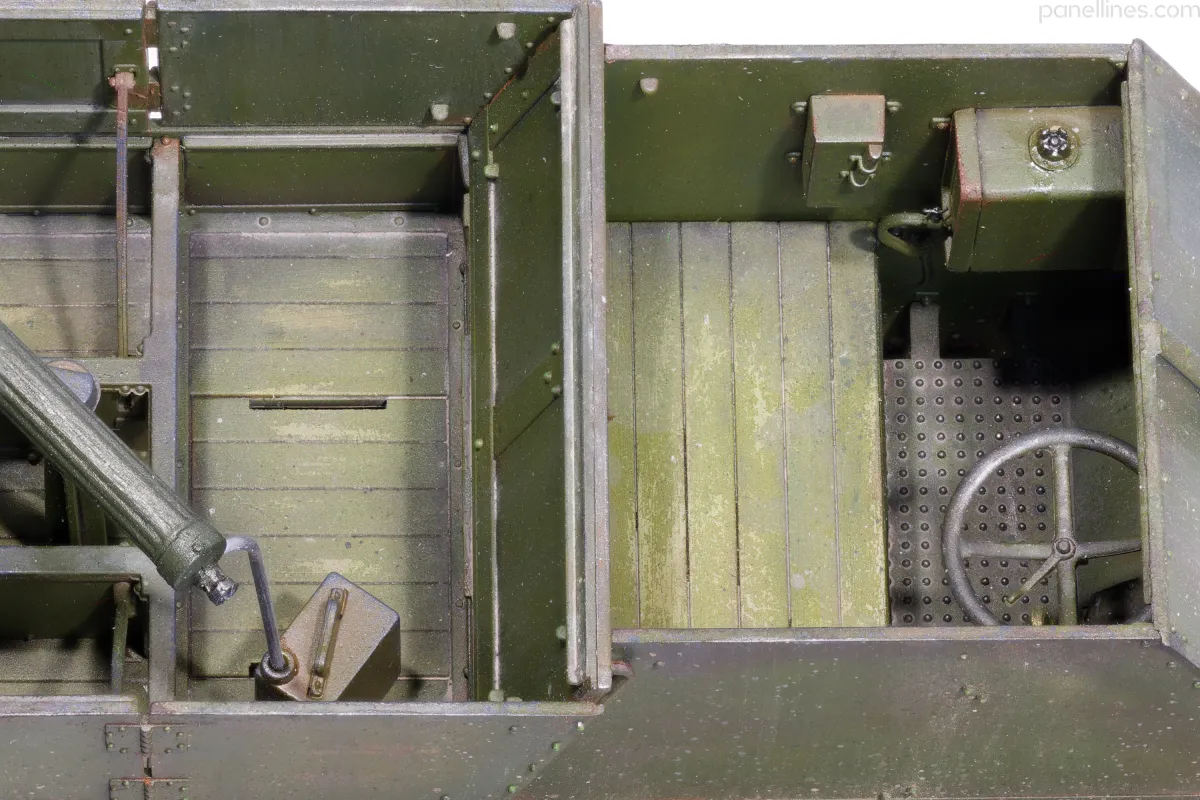
The final parts which could have been provided as PE don't actually exist! Photos show little flat panels —possibly intended to be splash guards to keep the steps cleaner — mounted behind the cab; but the kit omits them. They were added using thin plastic card.
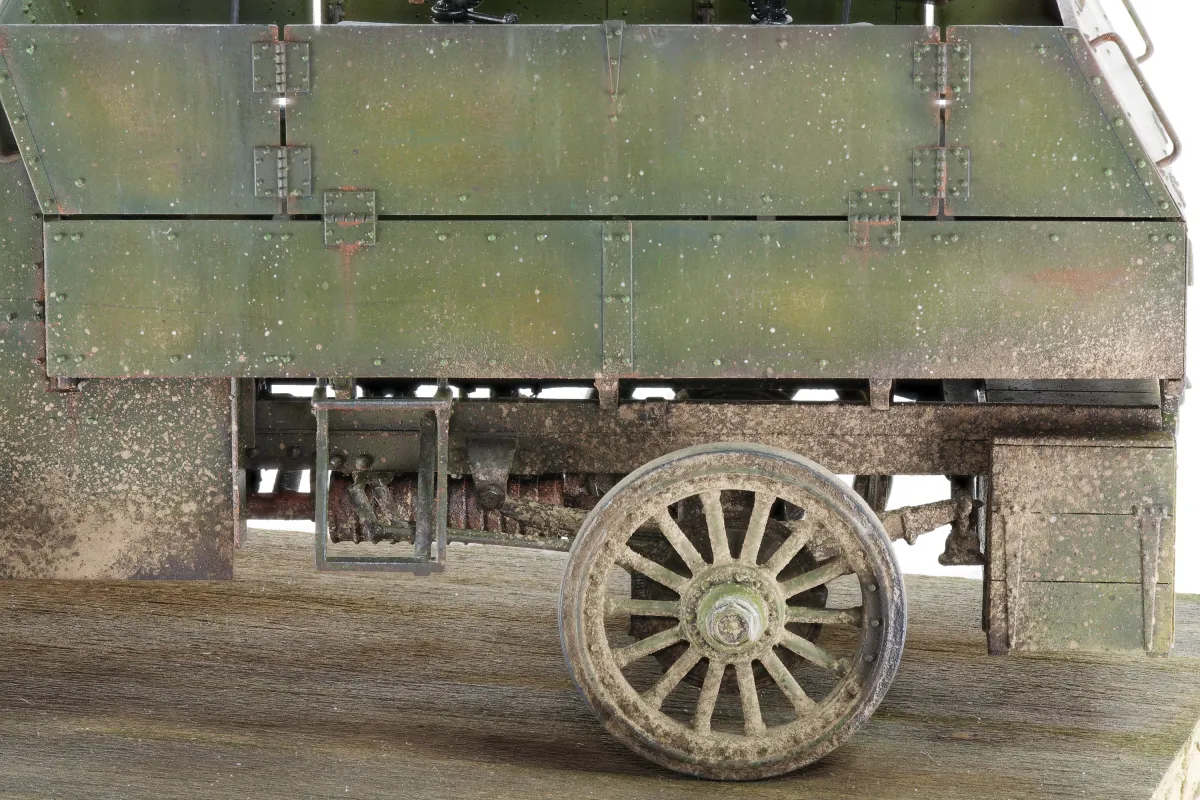
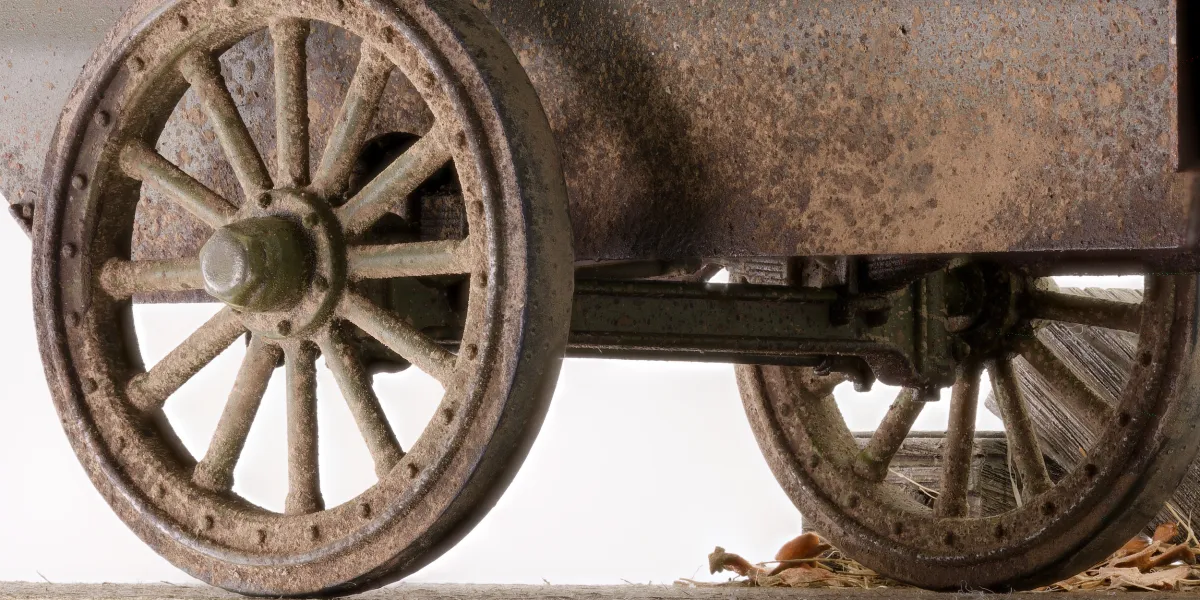
The tyres lack their distinctive dotted tread pattern (which is understandable) so I added it with a rivet wheel. Being a multi-genre modeller has its advantages.
The finish
Conservative painters might look at the museum example in the instructions and paint this subject in a monotonous dark green with little sign of a hard life other than mud. "They didn't last long enough to get worn out, you know".
But the distinctive box art illustration alone hints at what a missed opportunity that would be. Never mind some of the other reference photos, which suggest a longer service life than you might expect, with commensurate wear.
It's not very often, actually, that I have a clear picture — literally in this case — of what I want the finish to look like — and without that in mind, I'm much more prone to falling short of what I intended. Even a photo doesn't often tell us everything about a vehicle's condition and how we might replicate it.
Studying my inspiration (I can't call it a reference) showed that this would be a job for intermediate mottled shading under hairspray. Mottled shading is my favourite among several ways to bake variation into a base colour; it's very flexible in terms of colour choice, tonal range, and visibility, and it really suits old vehicles in dark greens. All of the paint layers used Model Air.
- Multi-tonal base coat of 'chipping' and generic primer colours
- Mottle coat of various colours to fade and discolour dark green
- Hairspray coat
- Top coat of a generic dark green, lightened and darkened in a zenithal light pattern
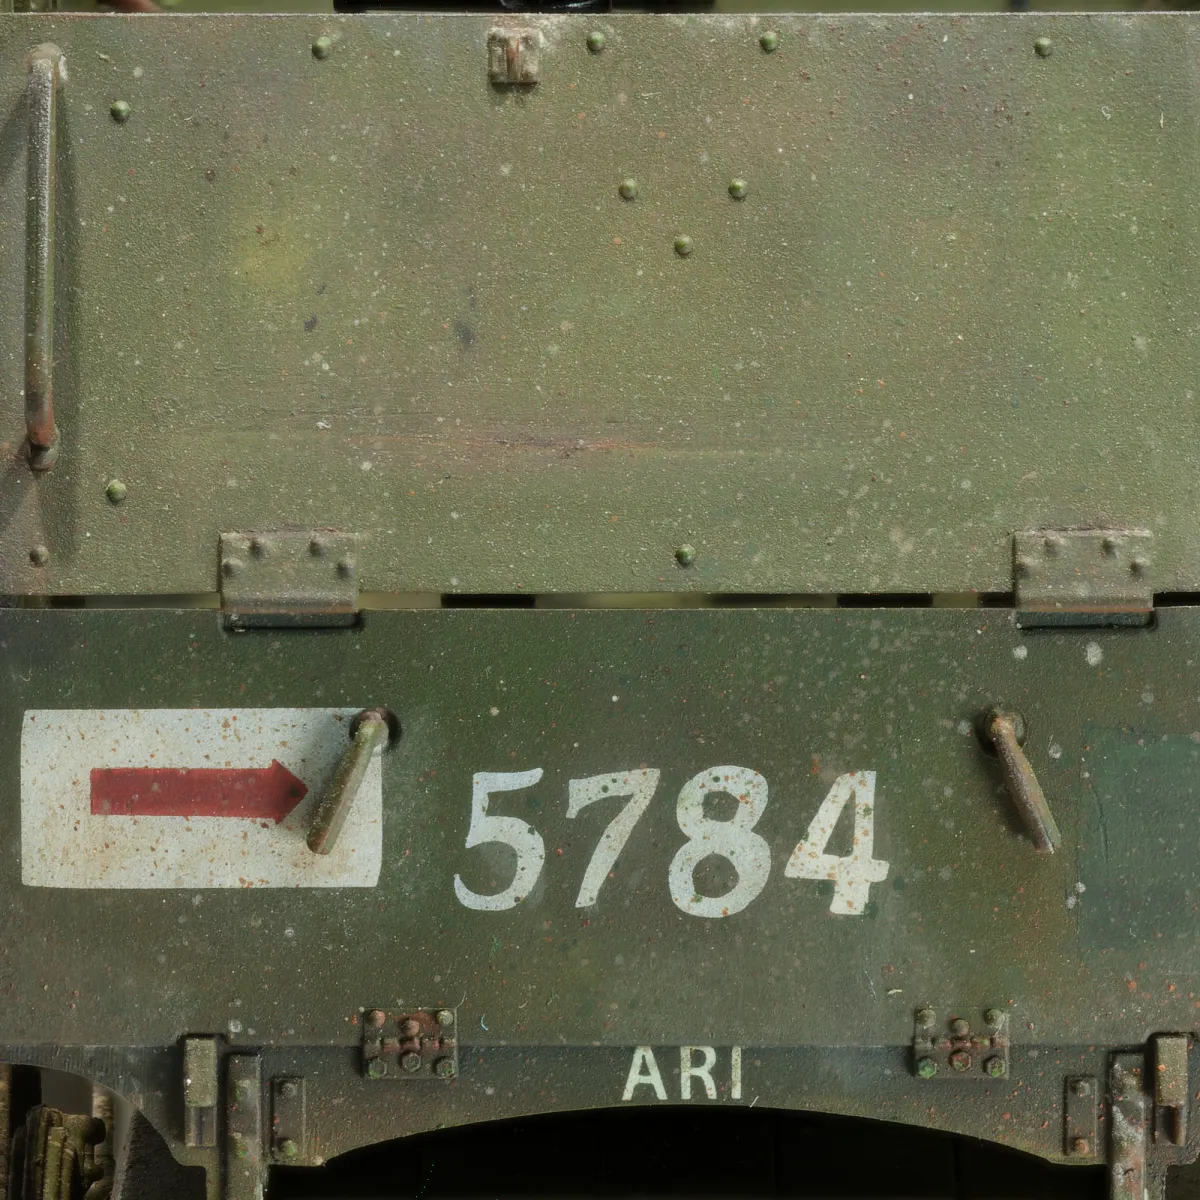
Markings were painted using vinyl masks of my own design based on the kit's decals. With those finished, I completed the weathering with Oil Paint Rendering and speckled pigment mixes. They both take quite a while, but there are no shortcuts.
Interior and details
The inside surfaces had much the same treatment. I couldn't be sure whether the wood areas would have been painted, but I worked on that assumption, so they also got the hairspray treatment.
Brass components, which include the radiator, horn, carbide lamps, and MG rounds, were finished with metallic oil paint. The MG cooling jackets were also painted with oil.
Over all, I was very happy with how this came out because I had a clear plan in mind and didn't wander away from it. I'm still pretty happy with it now, even though photos are good at showing all the little flaws which I either missed or decided not to fix. Those pull-throughs are still bugging me a bit!
This model was originally shared on Britmodeller a couple of years ago, so if it looks vaguely familiar, that would be why.


Comments
add your commentNigel Moore
I have this kit in my ever-growing, barely diminishing stash. You've done a really great job here, and the display stand, mimicking the crates, is a nice touch. I think I'll go with bare wood for the interior; not because I have any inside knowledge, just for variety.
I'm not sure what you mean by the "little flat panels...mounted behind the cab" though. I don't see them in the model or online photos.
Ade
In reply to I have this kit in my ever… by Nigel Moore
Thanks very much, Nigel. I probably could have been clearer in my description; I mean the rectangular plates sticking out slightly from the back of the cab, below the truck bed, in front of the steps. They can be seen in the reference photos in the instructions. They may be mud flaps, but they don't stick out far enough to be of much use!