
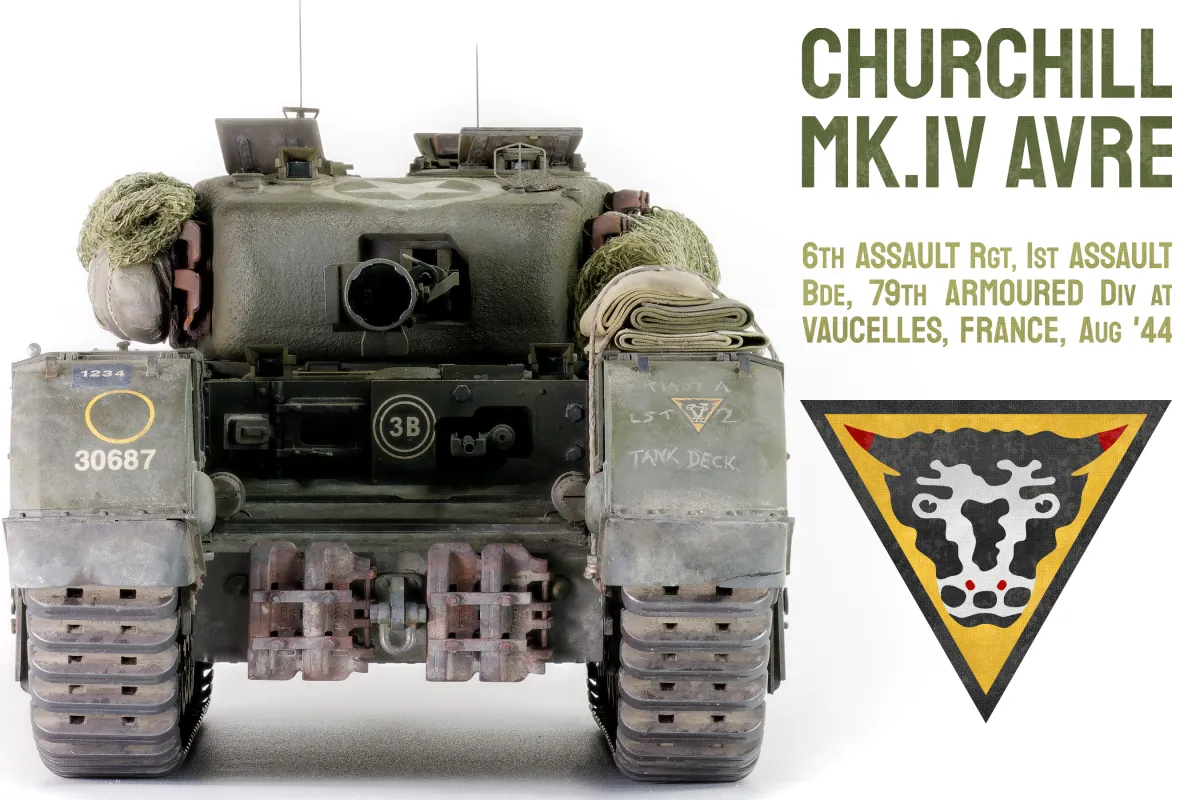


| Subject | Churchill Mk.IV AVRE |
|---|---|
| Scale | 1:35 |
| Company | AFV Club |
| Ref. # | AF35169 |
As I’m looking over these photos, I’m struck by my stowage. And not in a good way.
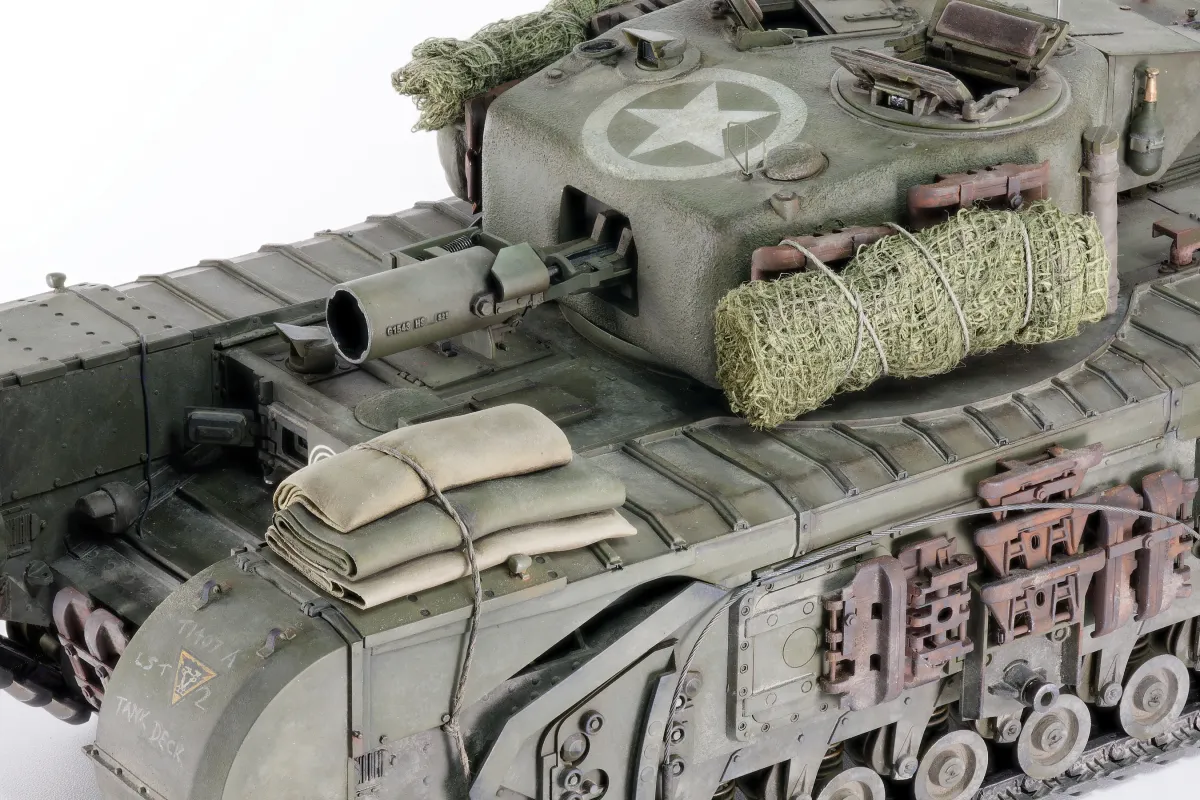
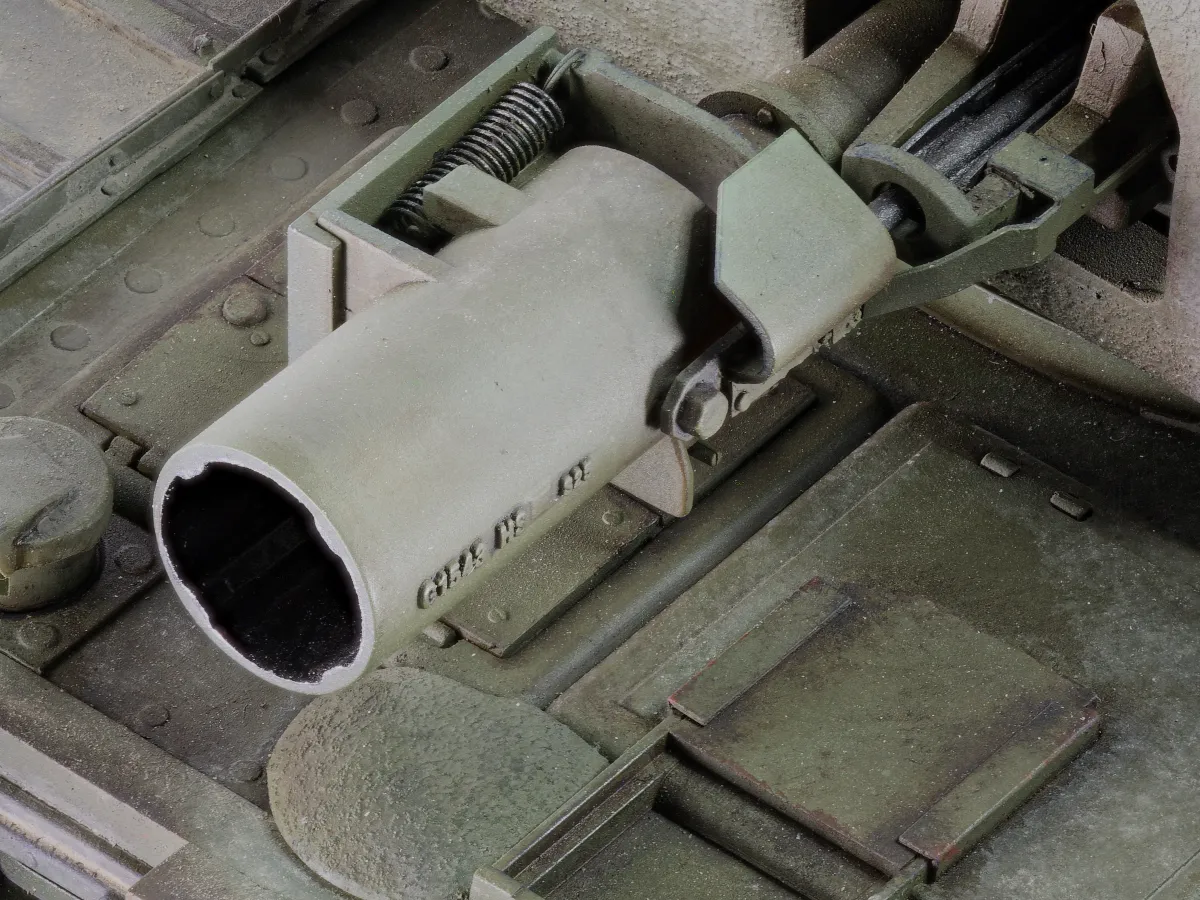
I can’t make stowage which doesn’t look slightly comical. My tent rolls, tarpaulins, or whatever they are could have been made equally well from marzipan. They’re too thick, unnaturally folded, and ‘pillowy’. I used Green Stuff putty, but I won’t again — no amount of rolling and swearing could produce a smooth and thin sheet. The experience convinced me not to attempt a dust cover for the petard launcher (see the reference photo below).
Then there’s my unconvincing first effort at camo nets. Well, third effort to be exact… They don’t look like the right shape and they don’t sag well, even with some help from watered-down Mod Podge glue. And though I found some forum info which said that they faded a lot, the colour — which was dyed with ink and shaded by airbrush — doesn’t look right to me.
Maybe, if time, ability, and enthusiasm align, I’ll redo the stowage one day.
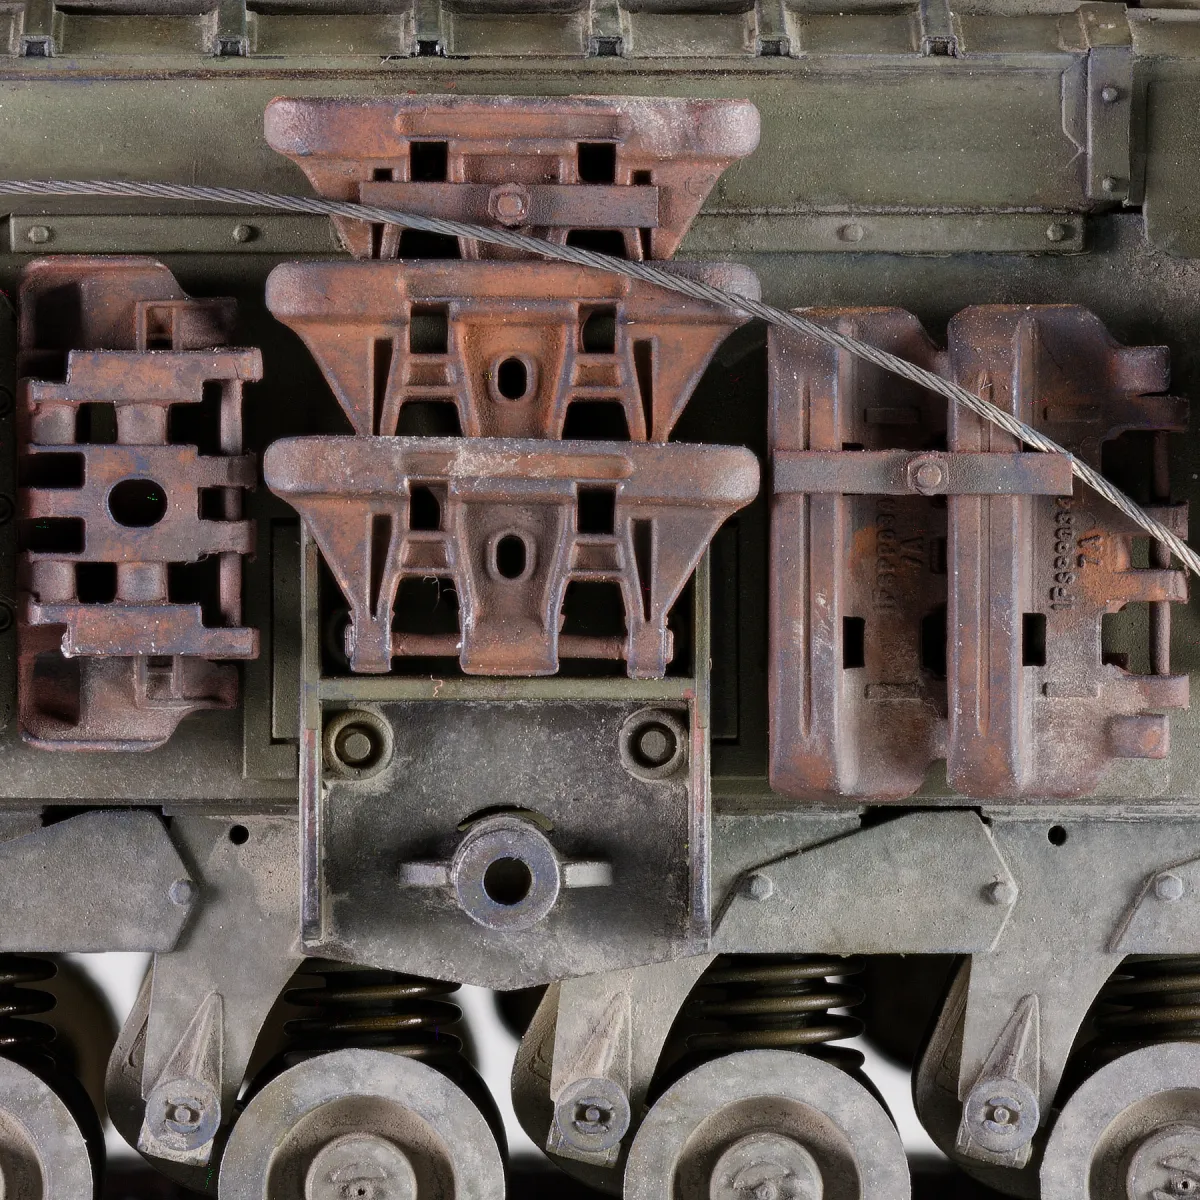
And while I’m there, I may try to improve the tracks because, judging by this evidence, I’m still a track weathering Padawan. I thought about how the tracks would look when my reference photo was taken, but didn’t have a clear answer, so after months of work and the model almost complete, I saw the finish line and stumbled unthinkingly towards it.
But there’s a lot in the detailing and painting with which I’m happy.
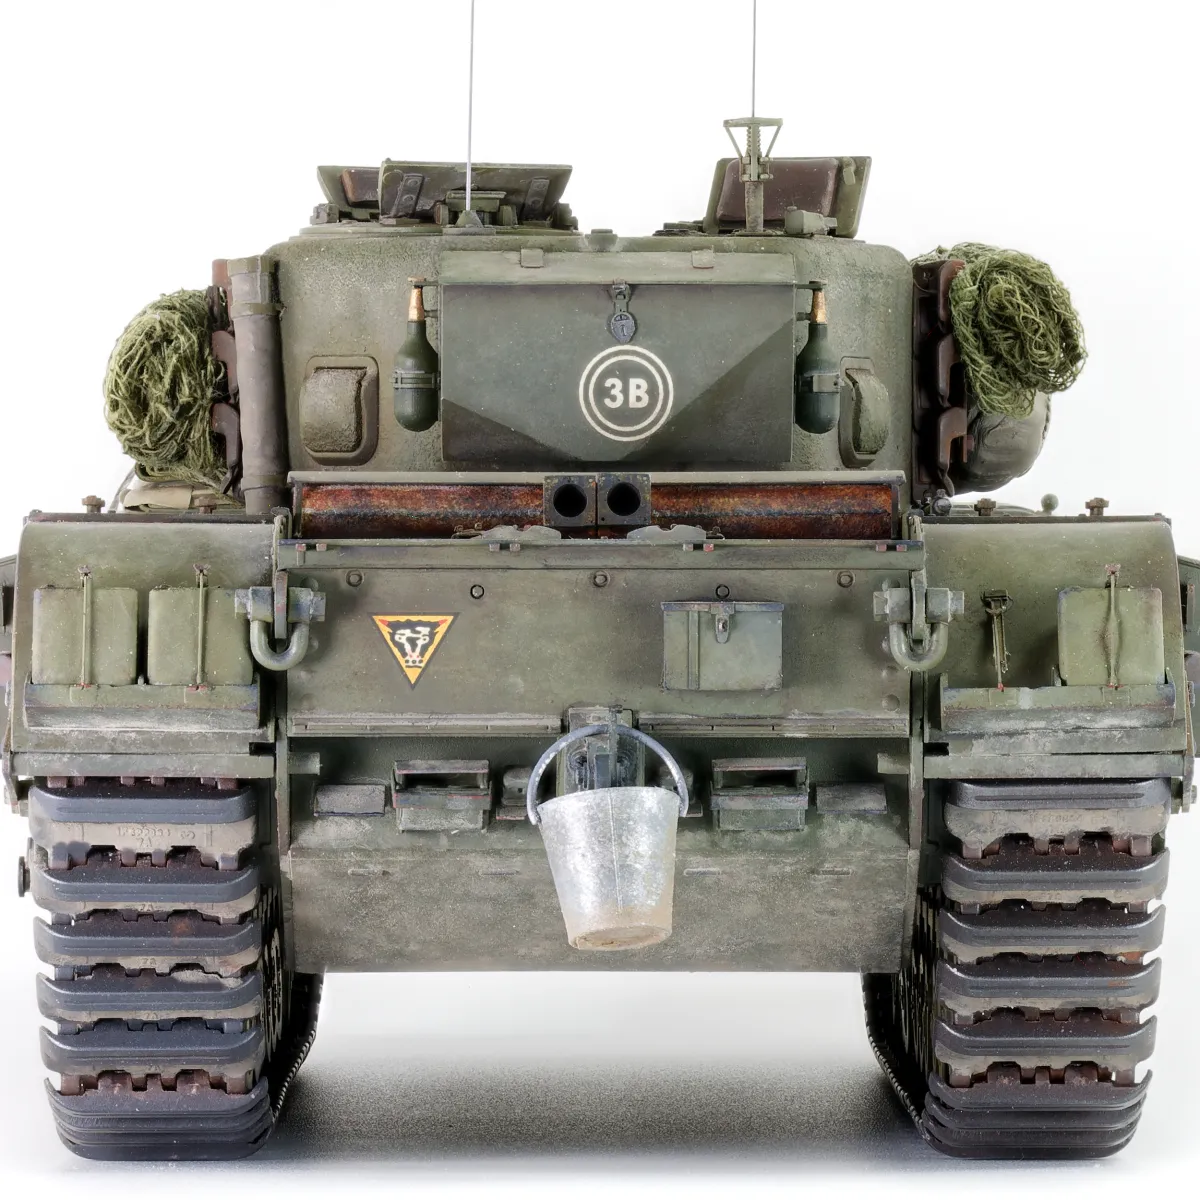
Construction
I put a lot of effort into dealing with this old AFV Club kit’s shortcomings and adding details seen in the photo.
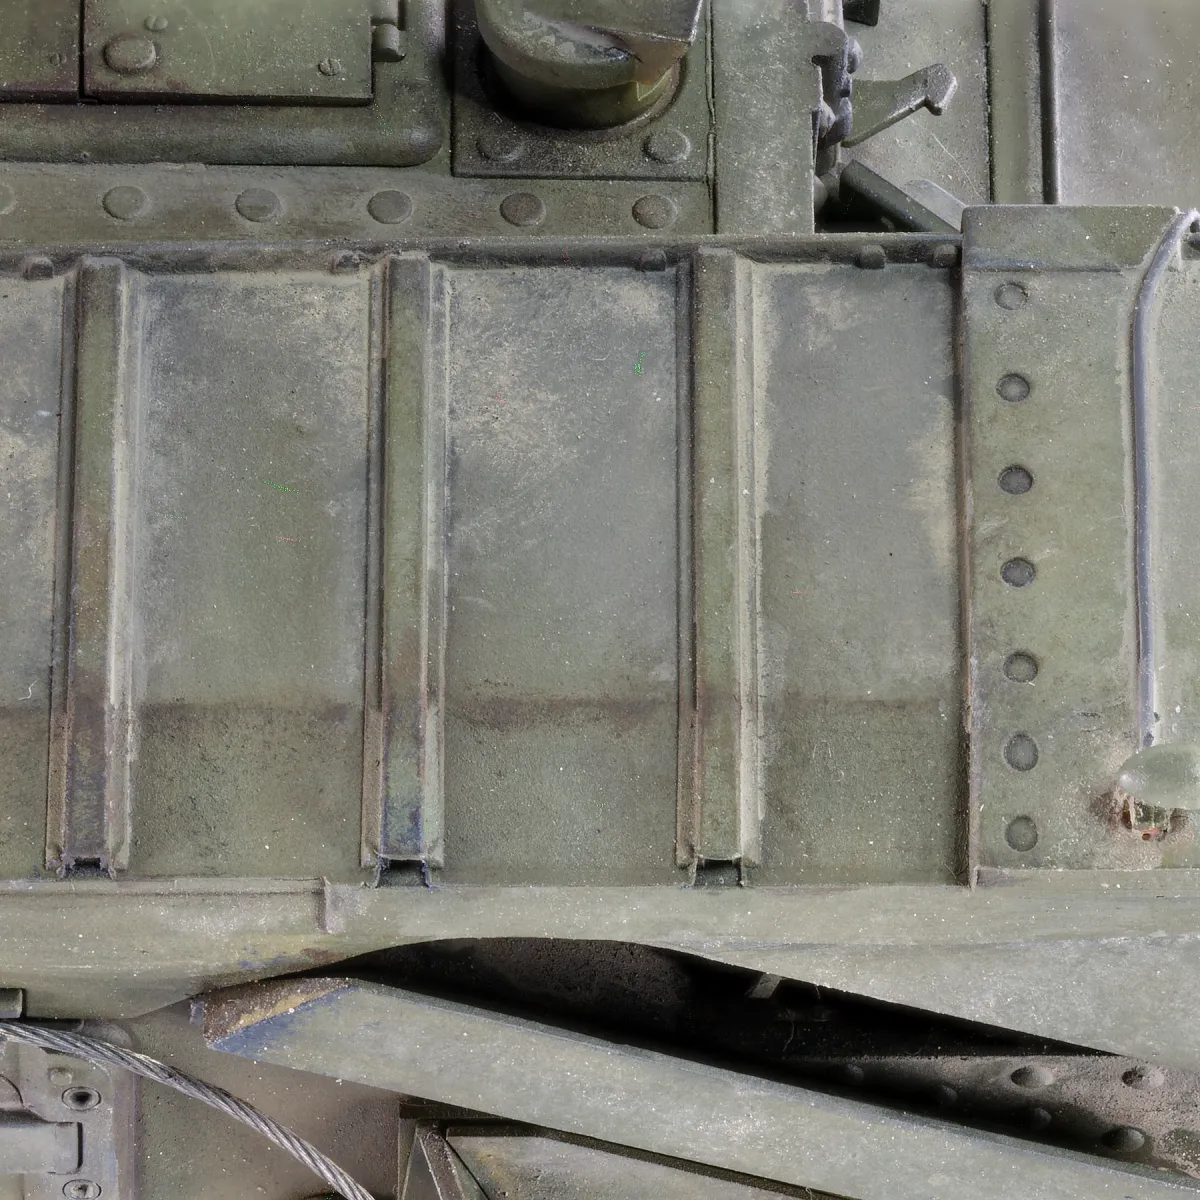
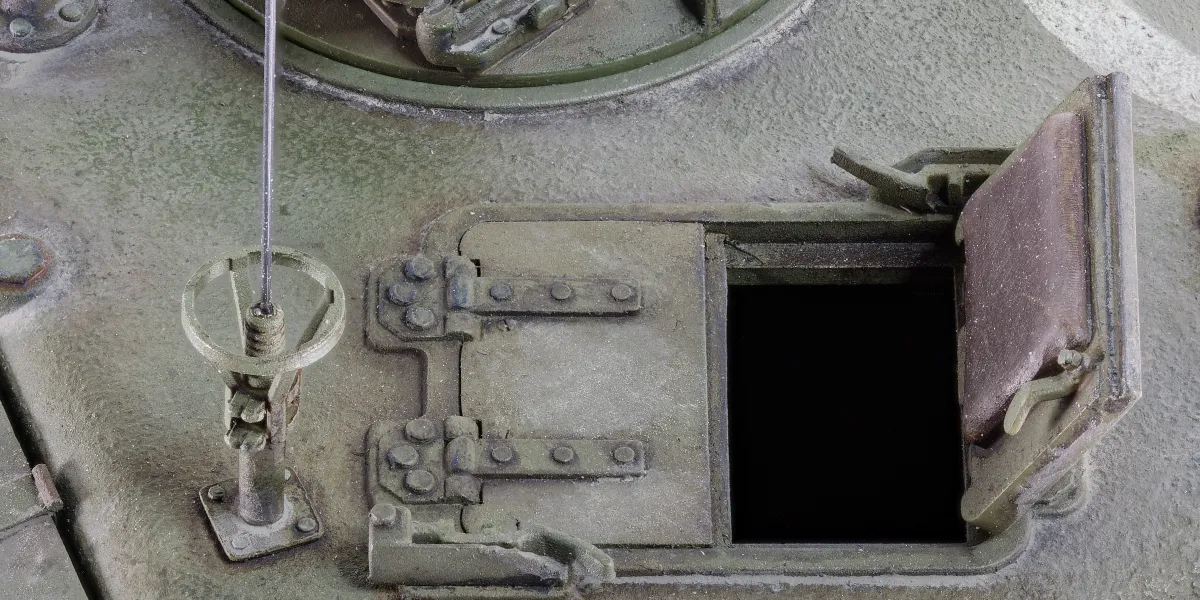
The hull parts and deck were warped, so I built a network of braces in the chassis tub and panniers. The air vents at the back were really iffy, so I remade them using very thin strips and rods. It was hellish, having to drill the delicate strips very precisely and splitting some along the way, but that was better than trying to align lots of separate rod pieces. The track guards didn’t fit well (partly due to warpage) so needed trial-and-error fettling combined with some persuasion.
Details and corrections
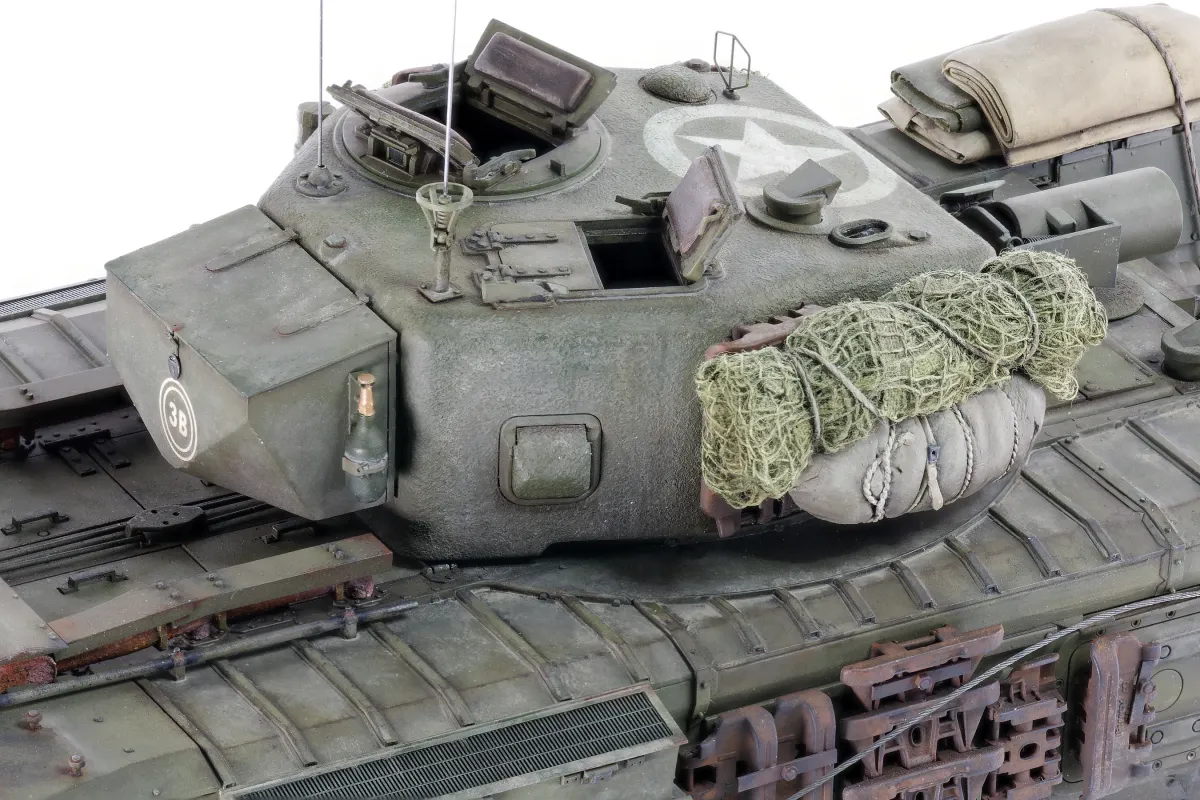
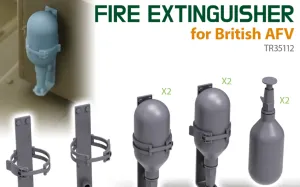
- Antenna base by Panzer Art and fire extinguishers by SBS
- Brass BESA barrels by Master
- Casting texture on the turret seam and hull vent cover
- Track guard lifting points repositioned and remade with bronze strip
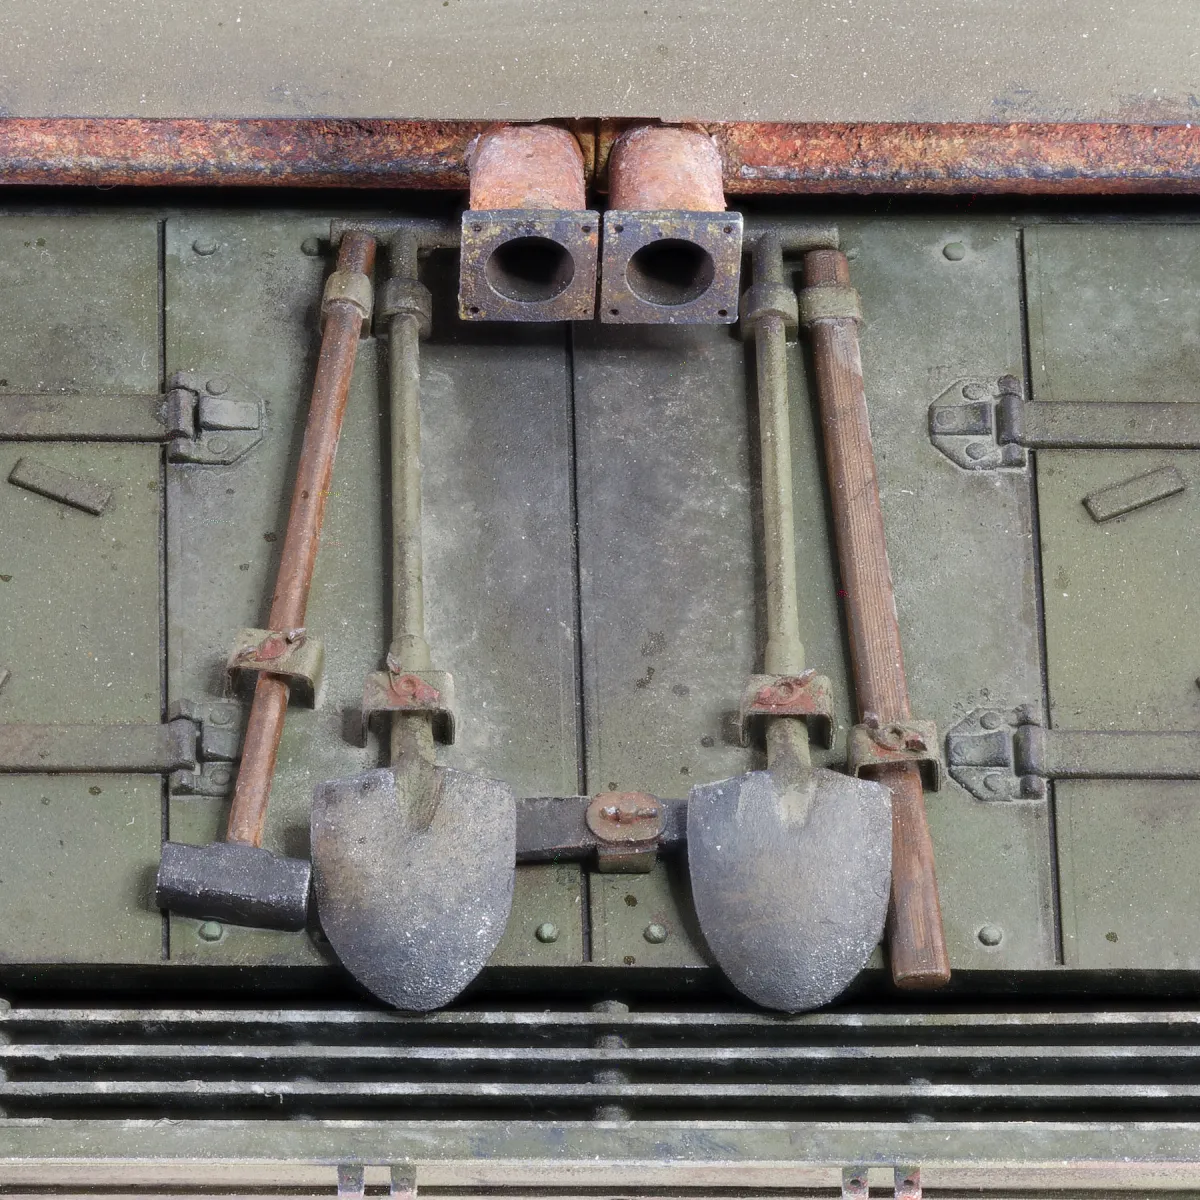
- Tool retainers made from bronze strip and photo-etch wing nuts
- Tow cables using 0.5mm multicore wire, with retainers added
- Lead wiring for the side lights
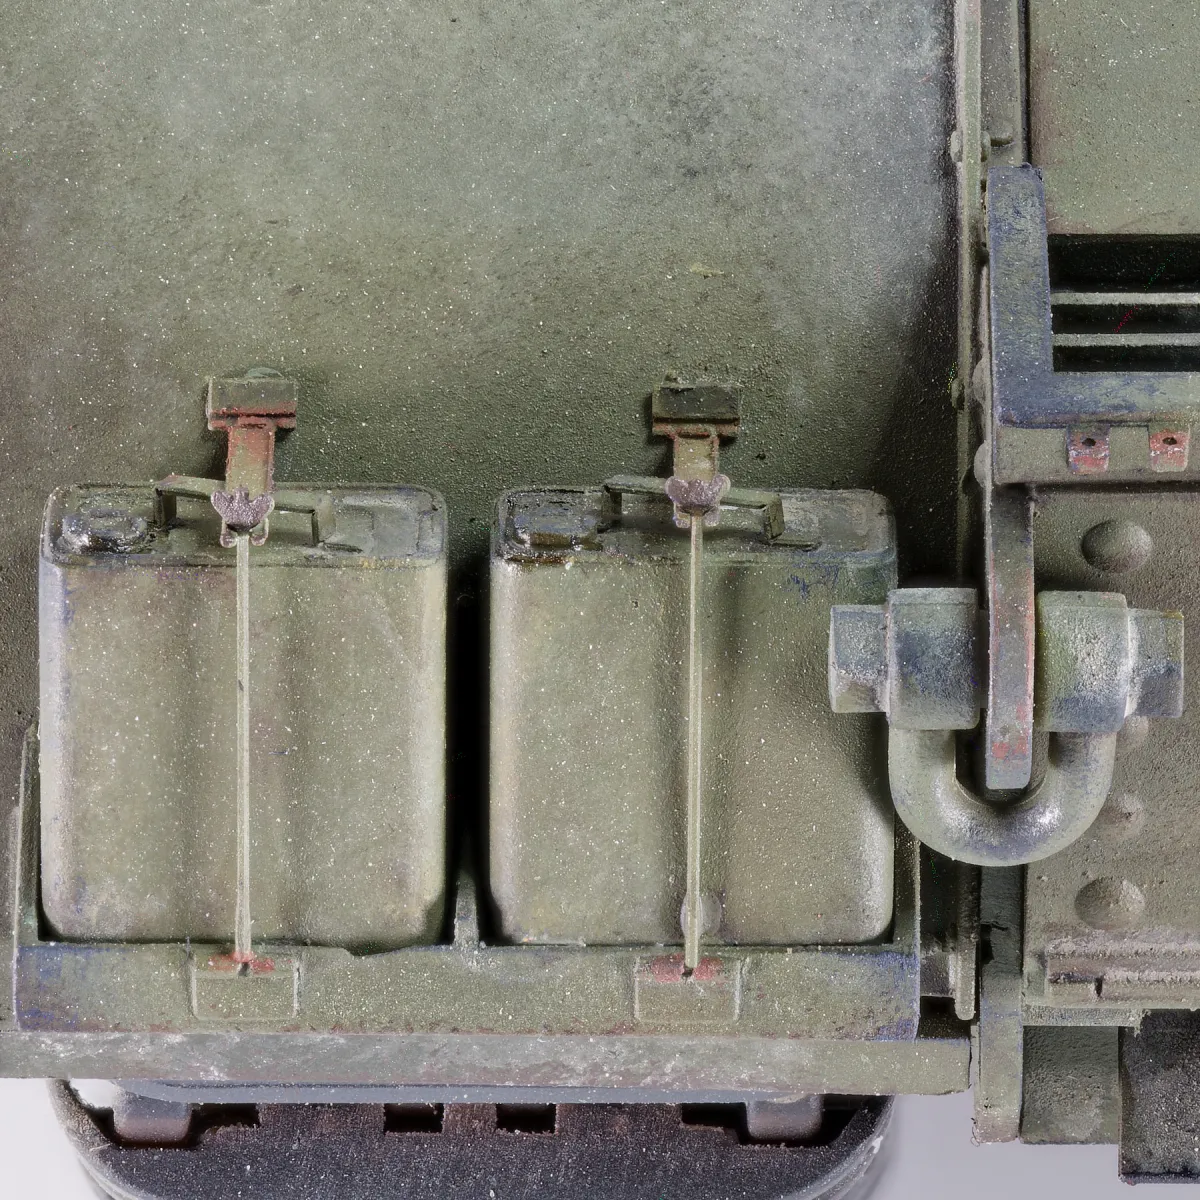
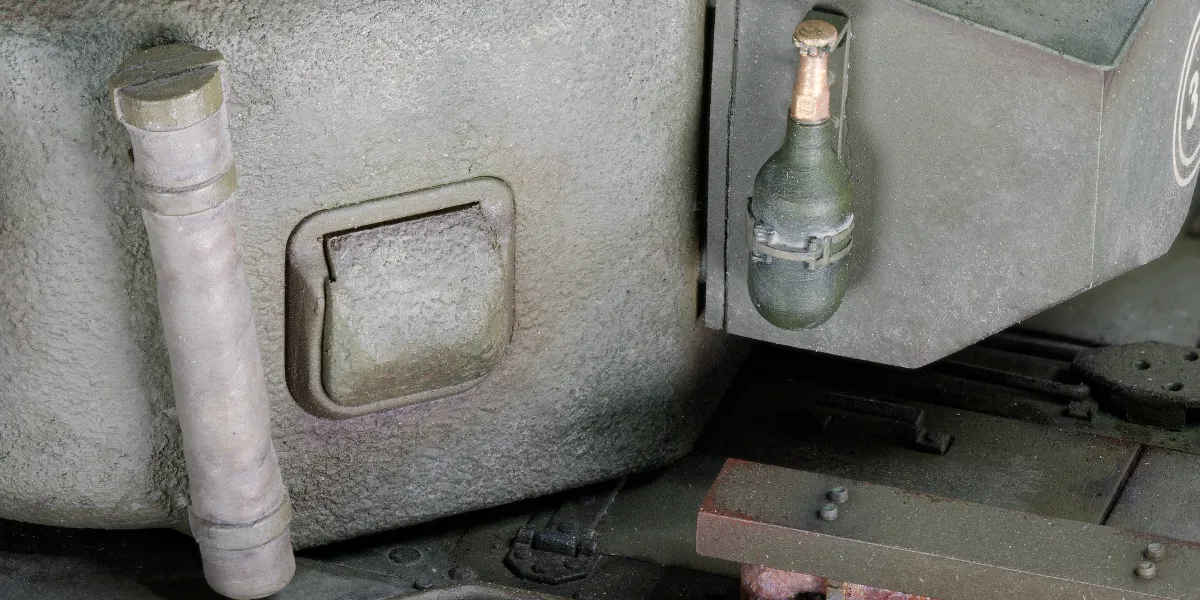
- Fuel canister handles replaced with spare photo-etch
- Support brackets for the exhaust cover
- Ceramic putty weld beads on the exhaust
- Flag tube’s shape improved (a bit)
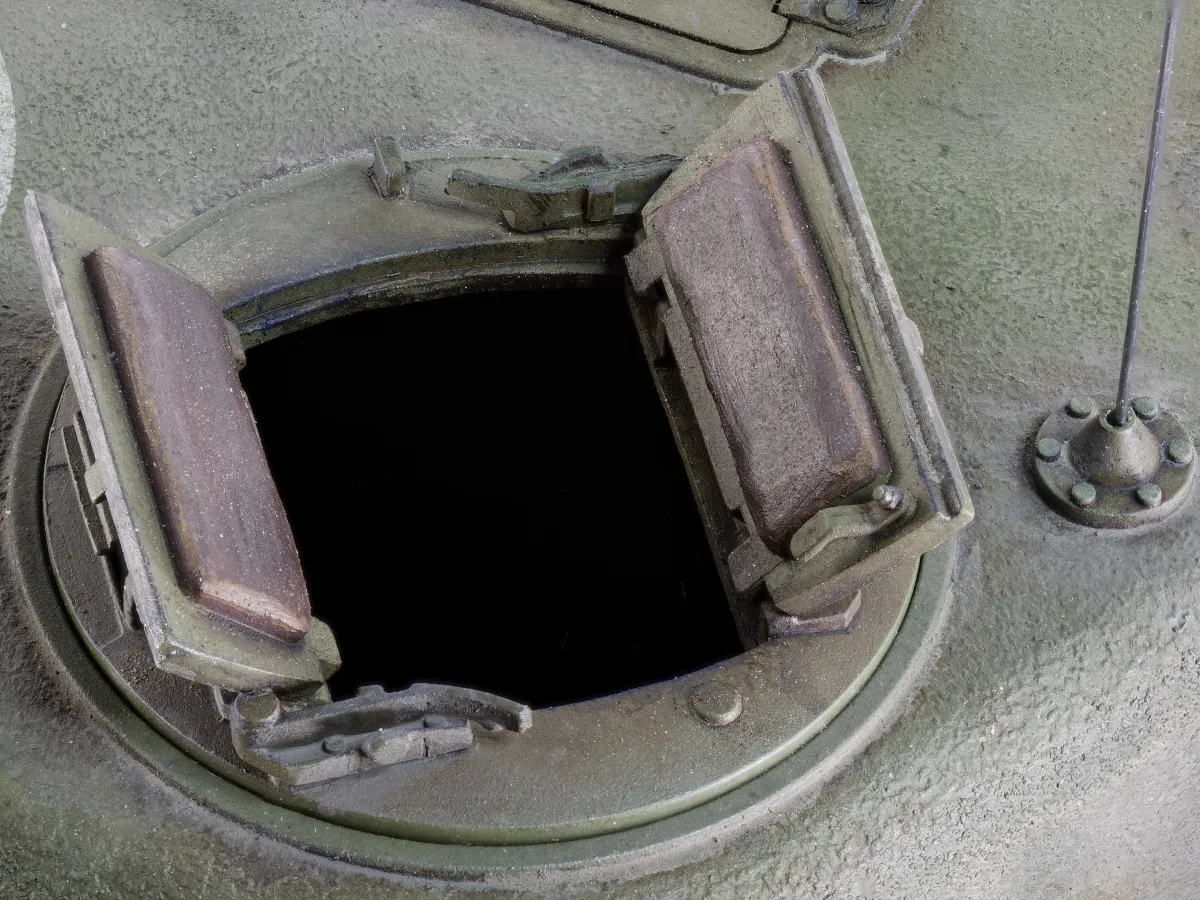
- Hatch pads reshaped to show wear
The lid for the stowage bin looked thick and low-res, so I remade it with copper sheet and a photo-etch latch and padlock. Then later realised that it should have a folded lip on three edges, which would have been easy to do had I noticed at the time.
From the photo
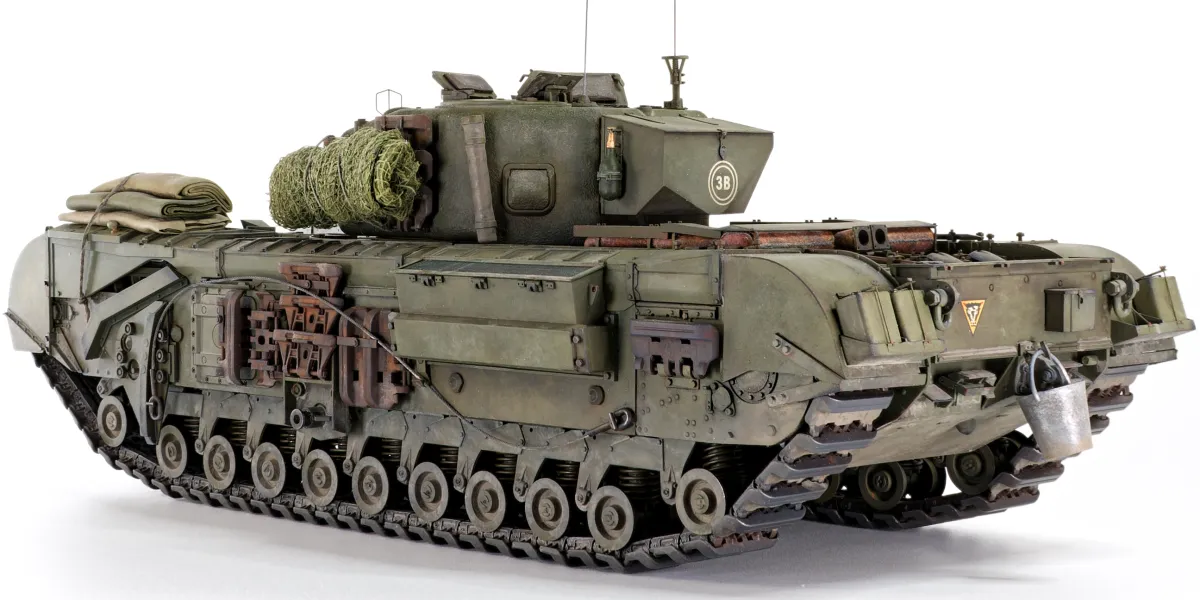
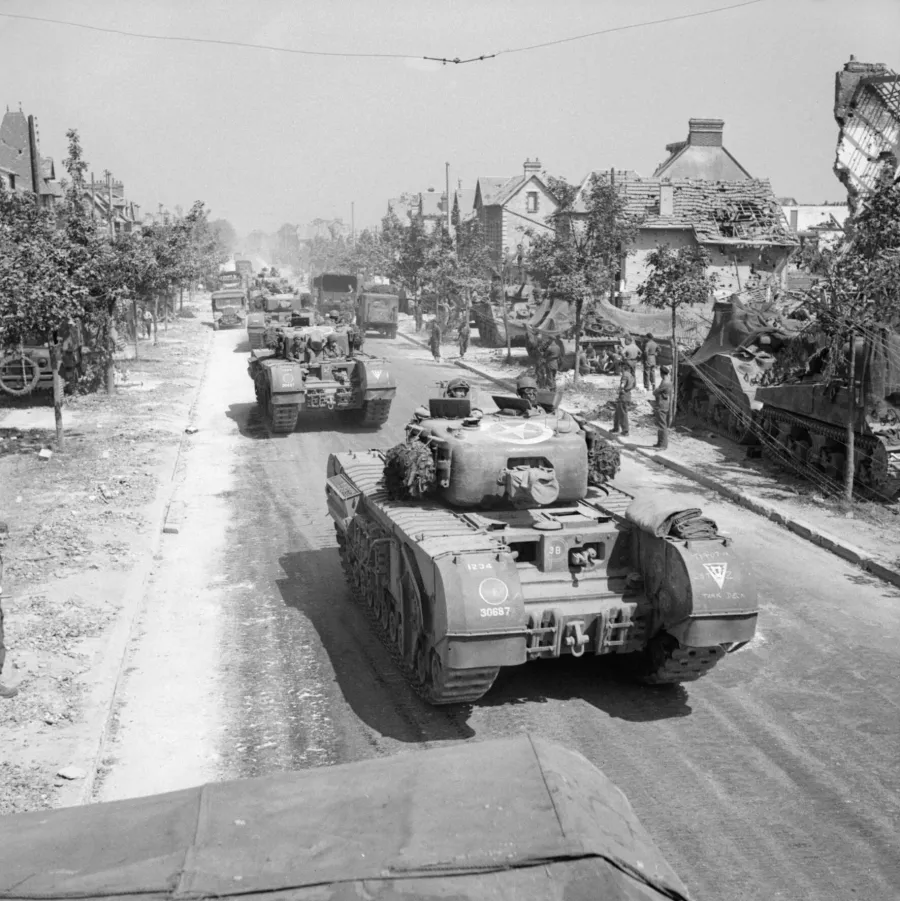
This reference photo was my inspiration and instruction manual for how to finish this model.
It shows two types of Churchill track link used as appliqué armour. Some of those links were left over from a Churchill III with track set which I made as a novice, while the rest had to come from this kit. Consequently, the track runs had to be incomplete and were cemented in place and hidden by the track guards. If this tank had any segments of track guard removed, it would have been impossible without an extra set of tracks.
- Bolts for attaching spare suspension bogies to the track guards
- Track links fitted with plastic strips and bolts
- Damaged front dust flaps
- And, of course, that stowage
AFV Club provided two types of bolt for the AVRE fittings; this tank used the shrouded type, which left just enough of the other type for the detailing.
The rear of the tank had to be guesstimated according to other photos of Mk.IV AVREs.
Finishing
Despite the likely age and mileage of this tank in August 1944, I wanted to push the wear as far as I felt reasonable for a tank which obviously wasn't just handed over to its crew at the dockside. Besides, I don’t do new. Some people may disagree with my treatment, in which case they should read my take on over-weathering. The one thing which gives me cause for any doubt is the extent of the exhaust corrosion, but slightly rusty is really difficult!
When I got into this hobby, I found painting easy but weathering a whole lot more difficult. One factor was the mainstream method of delineating painting and weathering. Paint a clean finish and then make it look dirty and worn, which makes no sense to me. When I ignored that dividing line and viewed painting and weathering as a set of finishing techniques with a common purpose, it got easier and my results got better.
To that end, this finish began with a mottled pre-shade, a mixture of freehand and templates, using several colours: duck egg, tan, red-brown, and ochre over a black-brown base. Once a few shades of olive drab went over this layer, it already looked dirty and varied enough to do the heavy lifting for the OPR.
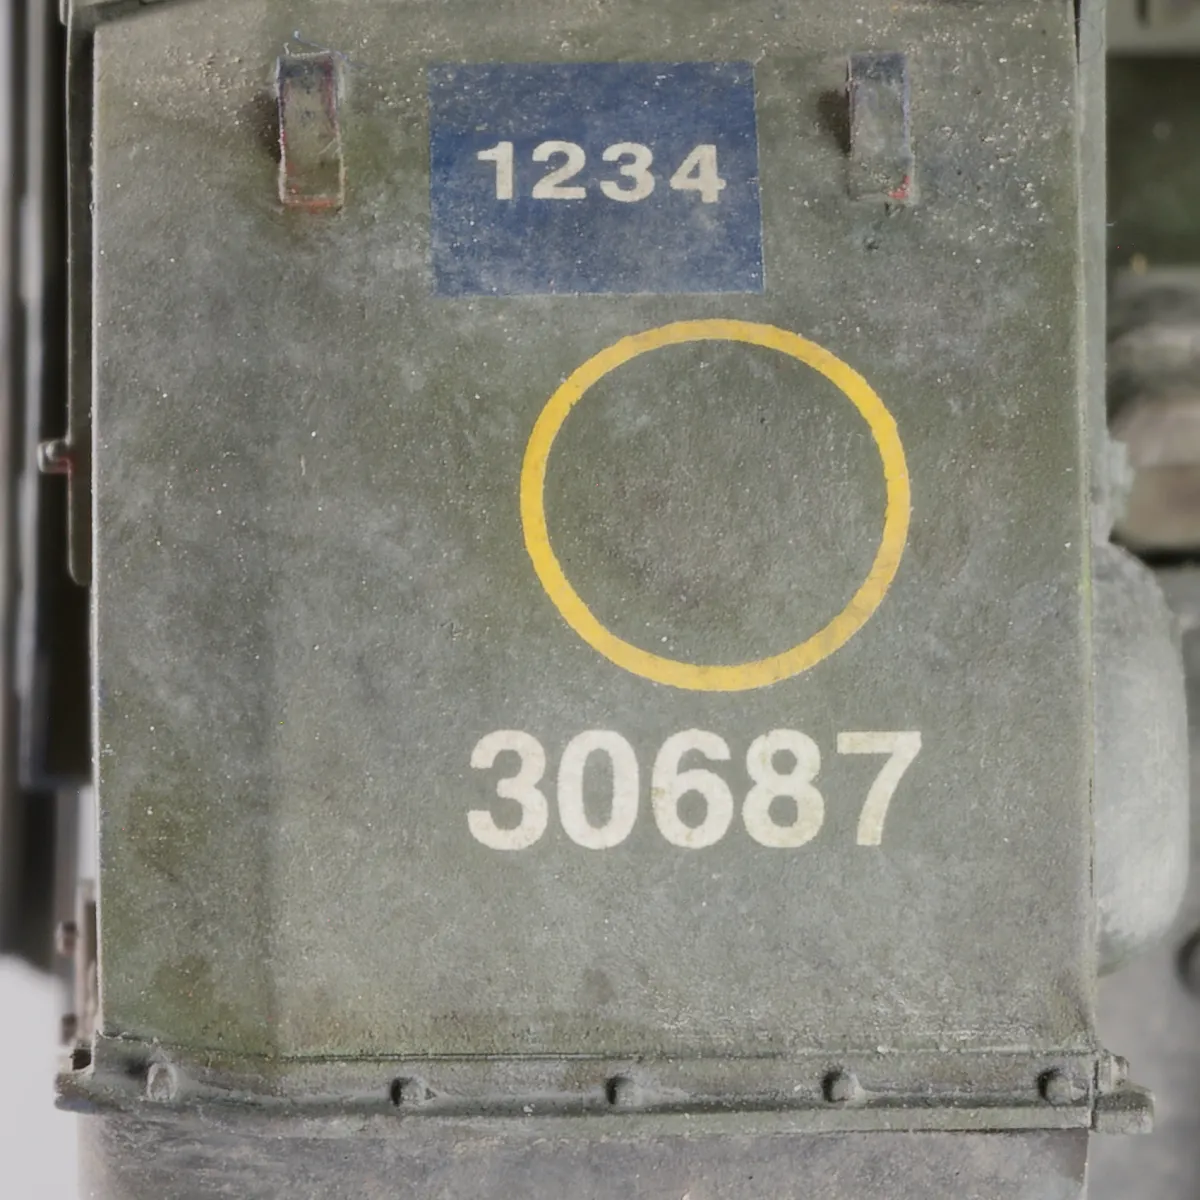
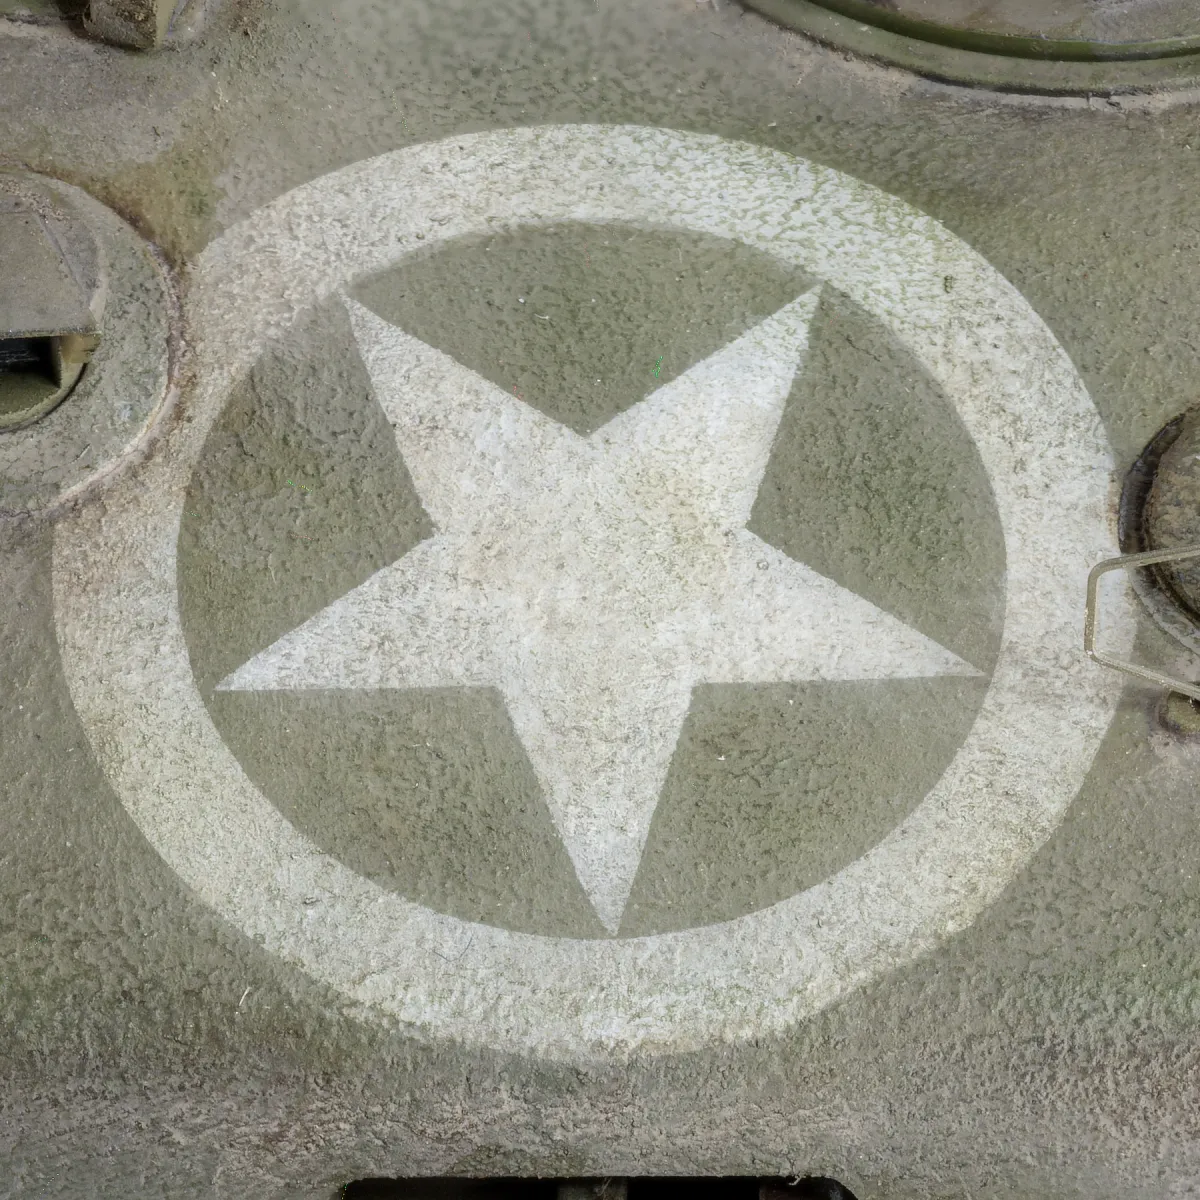
But before that, there were markings to add. As it happens, this tank is included in the kit’s options, but I like to paint whatever I can, so I made masks for the recognition star and the unit ID colours, with Archer transfers for the numbers. The only wet decals are the 79th Div insignia (also from Archer) and the vehicle numbers in white circles from the kit. The kit's decals didn't look promising, but turned out to be decent.
In case you’re wondering, there was no gloss varnish under any of those decals. Just a light matte coat over.
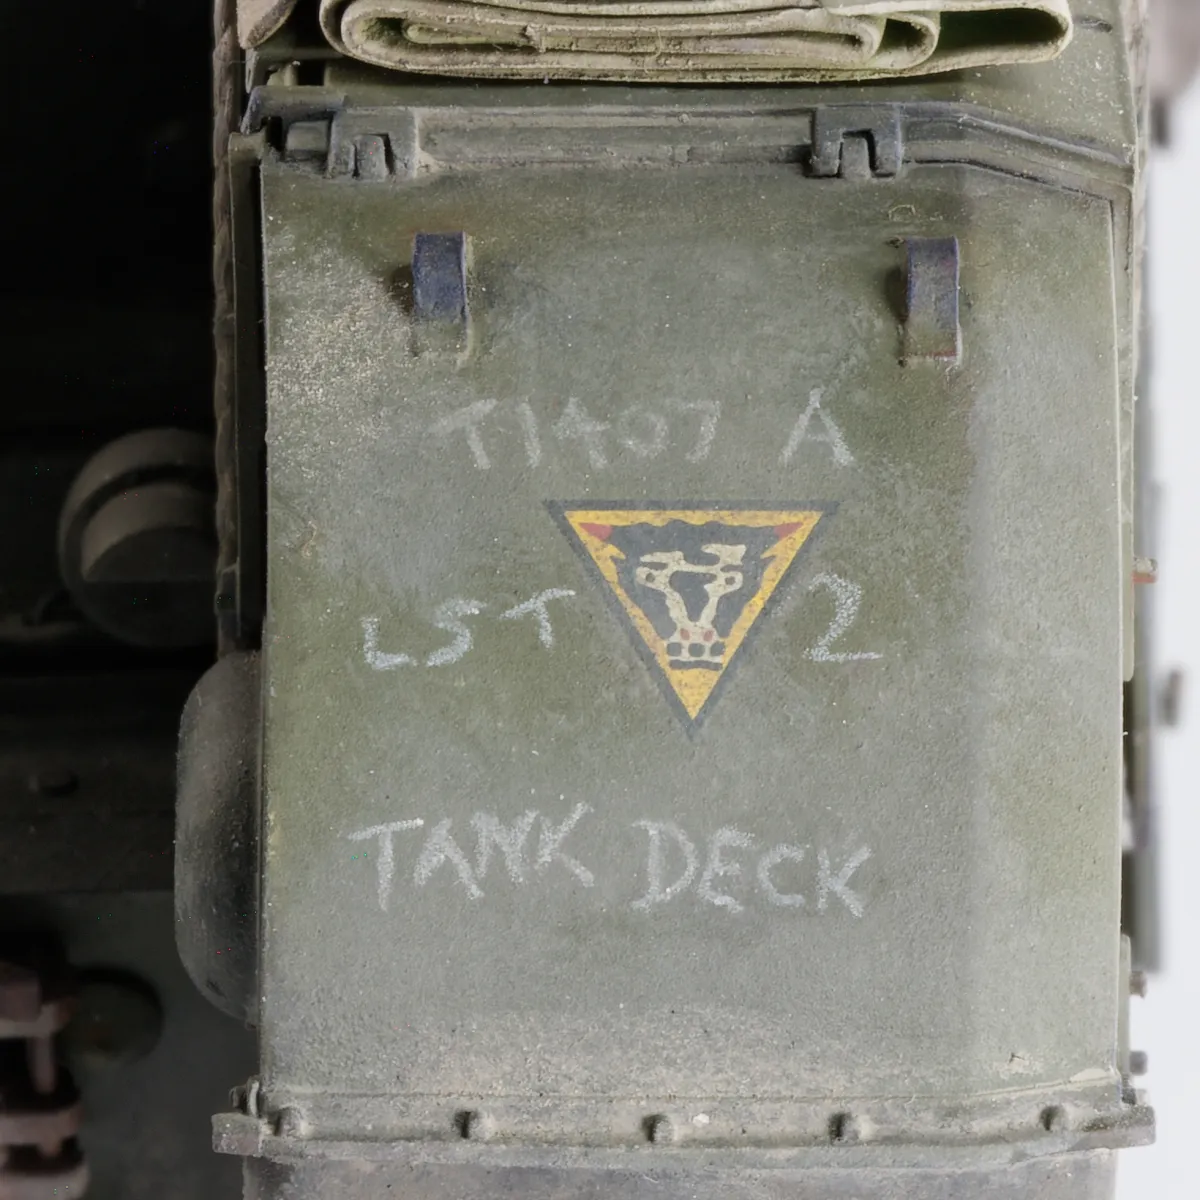
The landing ship embarkation info was written on with a Caran D’Ache Pablo Light Beige pencil. I practiced with a few art pencils of different media, including chalk and oil, but settled on the Pablo as the most effective and convincing.
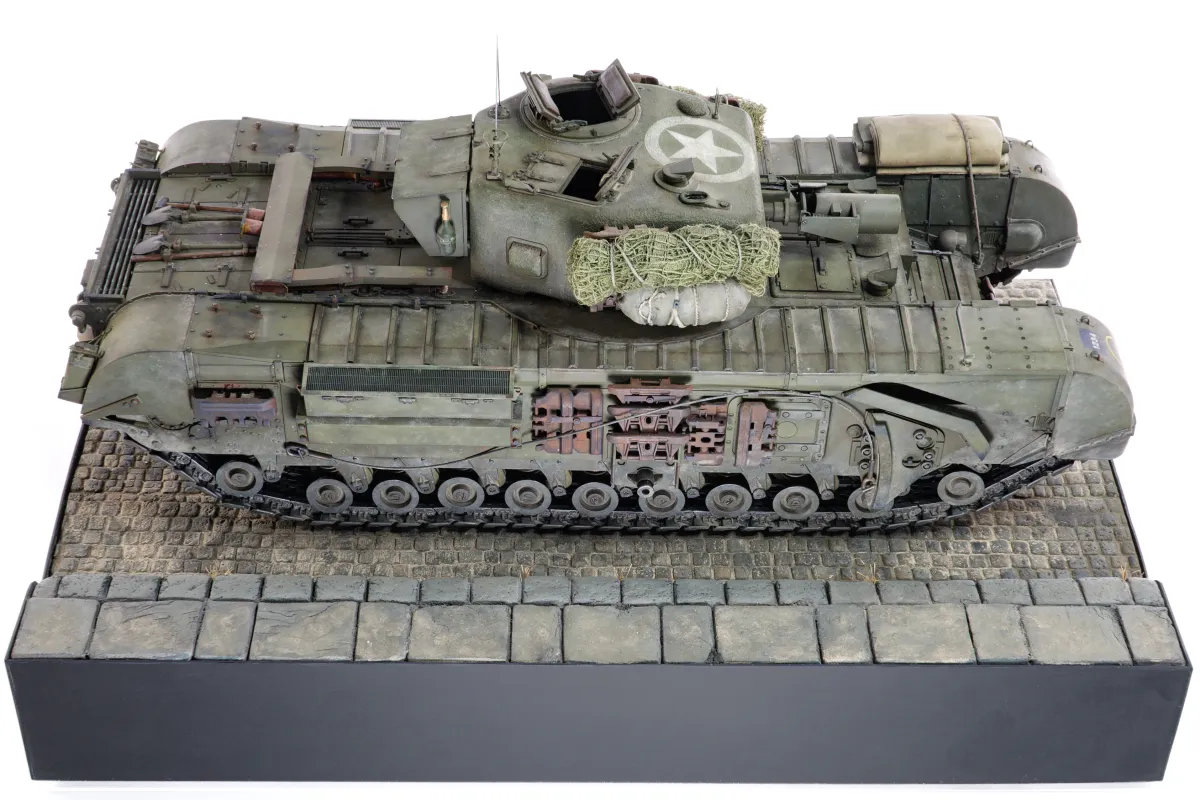
To display it, I was going to make a base to match the photo, but I had recently made a vaguely French or Belgian sett road from DAS sculpting clay and it suits it quite nicely, so it’s still sat on it for now.

Add your comments