
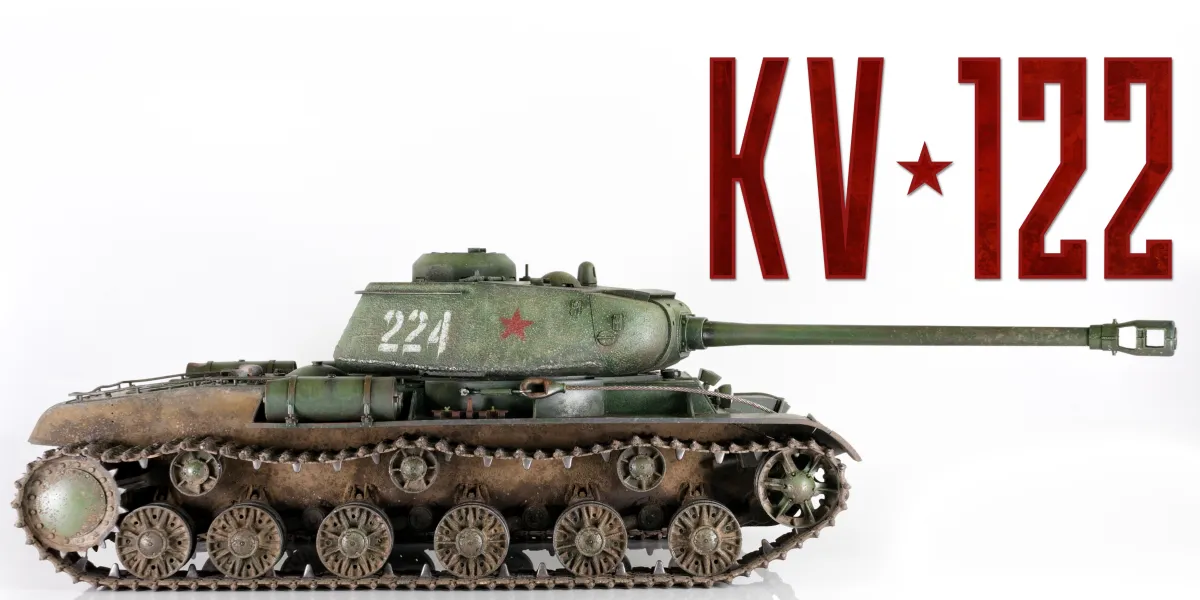


| Subject | Russian Heavy Tank KV-122 |
|---|---|
| Scale | 1:35 |
| Company | Bronco |
| Ref. # | CB35122 |
I usually like Bronco kits, but I may have found a pattern. If it has tan plastic, it should be top draw: sharply moulded, very precise fit, very detailed, and a big PE fret. But if it’s green, the moulding quality is comparatively poor and the PE is austere. So when I wanted a KV-122 — and who wouldn’t? — I could have opted for a cheaper Trumpeter kit, but Bronco seemed like the obvious choice. Unfortunately, I got a green one.
The building bit
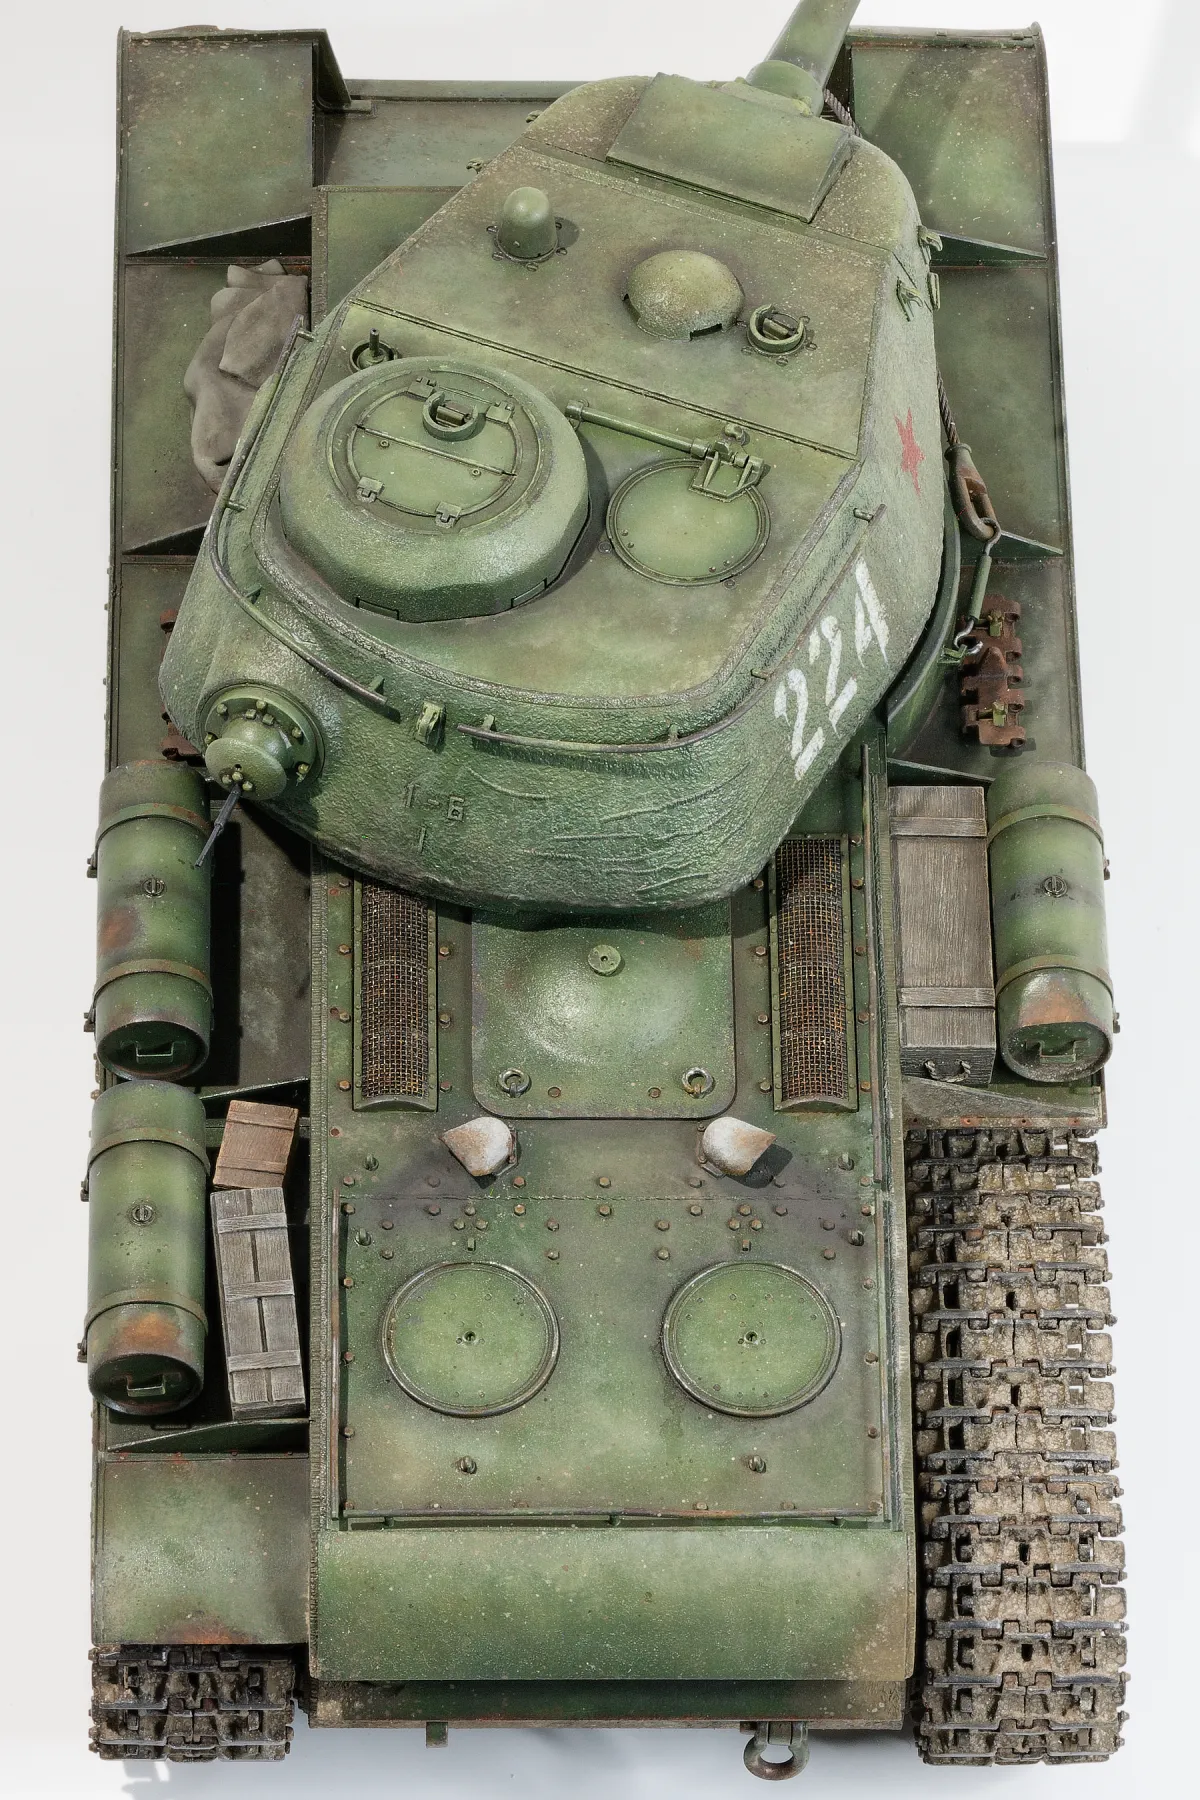
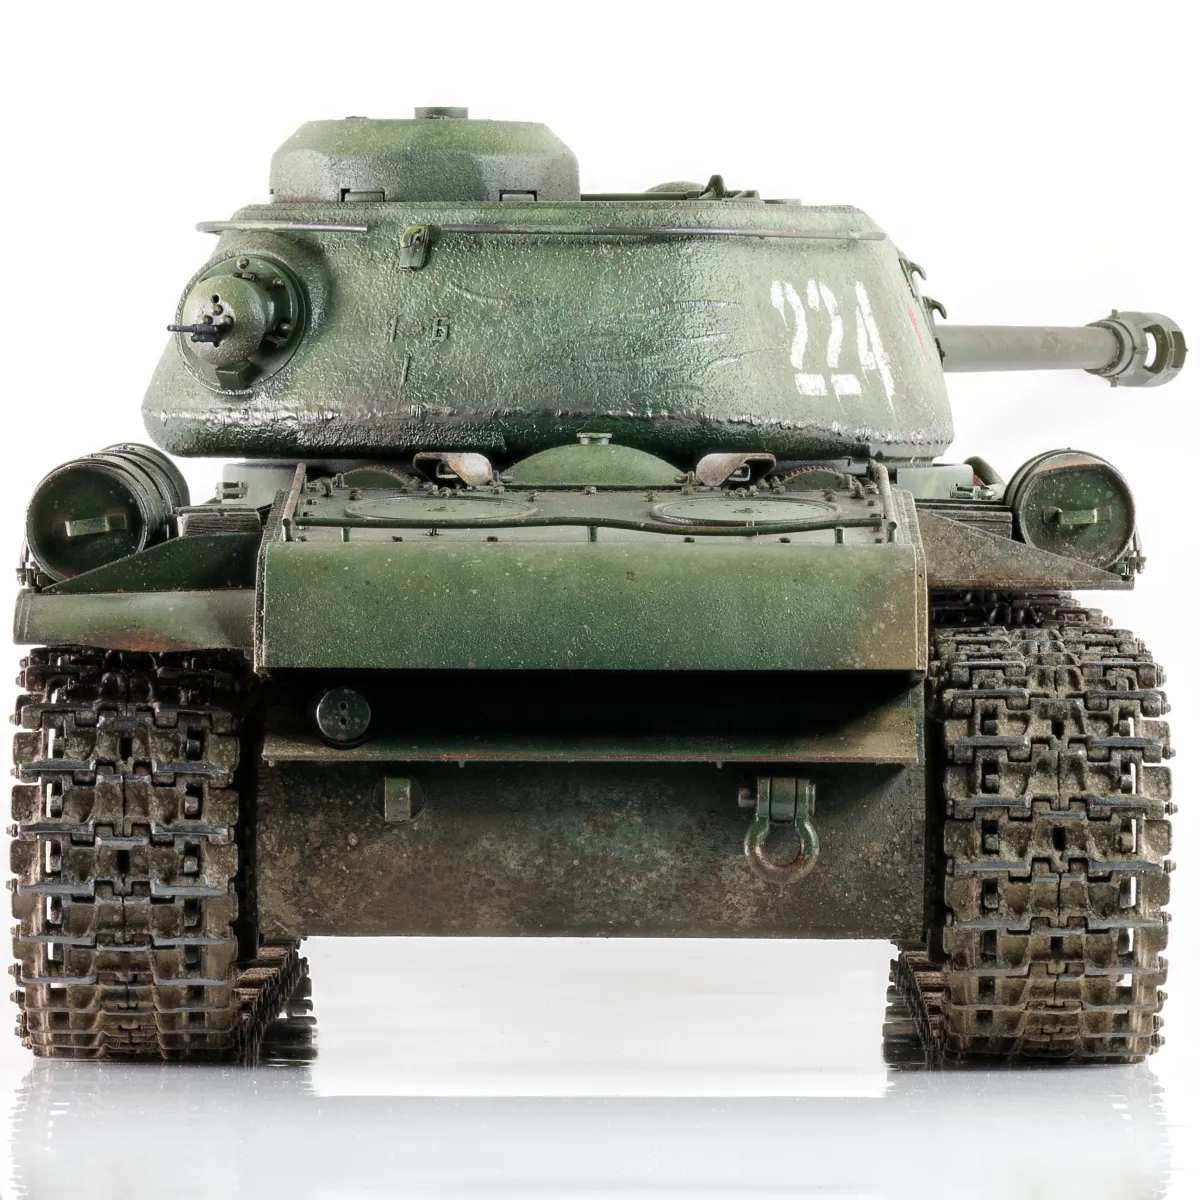
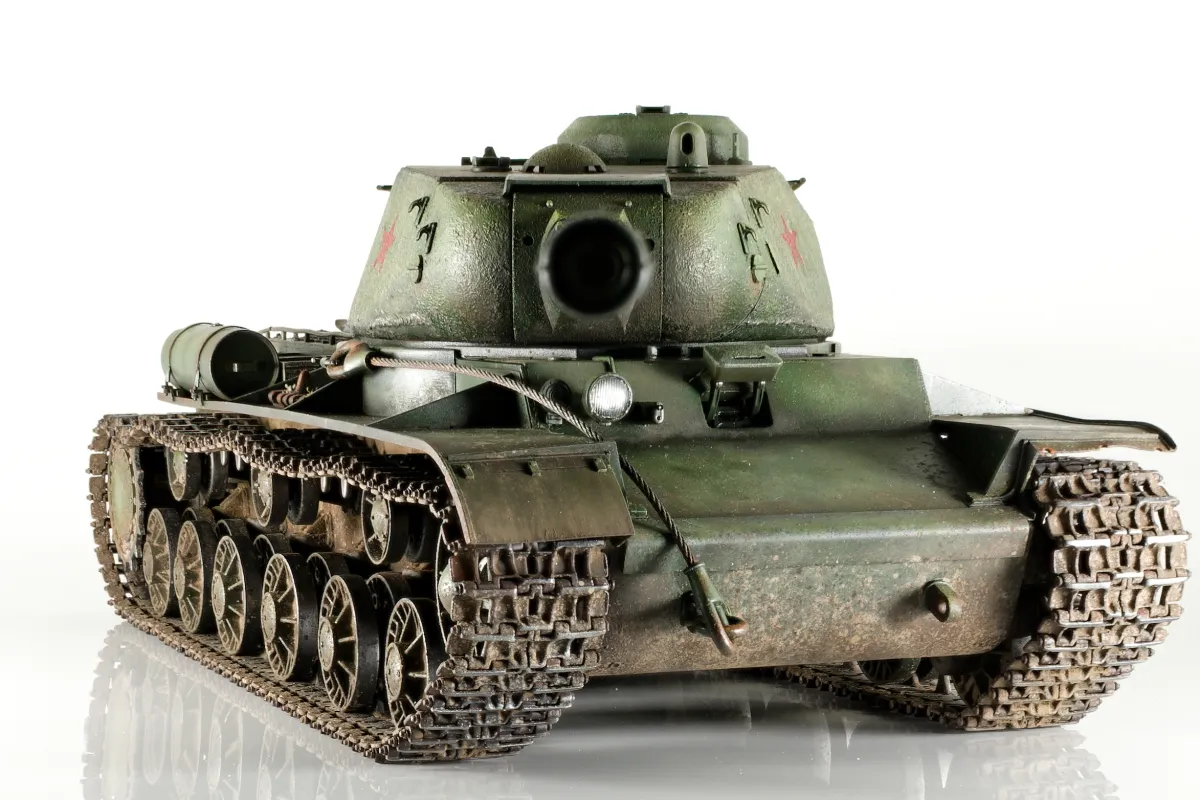
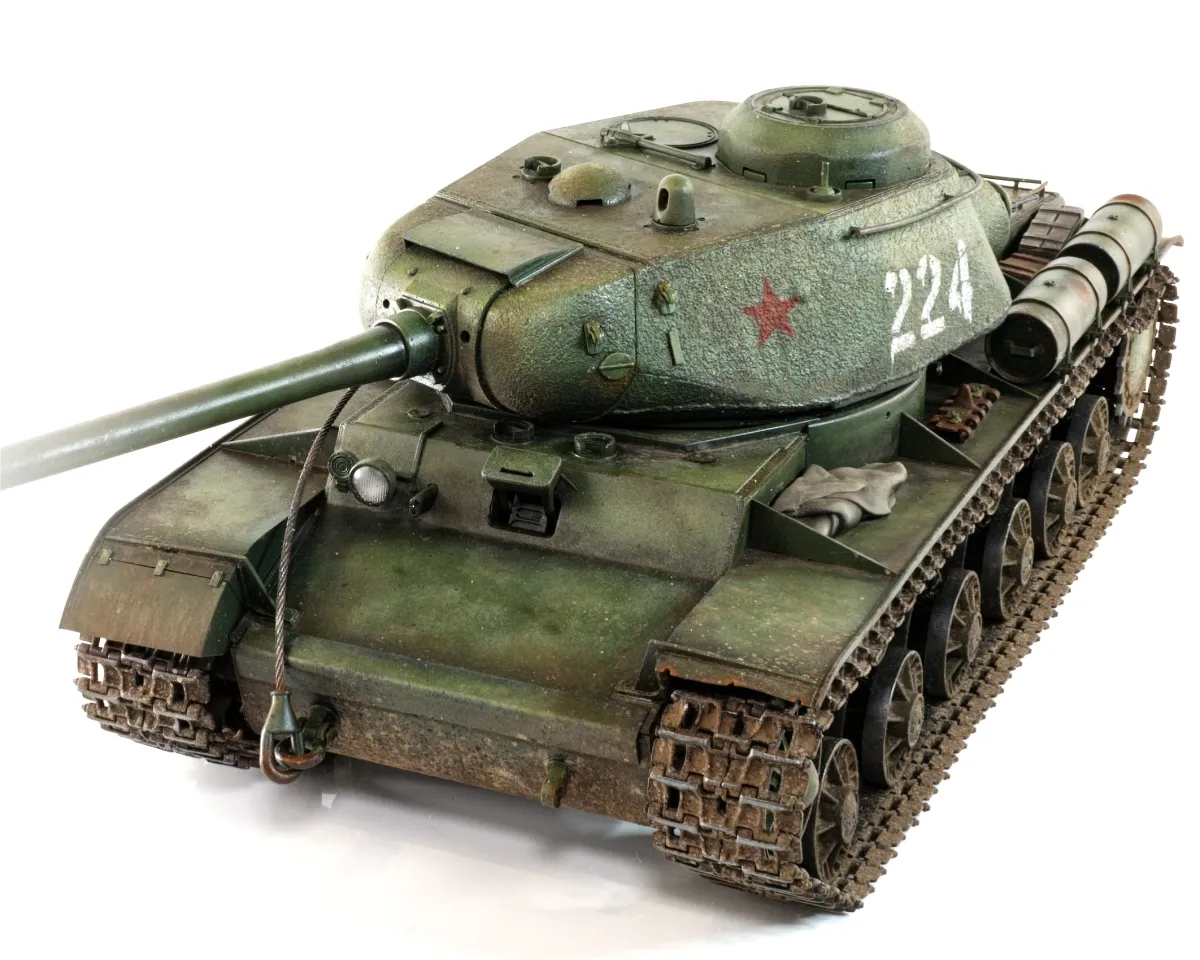
I decided to dial up the asymmetry, hence the missing left front mudguard, right track guard section; and some smaller absentees such as a grab rail and tow cable.
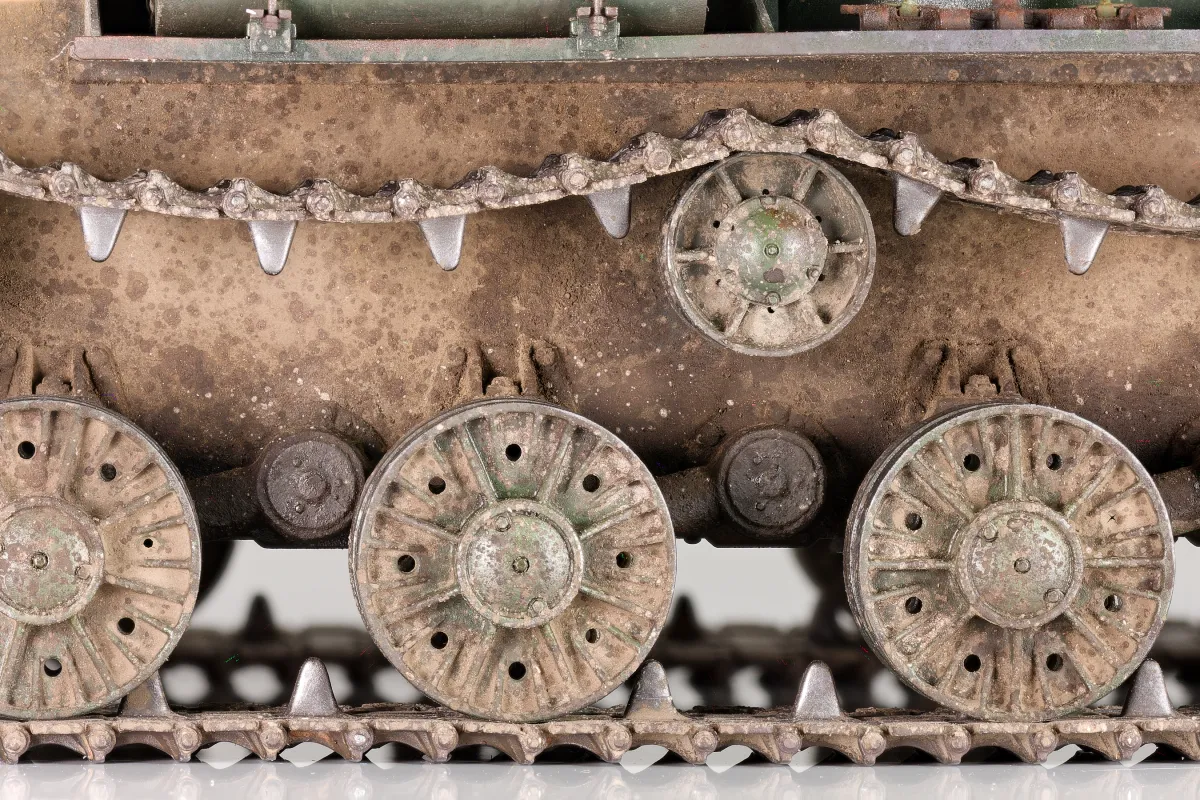
I made up the wheels first — get tedious tasks out of the way — and they took so much sanding that they must be around 1mm smaller.
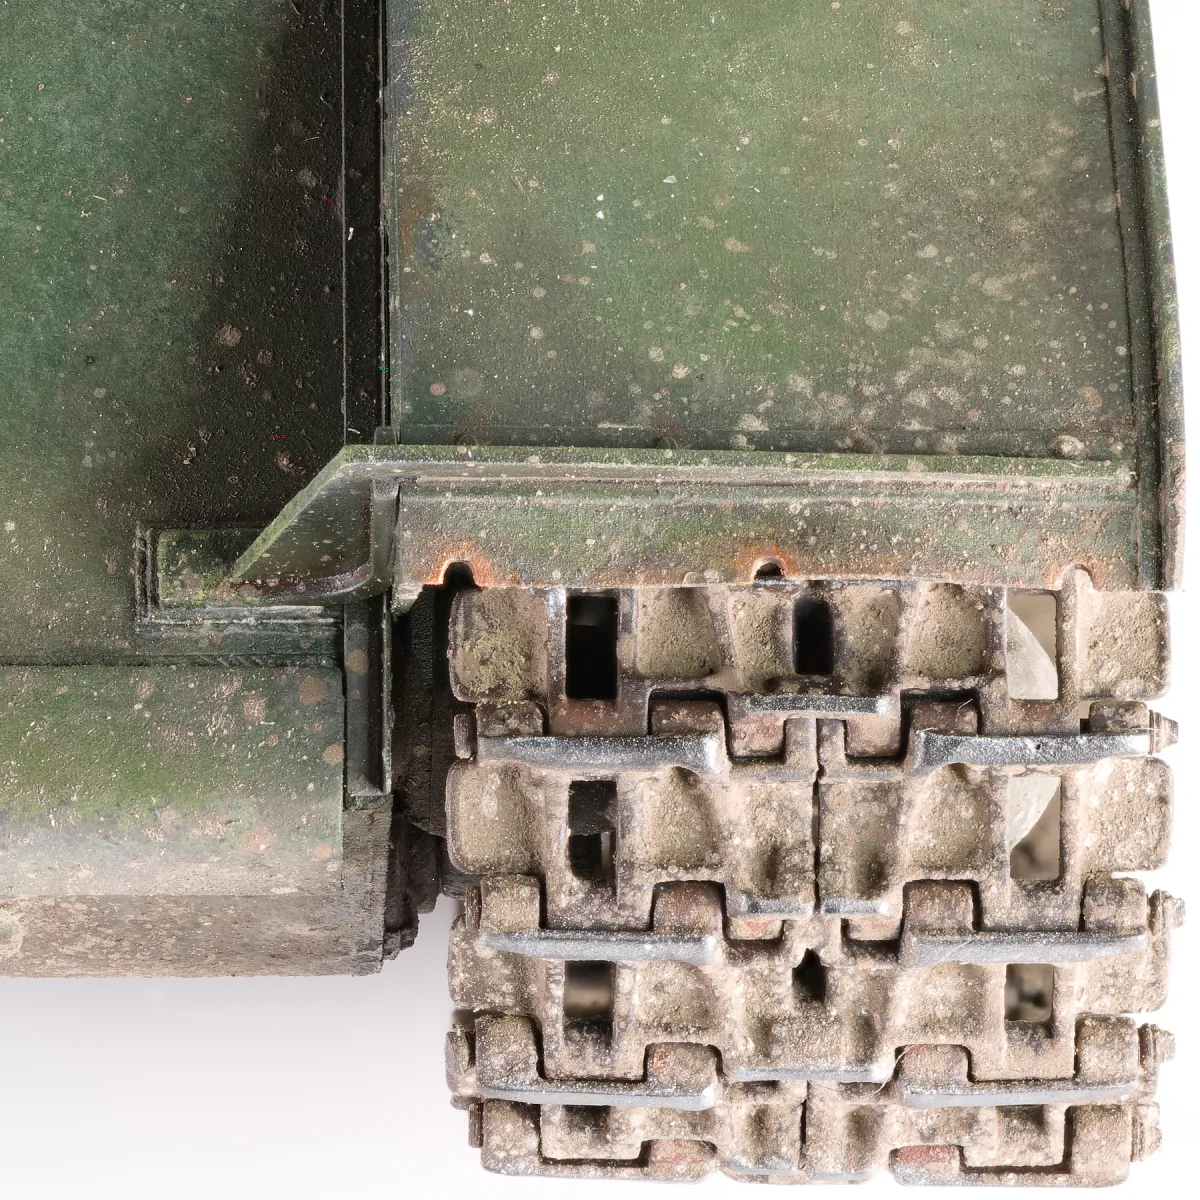
The track guards were warped, so I tried treating them to a hot bath with only partial success. I took the opportunity to work in a few more convincing bends of my own, so at least it all blends in alright.
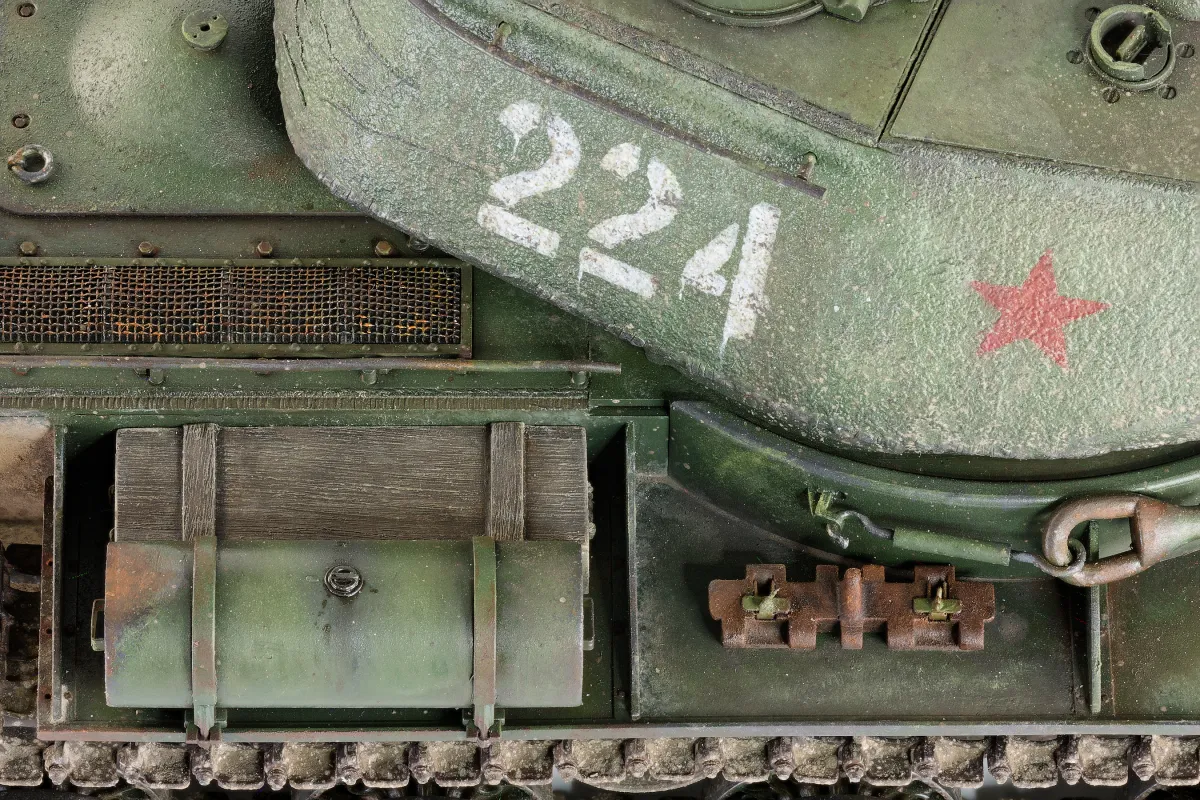
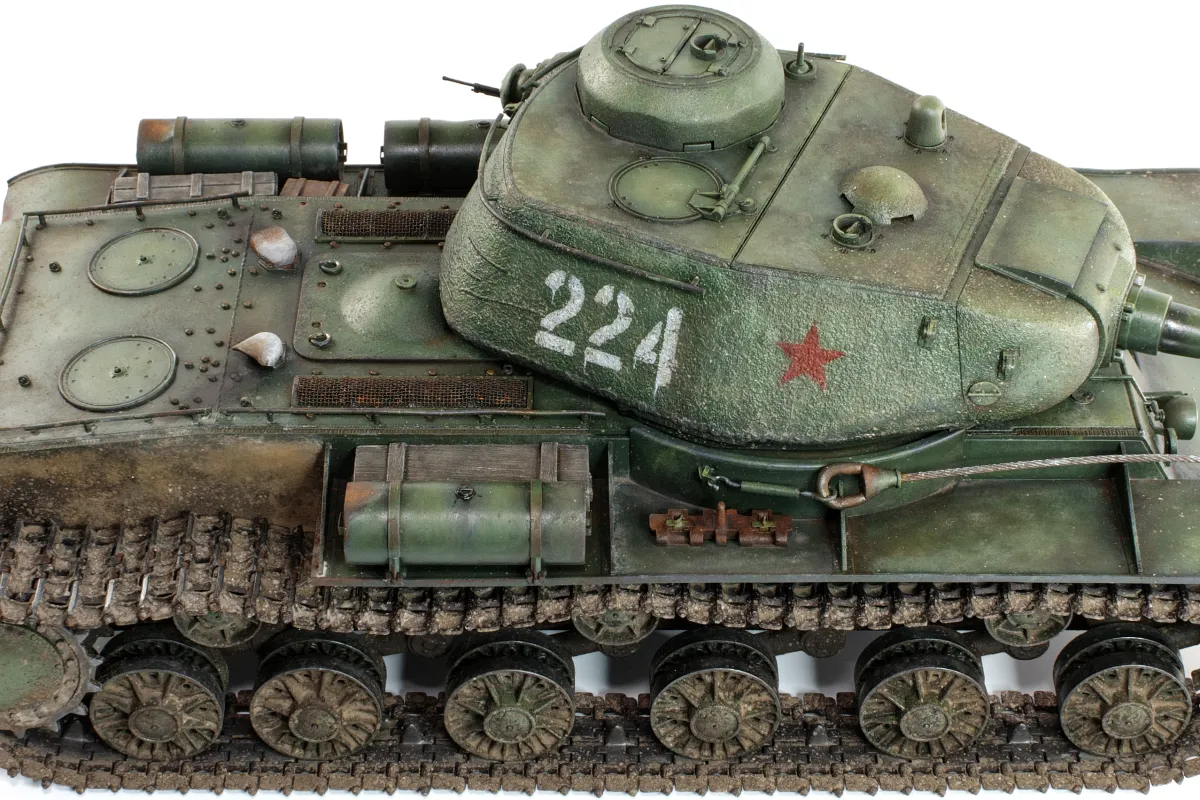
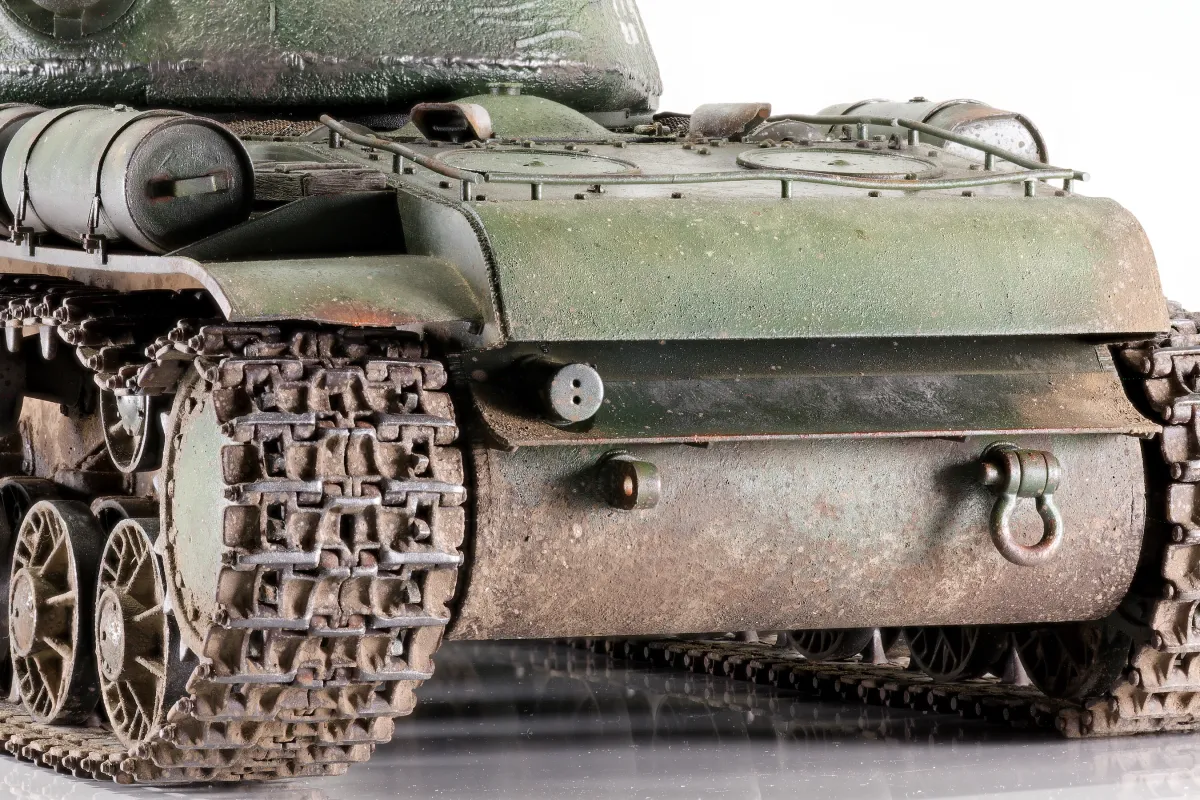
The fuel tank straps are moulded, and not well, so they were cut off in favour of plastic strips. The straps and fittings should have been provided as photo-etch. The handles were very chunky, so I remade them with copper. The flimsy tow cable retainers were snapped on the runner, so I made one from brass tube over brass rod.
The only photo-etch in the box is a pair of mesh grills, but the frames are flimsy and the mesh is too small! The plastic equivalents are very decent, though, and look believable under paint.
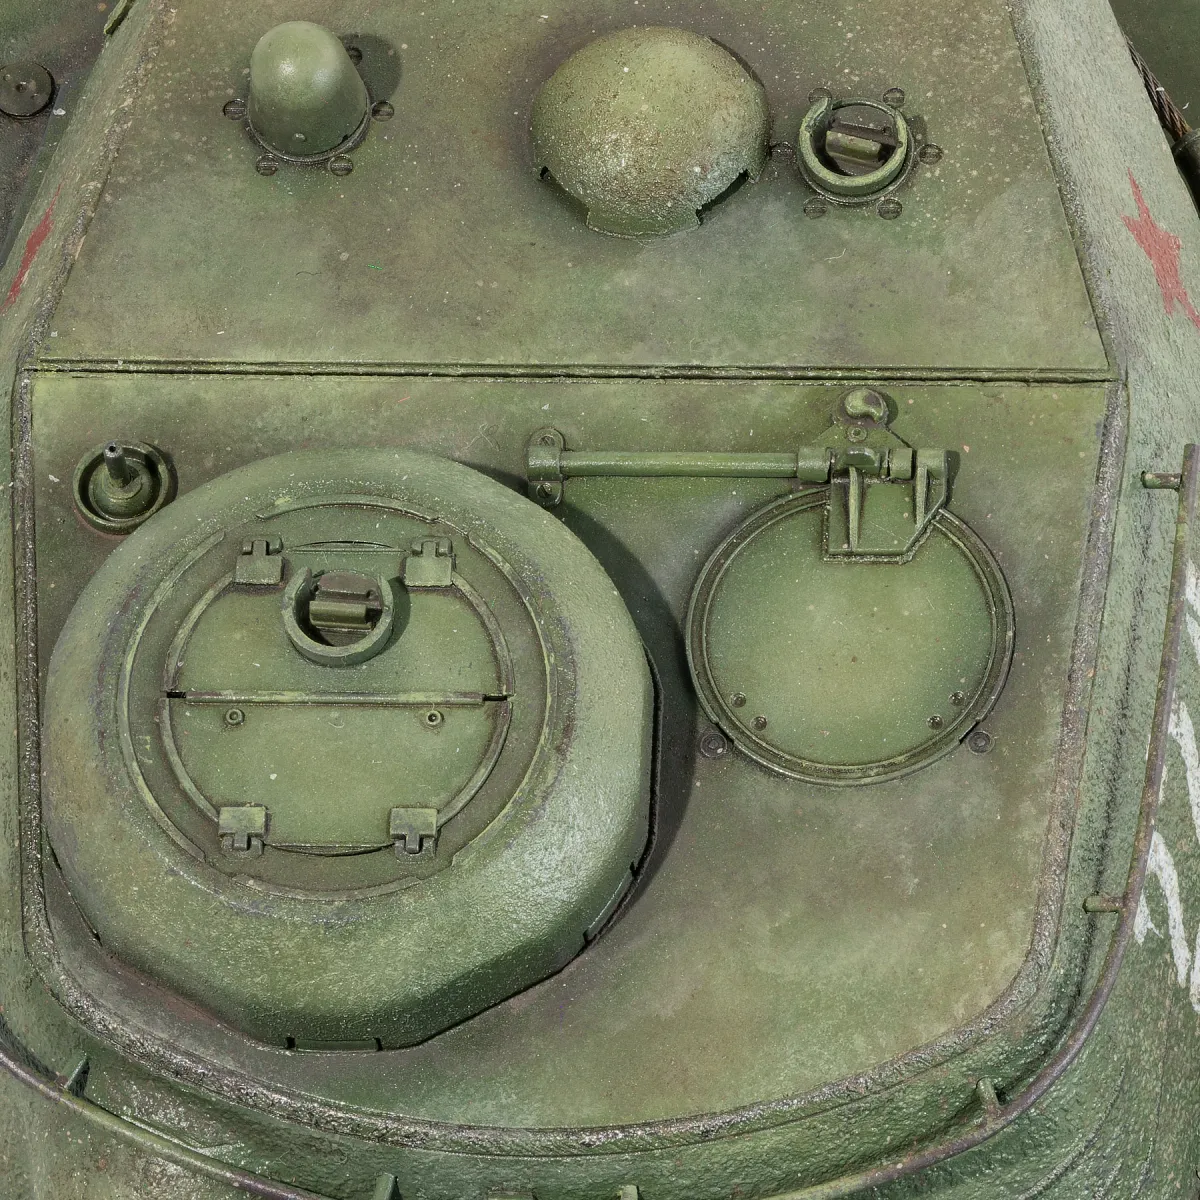
The thin grab rails were not really usable: if I had succeeded in removing the seams without breakage, they would have been out of shape. So I replaced them with plastic rods with a few bends to represent damage. Cementing the curves around the turret was a challenge.
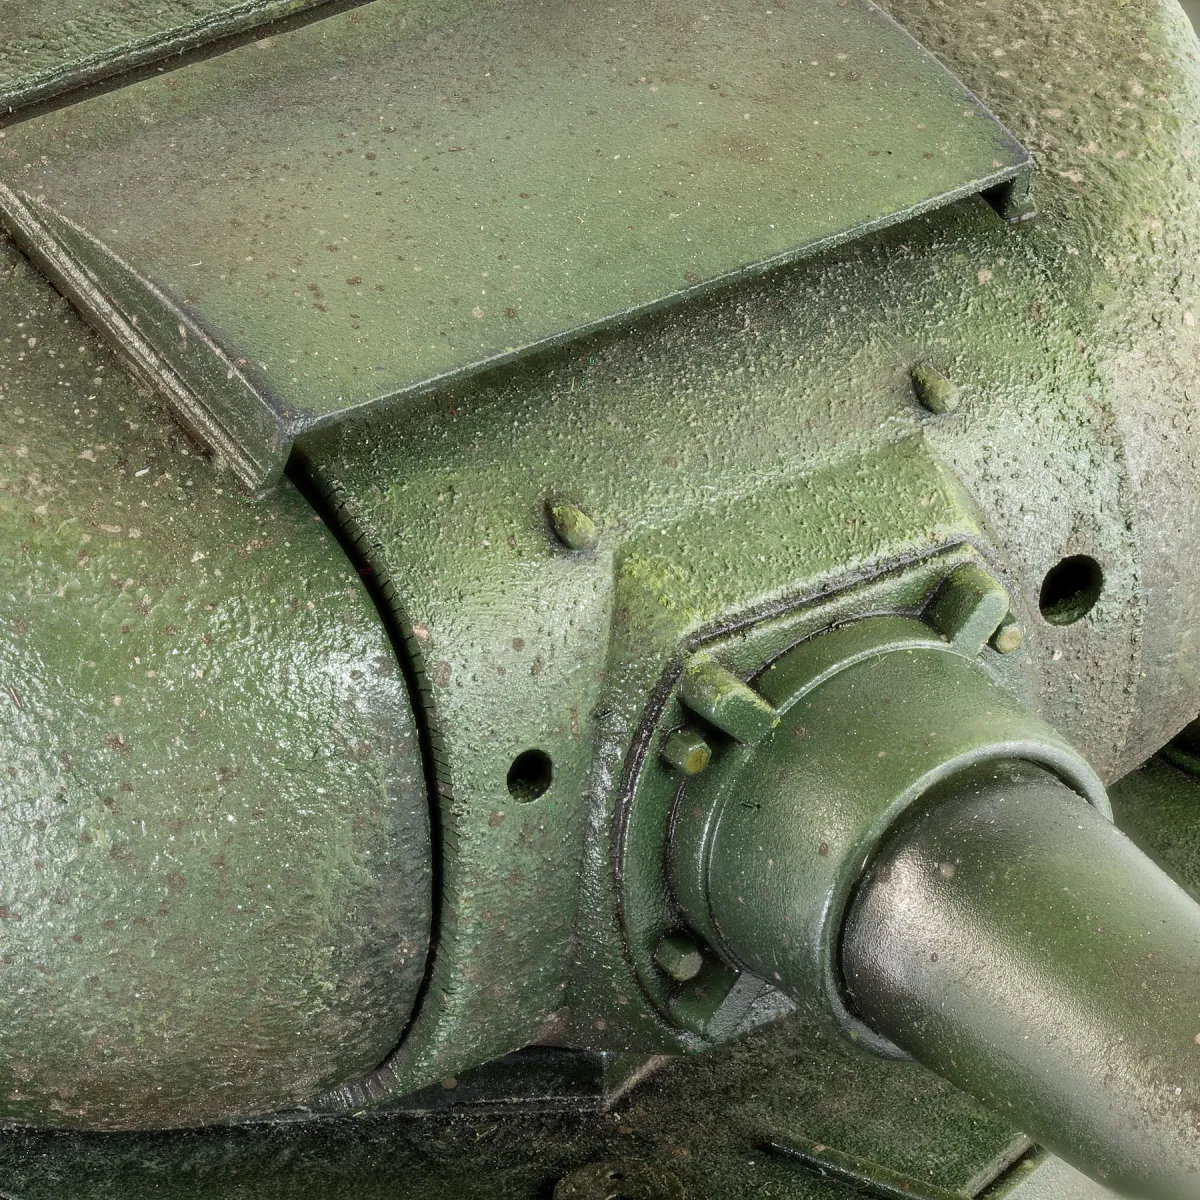
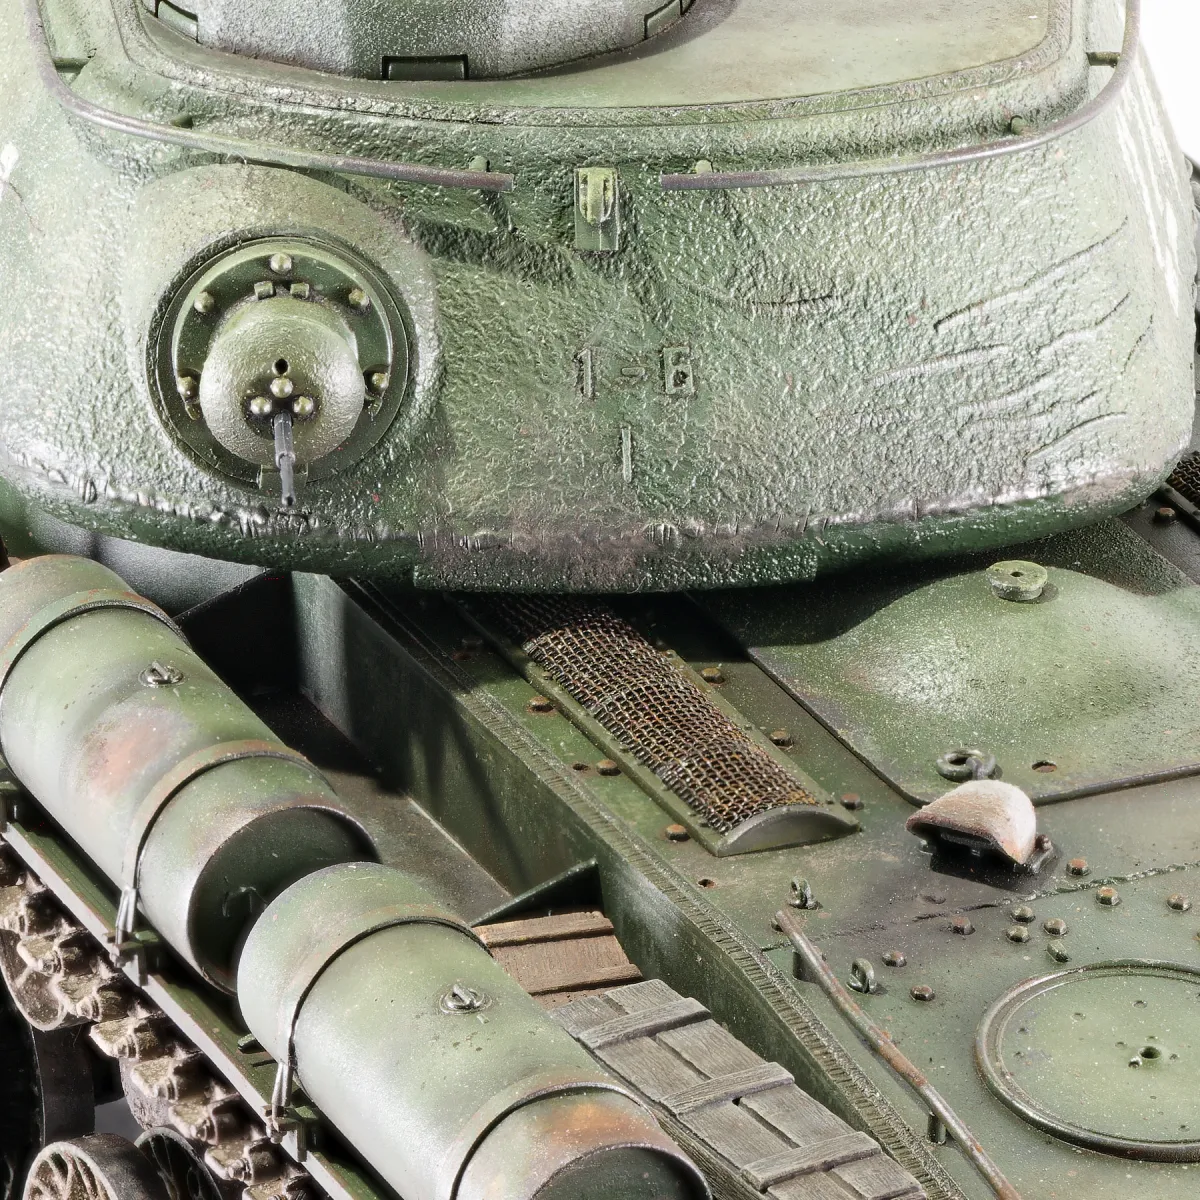
About the turret: it’s moulded in two parts. The large part has casting texture — and it’s good, with numbers, scars, and weld beads — but the front part is plain. I was never going to let that go, so I sorted it using a mixture based on a sandy texture paste. I was chuffed with the result and you wouldn’t guess if you didn’t know.
The kit’s weld beads are really good, but I pinched a couple of tunes from the Martin Kovac playbook and added some flame cuts and textures. With a fine texture mix, I sorted out the engine hatch, transmission casing, rear cover, driver’s visor, air vent, mantlet, MG mount, and cupola! Is it all entirely accurate? Don't know, don’t care. It looks HEAVY.
The individual track links have sprues and joining pins which were devised as a punishment for Soviet political prisoners. After several attempts which risked whittling away what was left of my sanguinity, I gave in and ordered Tankraft printed tracks for KVs. They aren’t cheap and had a hefty delivery charge, but I couldn’t find the right type on sale in Europe… I threw in another set to make it a bit more justifiable and waited for the slow boat to cross the pond.
They were worth it, as the hit to my wallet saved one to my sanity. The only niggle was that the track links are not correctly spaced for this kit’s sprocket teeth, so they are very tight and not quite aligned around the entire contact area. They sit fairly well if placed just right…
This kit is nose heavy due to the big turret and gun up front, so I chucked a small bag of weight in the back to settle it evenly on the workable torsion bar suspension.
The painting bit
I’m totally uninterested in endless debates about the correct shade of 4BO or any other colour. Within reason, I prefer to use whichever colour or mix looks and feels right for my model and, in any case, no model of mine has ever actually been painted in strictly one colour.
I usually use Model Air. I love it and I always get results with it. I’ll brook no criticism of it. But sometimes, I ring the changes and fetch out an alternative, the only solvent paint which I still use frequently: Mr Hobby Aqueous.
I used a mix of several semi-gloss colours* applied over a multi-colour freehand mottle using a variety of modulation called Zenithal lighting. Think “light bits lighter, dark bits darker”.
* I can’t actually remember the colour mix; but it doesn’t matter too much because I would paint any other Soviet tank somewhat differently, just as this is different to those which preceded it.
The next step was to add volume to the shapes: around edges, corners, joints, and gaps. You can see this around the fuel tank straps, barrel, mantlet, glacis, cupola, and more.
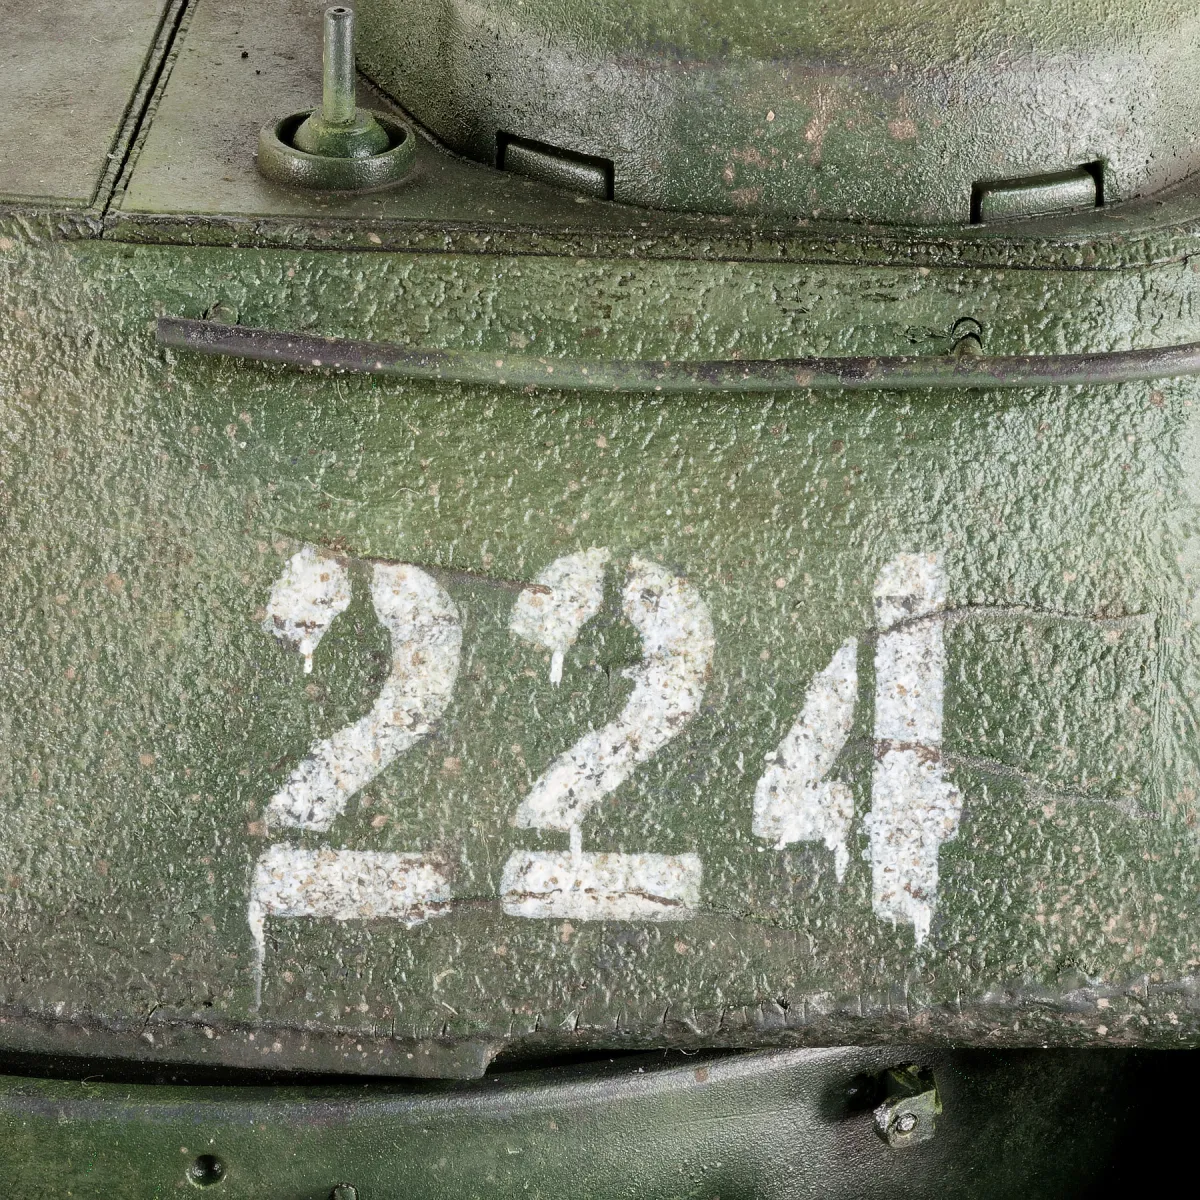
Finally, markings. I plucked a number out of the air, designed some masks in Affinity Designer, and cut them in Oramask 810 on a Cricut. I should write a how-to about that one day.
I did make one wrong call with the painting, but it occurred back in construction. It turns out that it would have been so much easier to paint two-part KV road wheels before assembly… Who knew? 🤦🏻♂️
The finishing bit
I don’t mind admitting that, even though I’ve been modelling for seven or so years, the thought of trying to replicate mud is still triggering!
But then something happened this time, I got into a zone, and I actually did a decent job of it. Even the front and rear of the hull are fairly good, and that’s usually my weakest area. Any place where I have to go from muddy to not-muddy gives me the heebee jeebies.
For a very dusty or muddy hull, I will usually airbrush a pigment mix as a base layer. It creates a soft demarcation, maps out the working area, makes it easier to fix dropped pigments, and it’s an easy opening gambit in the contest of me vs. mud effects.
I abandoned most enamels in favour of oils long ago, but I keep a few Ammo Mud Splashes and Heavy Muds because they can be useful, as long as they are thinned and mixed with pigments. I made a couple of dark, glossy blends and put them low down and around the suspension arms.
Then several “damp” and “dry” pigment mixes were added in a few layers, topped by a speckled “wet” mix to match the wet mud, and lastly some grease/oil stains. All of these were made with the excellent VMS oil and alkyd media.
Instead of one pigment per task; I always blend at least two similar colours, which seems to help with the realism.
The rest of the finishing was mostly oil paint rendering (OPR), and quite a lot of it. But, because I painted it with the finish in mind, I wasn’t working on a blank canvas. I put a lot of effort into making the top of the turret, engine deck, and track guards look well used. The story of a vehicle’s life is told in the details, so the rusty dents on the track guards and fuel tanks got a lot of attention, as did crew contact points.
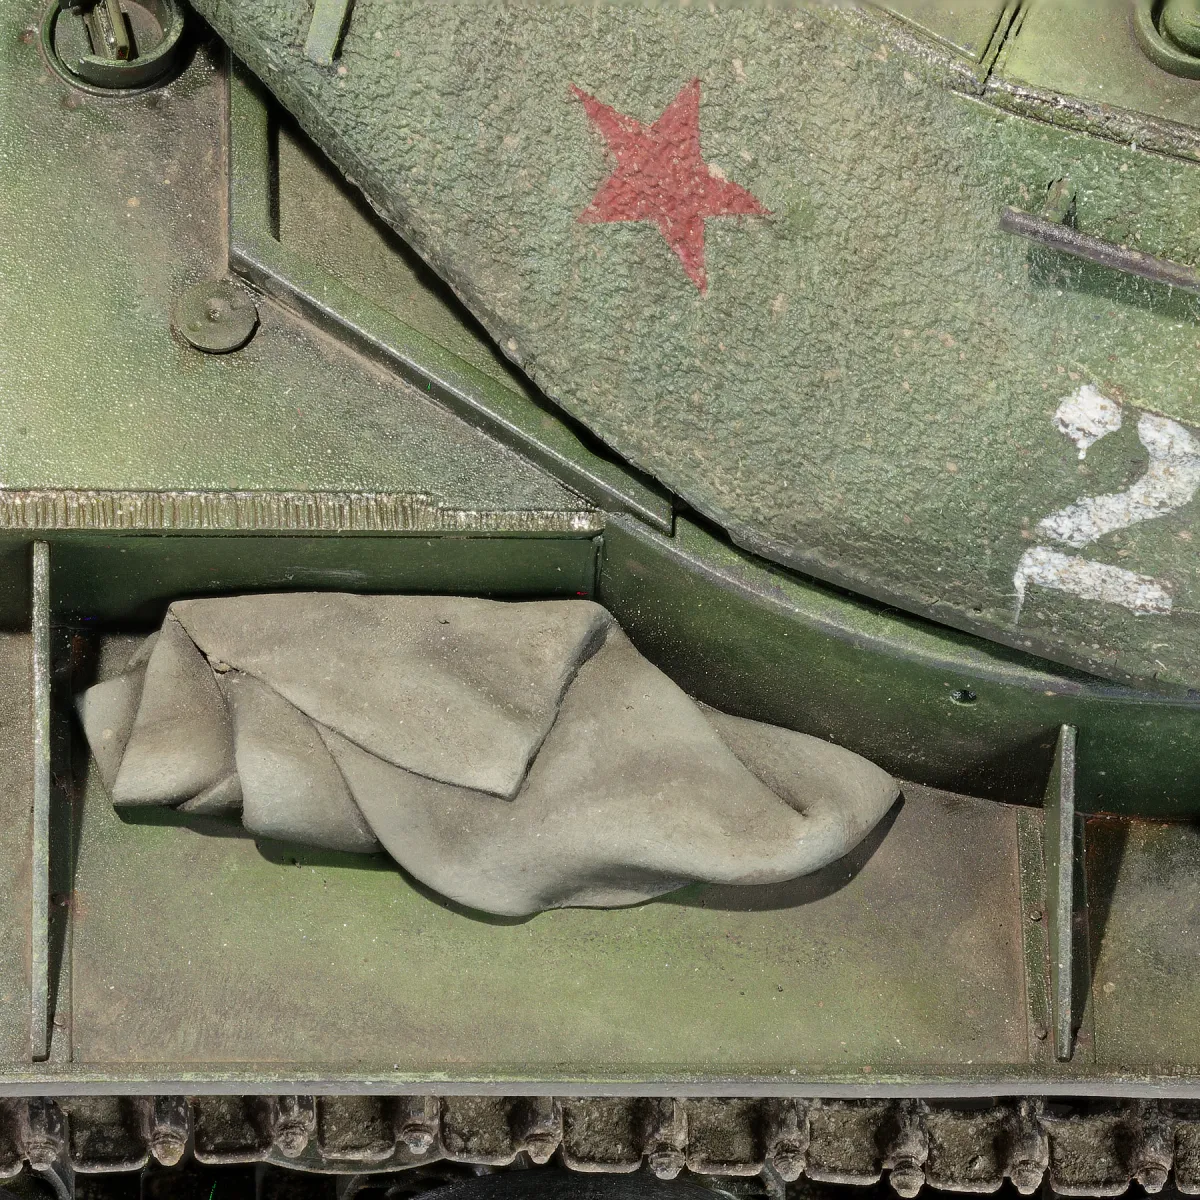
The final touch was some stowage. I didn’t have anything really evocative of Soviet vehicles — not too sure what that would be, actually — so the most suitable things were a few generic wooden crates and a tarpaulin which happened to fit neatly on the left track guard.
I have no idea how long it took me to finish this; longer than I expected, I know that much, but that’s typical of me. But I absolutely loved [nearly] every minute of it and it’s a milestone because it was the first tank project which came out pretty much entirely matching the version in my head, instead of me falling short and messing it up somewhere.


Comments
add your commentLee Fogel
Very nice work all around. Deft touch with the weathering especially.
Ade
In reply to Very nice work all around… by Lee Fogel
Thanks very much, Lee.
Андрій
Дуже гарна робота!!!
Ade
In reply to Дуже гарна робота!!! by Андрій
Thanks, Andriy!