

| Subject | Magach 6B Gal Batash |
|---|---|
| Scale | 1:35 |
| Company | Meng Model |
| Ref. # | TS-040 |
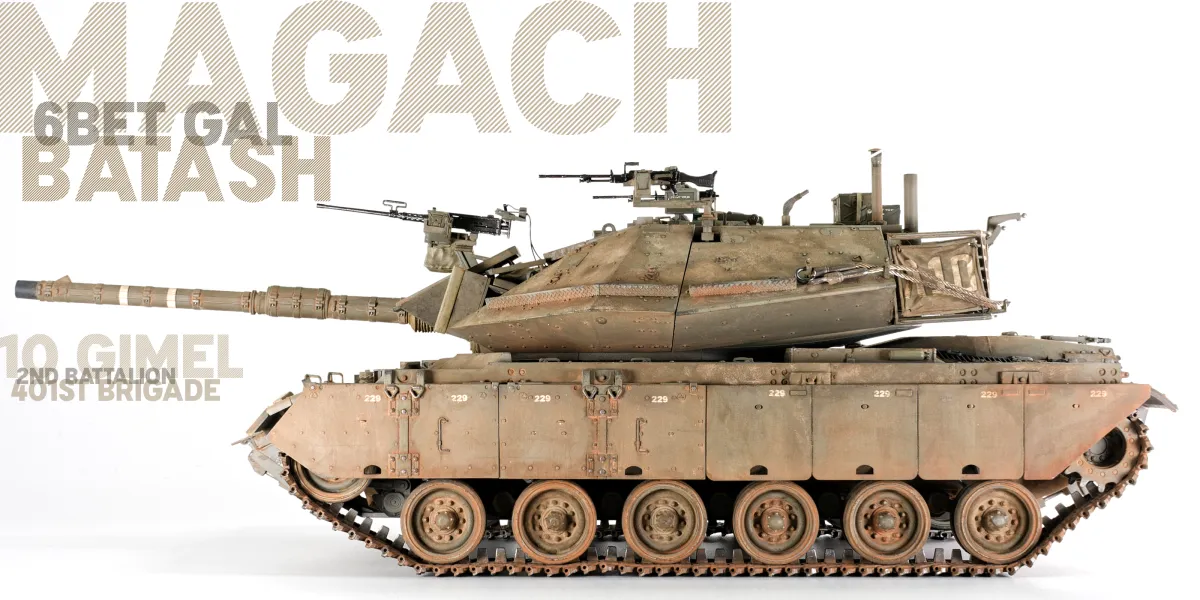
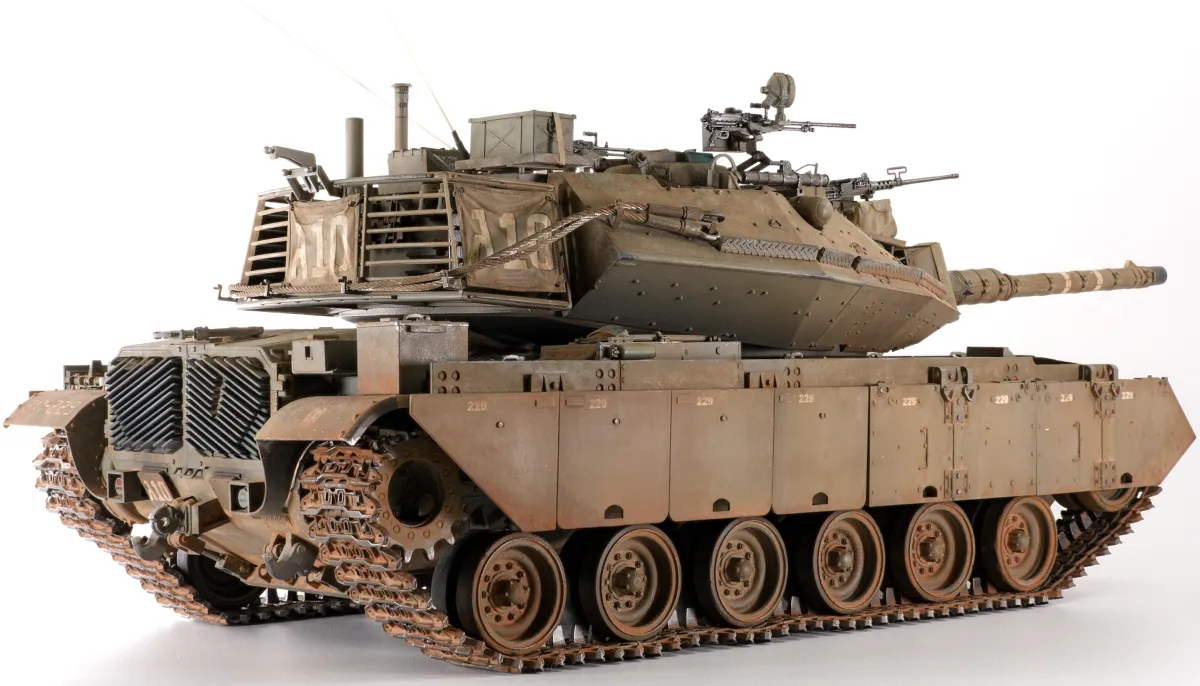
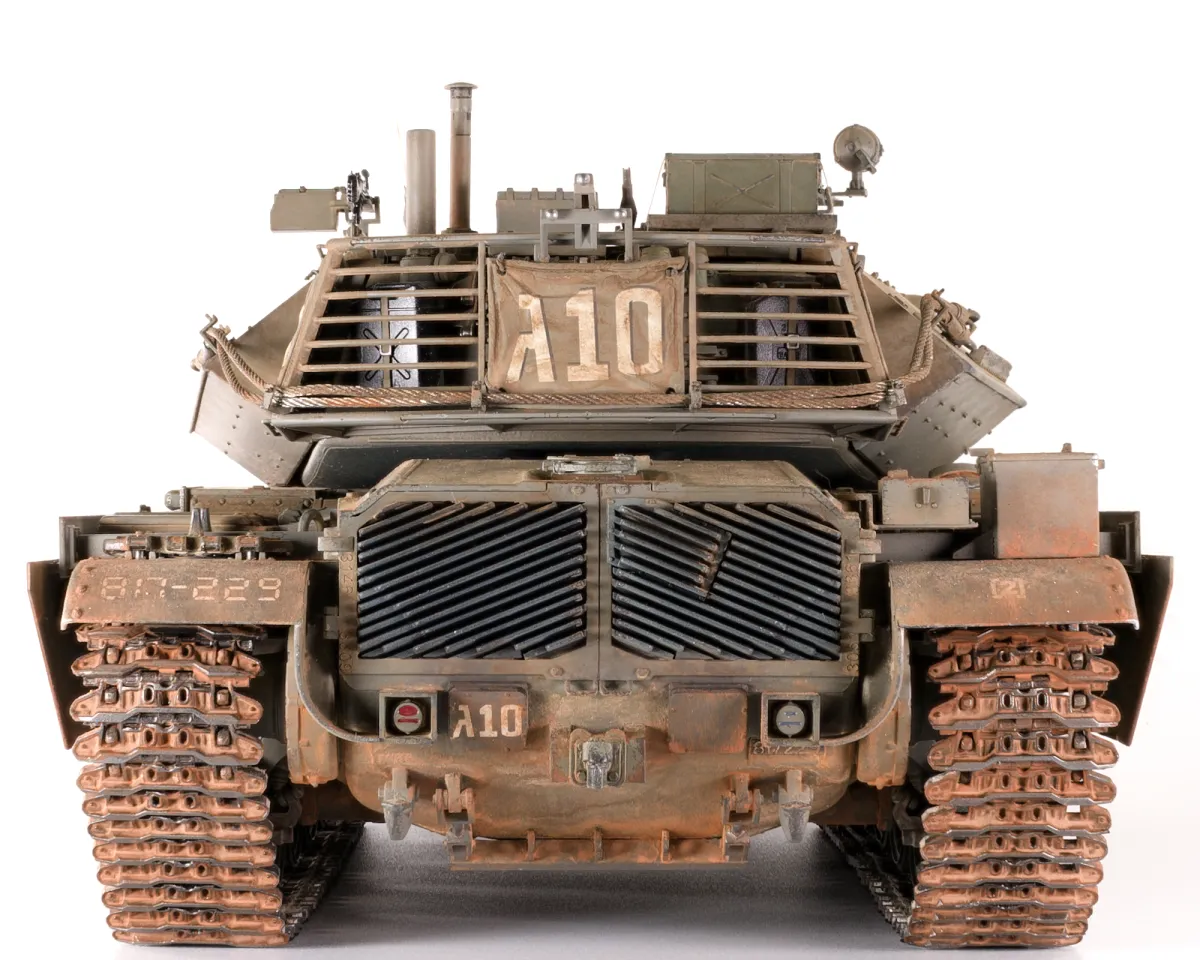
Meng’s short-lived 2019 kit of the Israeli Defence Force’s Magach 6 Bet Gal Batash is an intriguing mash-up. Underneath all the sloped armour and skirts is a U.S. M60A1. An oddity such as this is bound to appeal to me.
Five years. That’s the time between starting and completing this project. A record even for me, so how the heck did that happen?
If you sneaked into the Panel Lines office and went through the draws crammed full of “work in progress”, you may correctly conclude that, in reaching the display case, this one beat the odds.
In fact, the timescale involved — being almost completed in the second half of 2019 and pushed over the finish line in the tail end of 2024 — makes it an anachronism because it’s simultaneously one of my oldest projects still on display and one of the newest.
In a few months, I got this so close to completion that it needed little more than a set of bent aerial mounts and other finishing touches. As I had none (the kit provides only straight-up mounts), I decided that the safest convenient place to store it was in a quiet corner of the cabinet and there it languished, becoming an unnoticed fixture.
But once 3D print producers began to produce bent aerial mounts for IDF AFVs and I belatedly got around to purchasing some from EMP3D, I set some time aside and picked up where I had long ago left off.
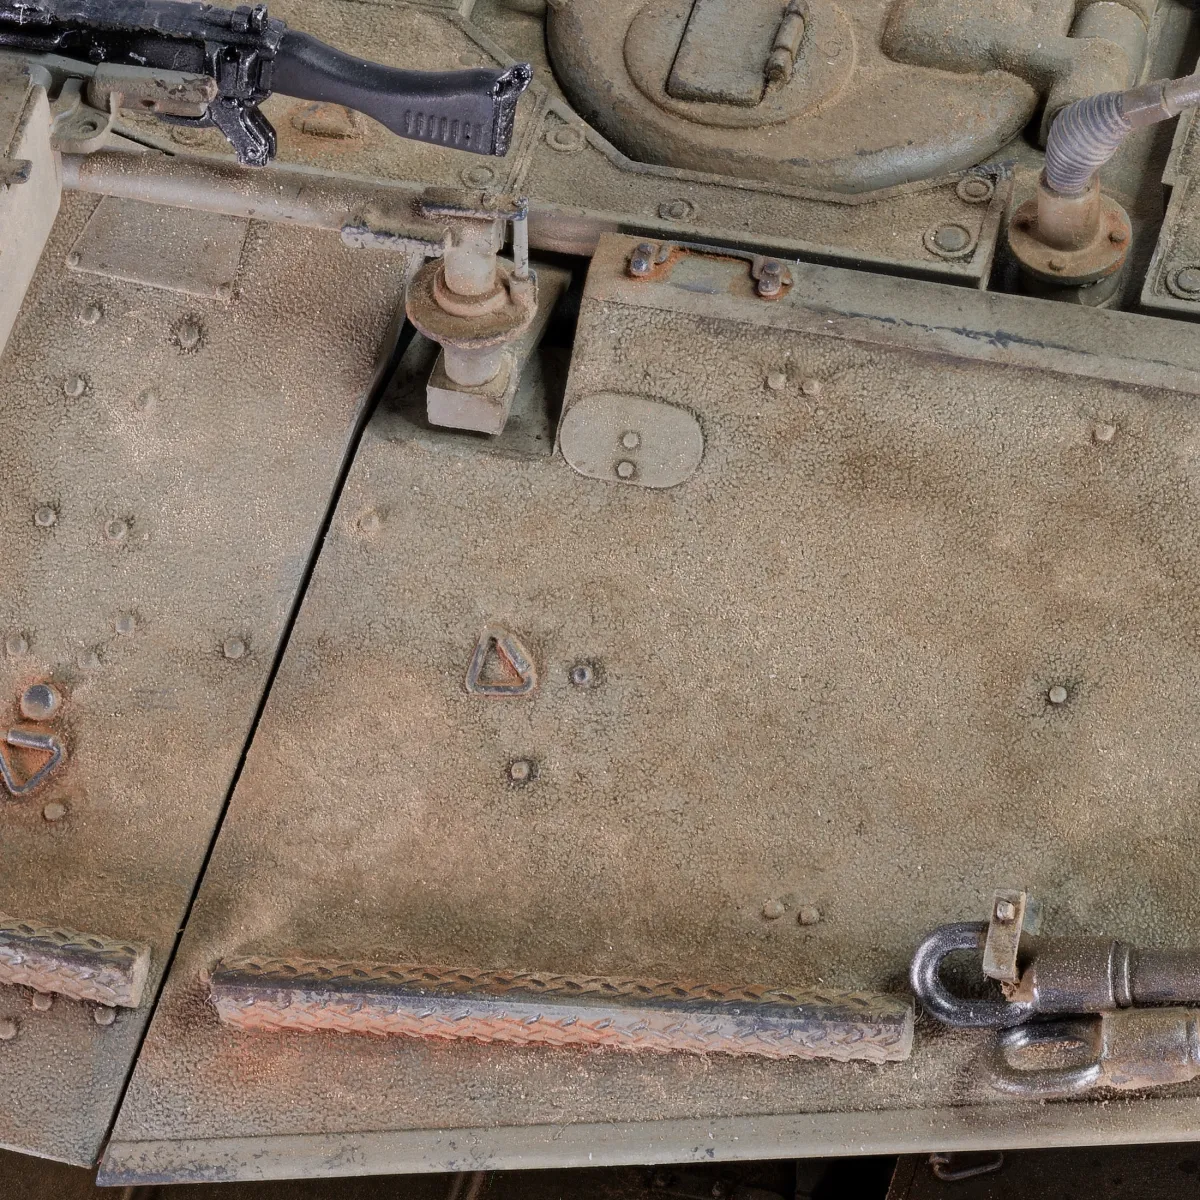
And in some places, its true age shows in the close-ups. The younger me took a more simplistic, delineated view of the build-paint-finish process and didn’t give enough consideration to areas which I assumed wouldn’t be observable, nor to some little nooks which should have been finished earlier while they were still easily accessible.
Nor did I put quite as much thought into the paint process as I do now. I experimented with a geometric B+W pre-shade which all but vanished under a zenithal top colour which needed too many adjustments to have any chance of maintaining sufficient translucence.
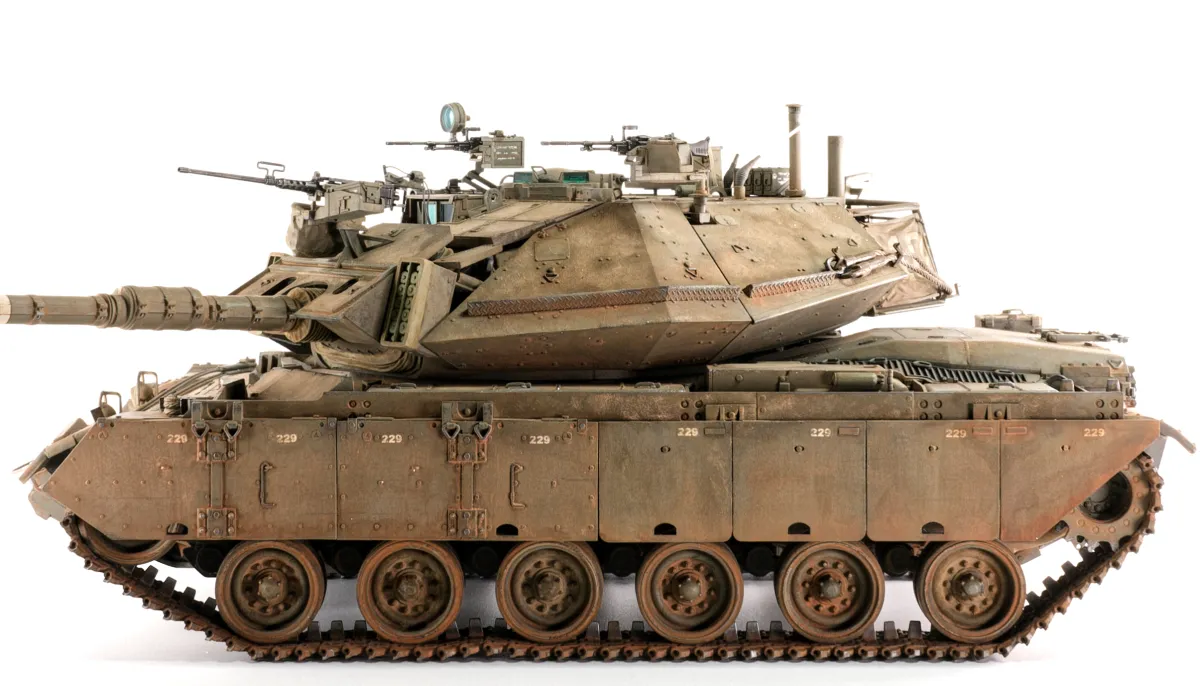
Weathering focused on multiple layers of dust washes, alternating between solvent and water-based mixes, using two colour pairs — Negev Sand + Golan Earth and Brick Dust + Vietnam Earth — with OPR over the top. In some shady spots, especially around the front and back of the hull, the original weathering is obviously nowhere near refined enough, but I’ll live with it now.
Construction
Just before starting on this, I finished Meng’s ginormous French Char 2C: decent quality, for the most part, but this newer kit embodied a step forward, with much more precise fit and more sophisticated details.
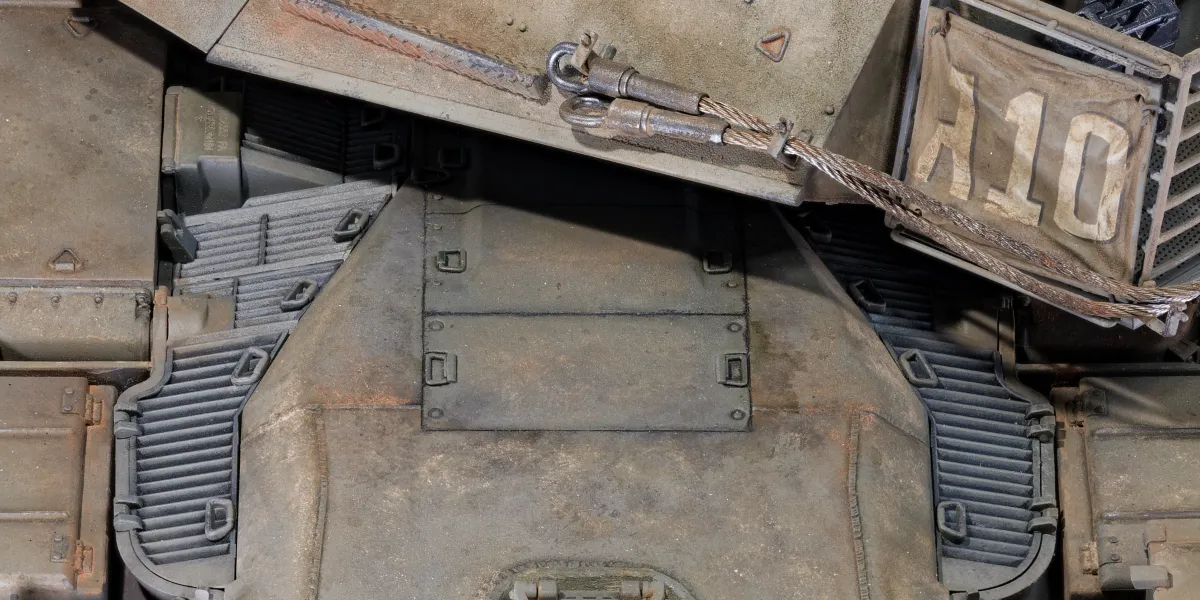
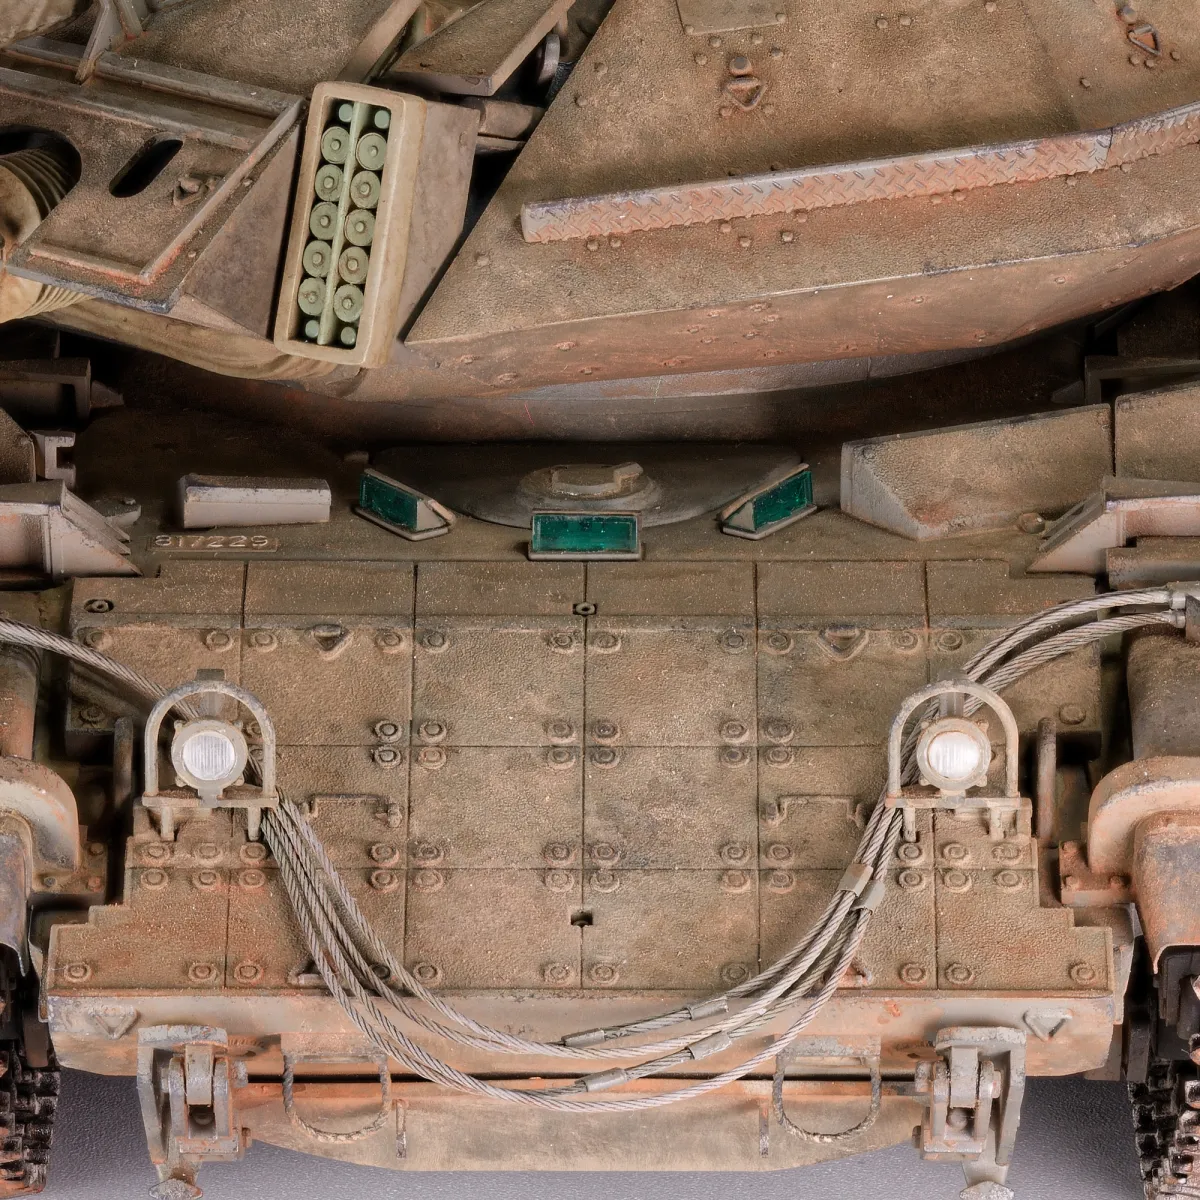
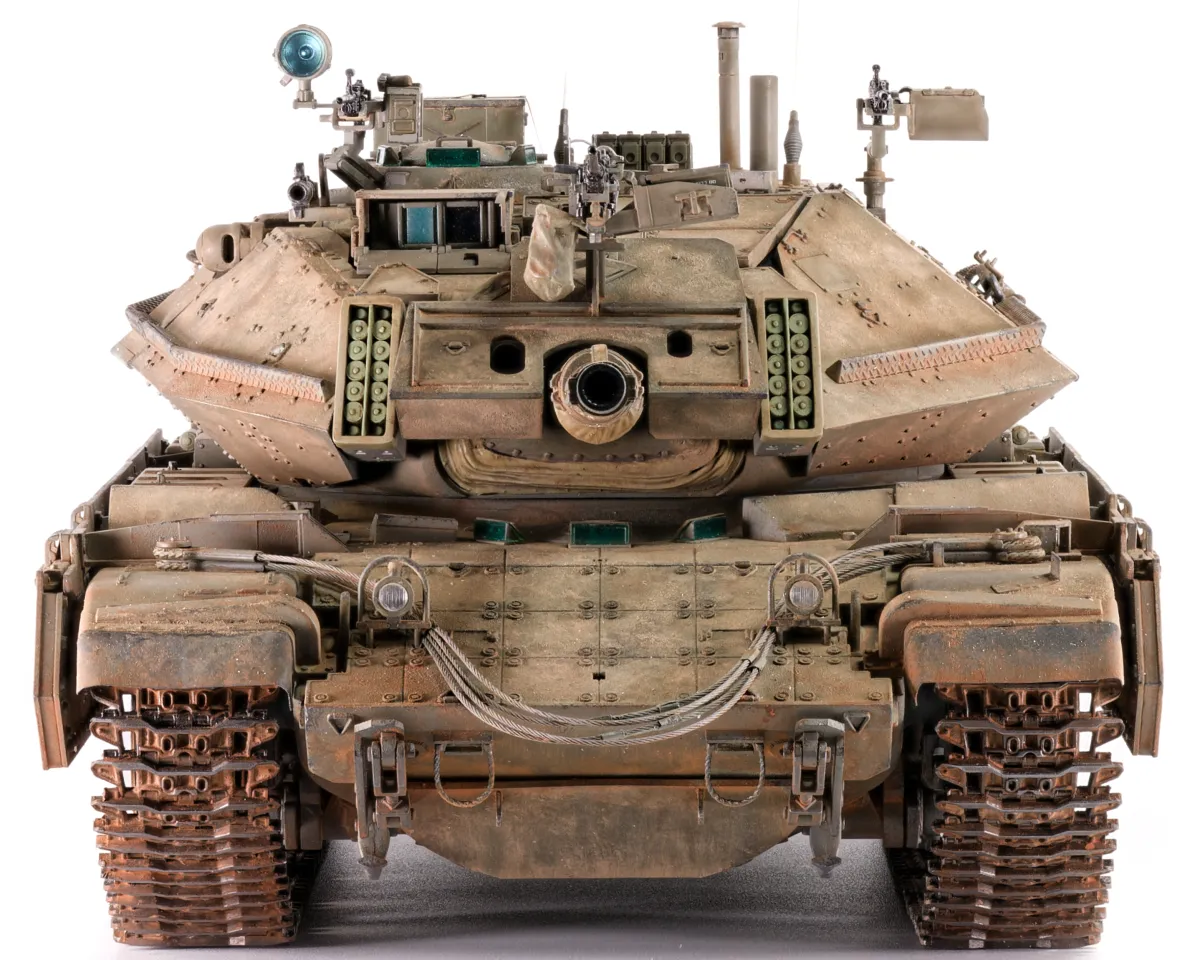
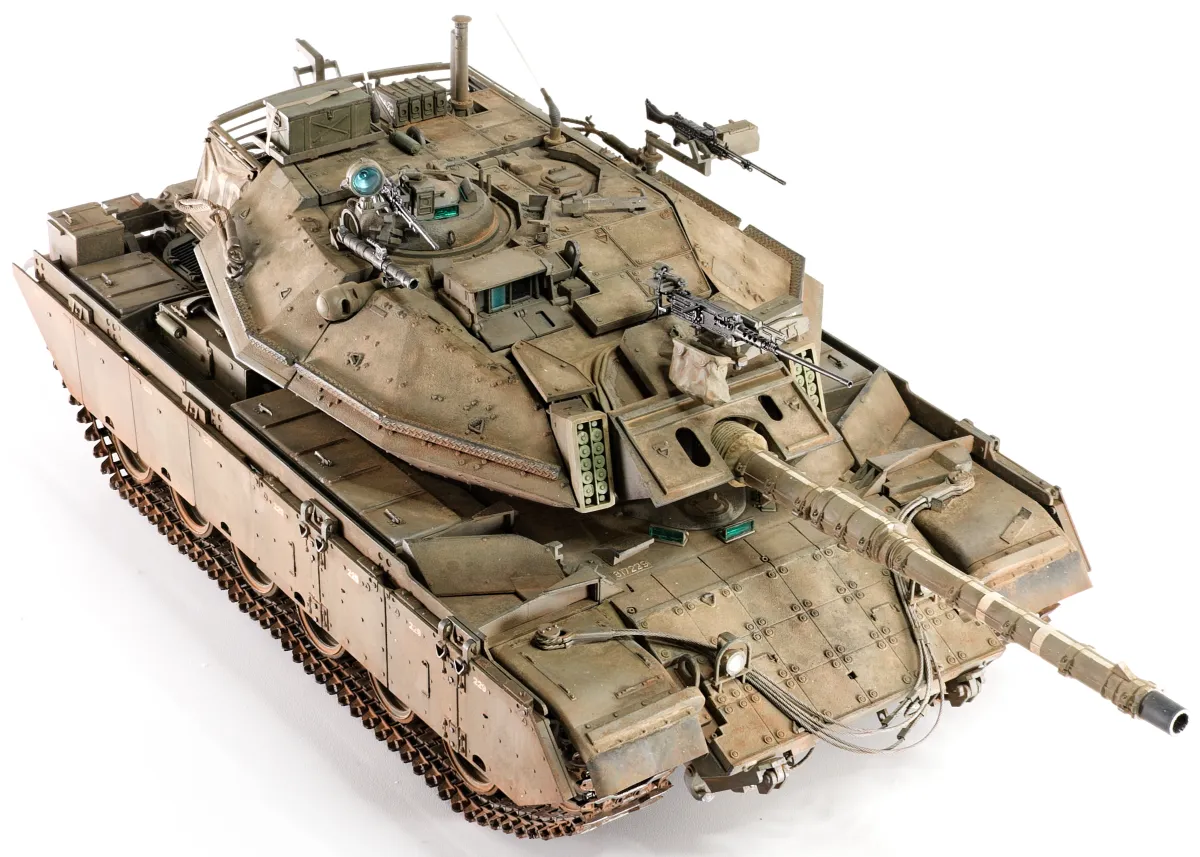
In fact, some ideas — such as the complete glacis-mounted tow ropes, the soft styrene mantlet cover, and the non-slip/diffractive texture — are quite ambitious and mostly fairly successful.
That said, I found those “ropes” to be a bit low-res, so I cut off and drilled out the ends, replaced the rope sections with wire, and made the sleeves from foil strips. It was worth the effort; much sharper. I also thought that the front dust flaps were too chunky and symmetrical, so I replaced them using copper sheet. I like copper over brass because it's far easier to cut and it's more malleable, less springy.
The two-part barrel was a little underwhelming, but probably the only alternative would be a bunch of small parts. I’d be fine with that, but simplification seems to be favoured by most kit makers. A Russian company made a metal replacement, but it must have been machined from Unobtainium, being both expensive and mythical.
My trick with long two-part barrels is to push one half into adhesive putty on a hard surface, using a ruler to keep it straight; then glue the other half on with enough rubberised cyanoacrylate to fill the join. Once cured, rubberised CA makes an easily sandable bond which won't shrink. It's brilliant for almost any join line which you want to magically disappear.
SNAFU
The workable tracks are combined with real torsion bar suspension, and this is where I think that Meng made an error, though I admit that my opinion may have been coloured by my own catastrophic cock-up.
The thing is, kit makers, if you go down the fully workable road, you really need to make sure that the model will sit at the correct height and make the suspension compliant enough to sag under a little added weight.
Reference photos and common sense told me that this heavily modified and probably over-burdened M60 would ride a bit on the low side.
A dry fit indicated that, unless I happened to have a lump of uranium ore lying around, this was at real risk of ‘showing a little too much ankle’. Removing one track link per side made them too tight, so — here comes the bright idea — I’ll just omit the torsion bars and cement the arms at the “correct” angle. After what I believed was very careful measurement and eyeballing, I settled on the right wheel position and started fixing them: first the front axles, then the rear, then the rest.
All of the road wheels were perfectly aligned with each other. Yet, despite all the measurement and care, I somehow set the ride height far too low! Now that, Ms. Morisette, is actually ironic.
There was no coming back from that, so a few days later and some forty quid poorer, I lifted the lid off a new box and started again. Not the first time and it likely won’t be the last. If you want a job done properly, you can try me, but I might need a couple of stabs at it…
Mk.II
The second attempt is still far from perfect, of course. Much of that is on me, though some of it is on Meng.
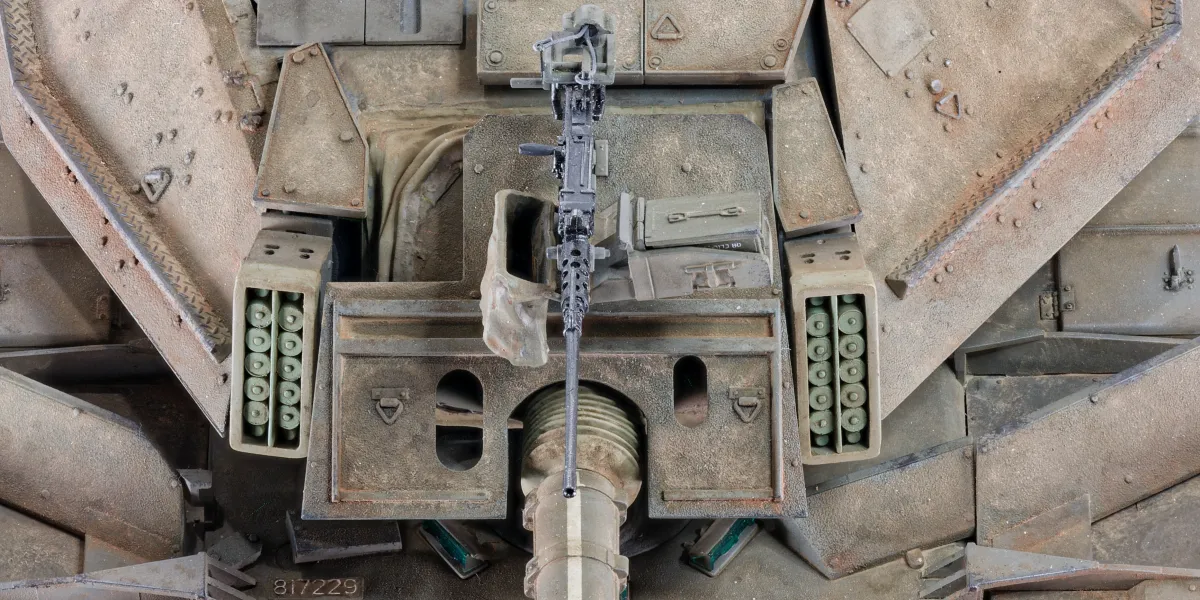
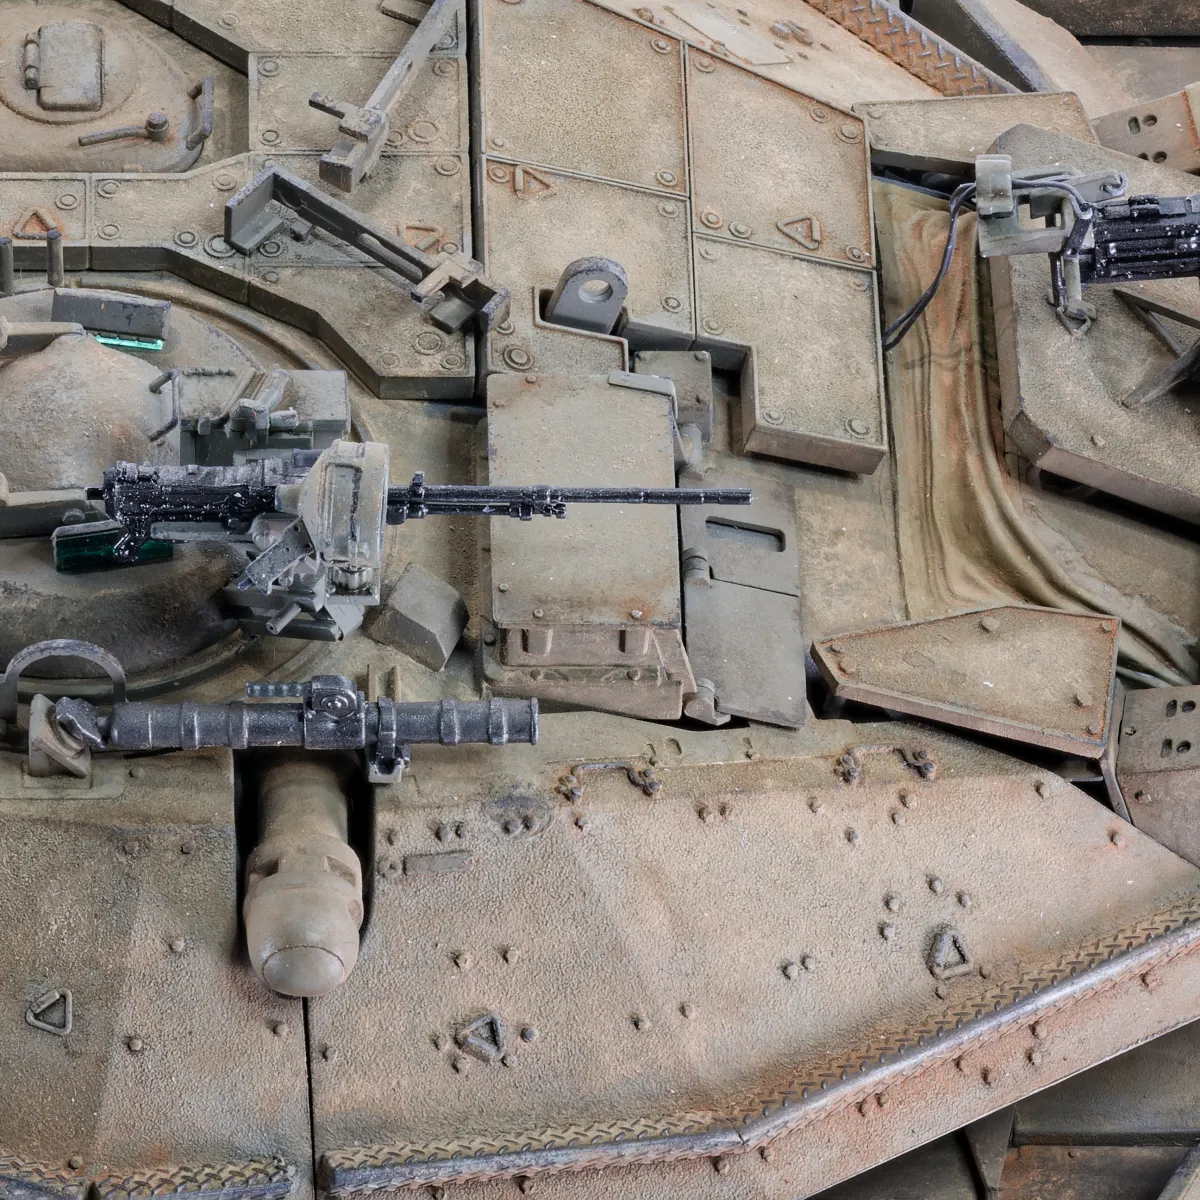
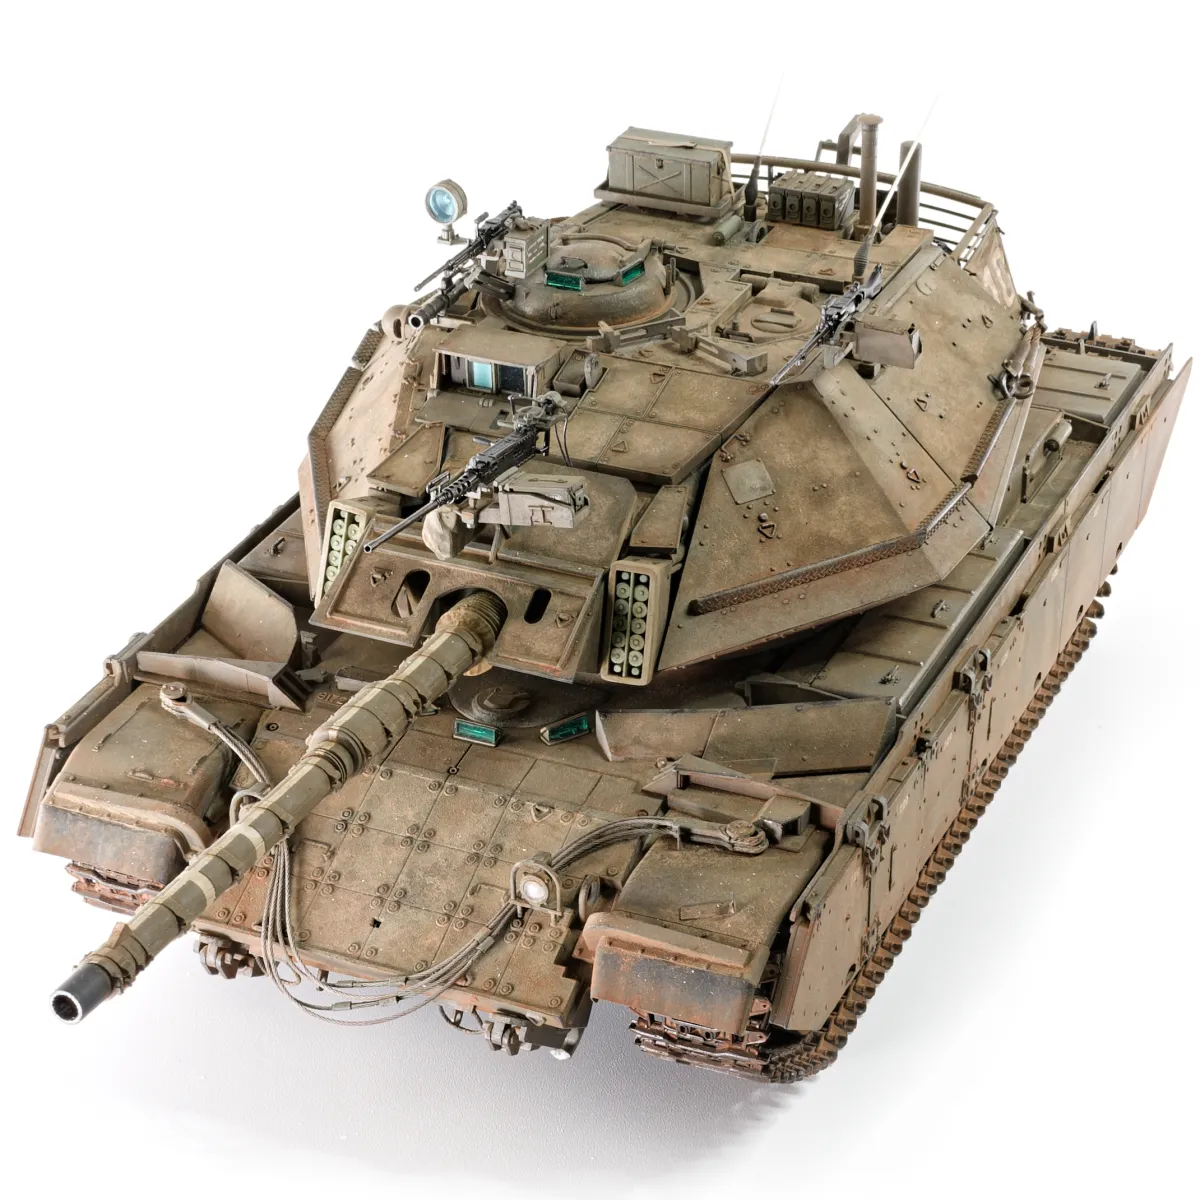
Despite taking what I thought was great care, the .50cal coaxial MG points slightly upwards in relation to the main gun, which I’m blaming entirely on the part alignment. Nothing to do with me…
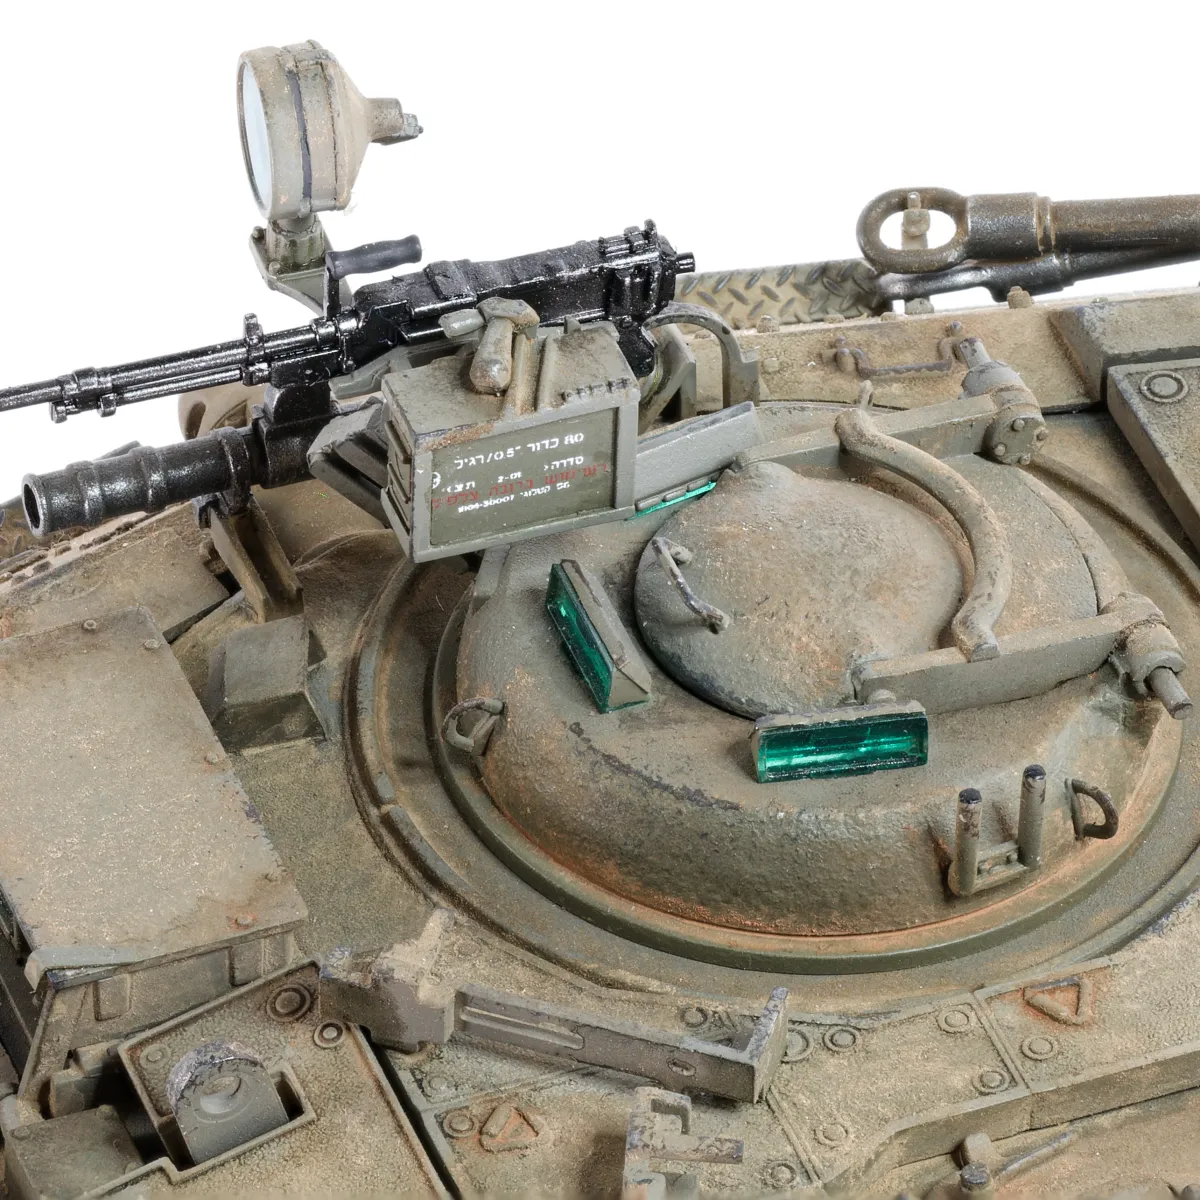
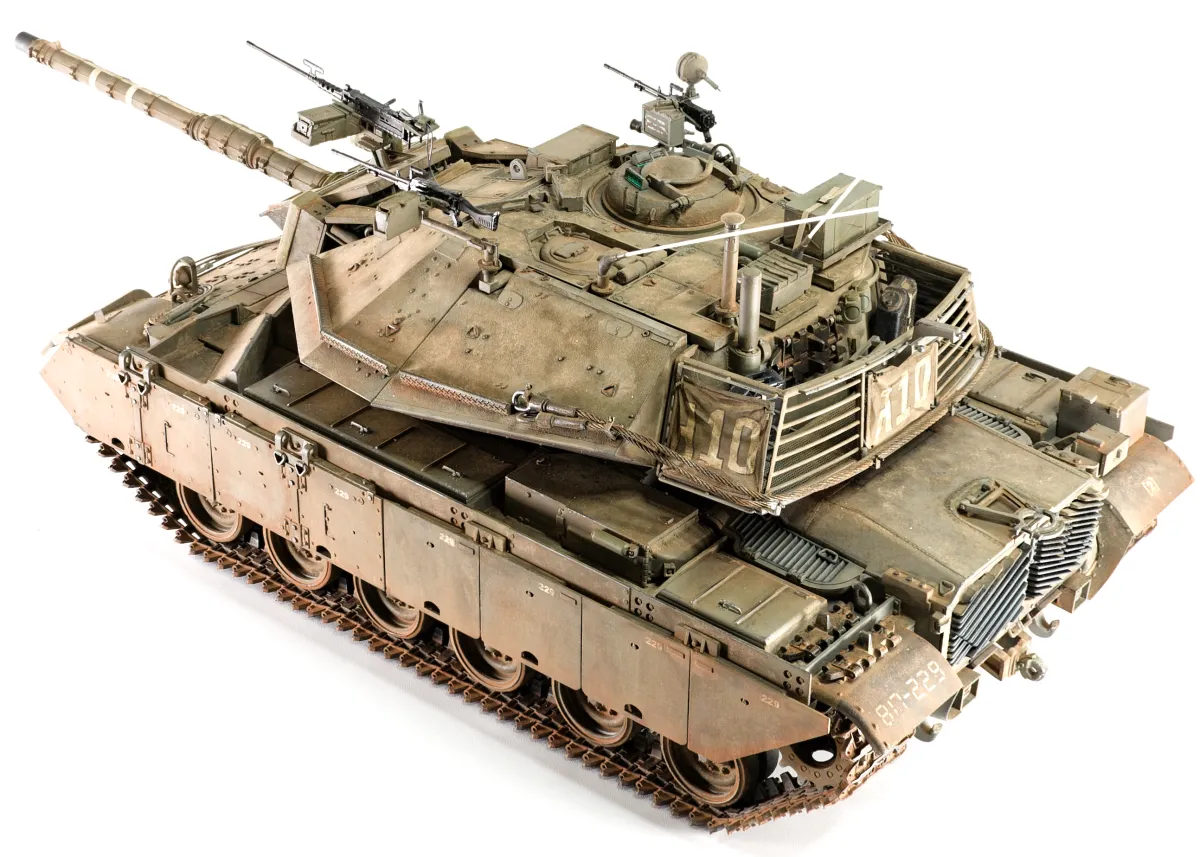
The decals are incomplete and somehow of variable quality. The larger decals were alright, but the smallest chassis numbers didn’t adhere quite as well; and the barrel ID stripes are thick enough to use as speed bumps. There is no decal for the TC’s stripe, but I was going to paint all of the barrel markings anyway. Stencils for ammo boxes are also absent, so I added some from Echelon, although they were not the best quality.
A query which I never fully resolved is whether the TC's stripe should go over or under the band clamps. Both variations occur on IDF tanks generally, but there are precious few photos of these particular tanks.
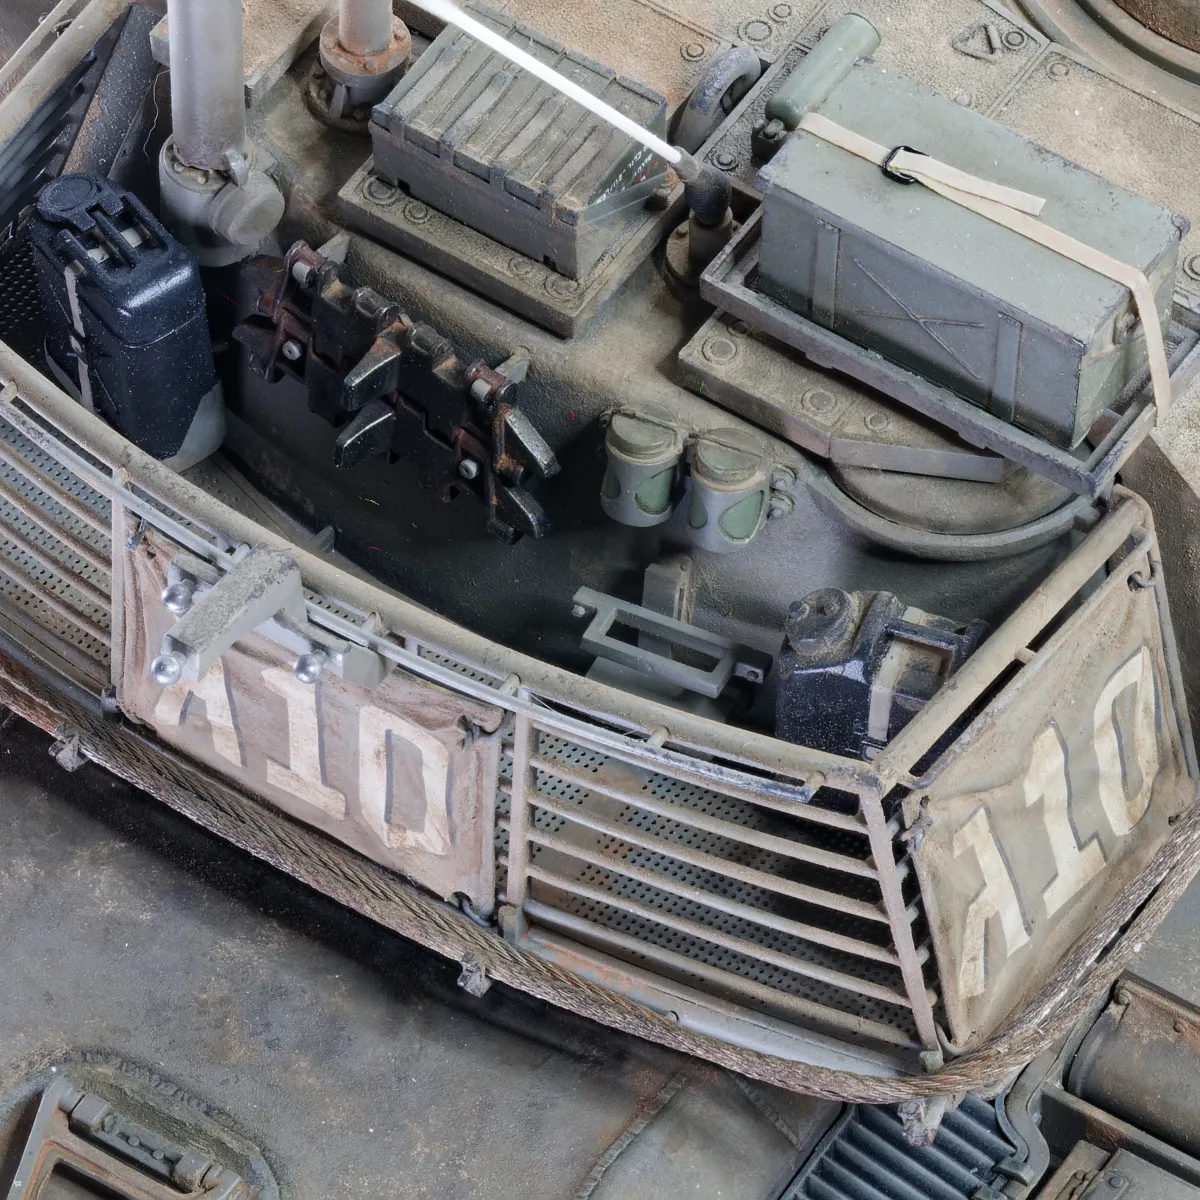
The kit's ID placards are a good effort, but possibly not accurate. What I saw in photos looked flatter, often with fold lines crossing in the middle, which I think could be replicated by brown packaging paper. Mine are tied on with wire, so they could be replaced in future, if I can muster the enthusiasm.
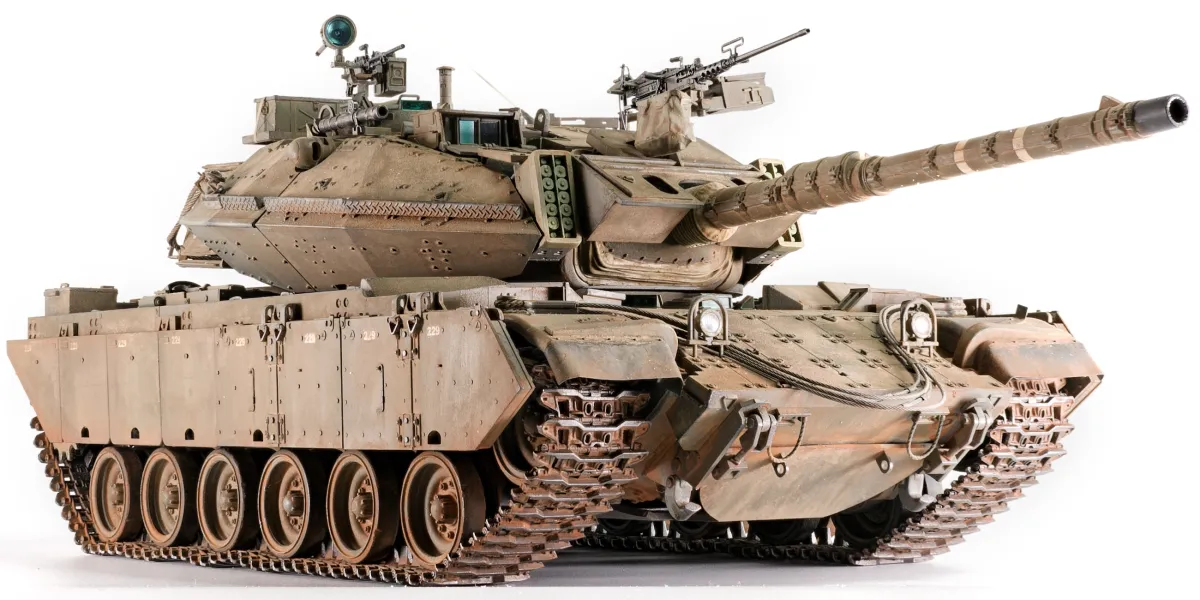
The alignment of the soft styrene mantlet cover is poor enough that it forced my hand in deciding on a slightly raised gun position, but I kind of like that pose.
After being lulled by some smooth progress, Meng hit me with another gotcha! I came to fit the TC’s MG onto its mount after painting and discovered that the ammo box would foul on the cupola’s periscopes. The mount was too short and the scopes were fixed in place, so the only solution was to cut it off and make a new one. I’m not very good at scratch-building now, never mind five years ago, so it took me three tries to devise a half-decent effort.
If you ever build either of Meng's Magach kits, you should probably try the DEF Model cupola.
Then, one final OMG moment which was entirely down to me. With the turret finished, I managed to drop it. By some miracle, the only part to snap was one of the tubes at the rear and it was such a clean break that it just needed careful re-cementing. My stress level took a little longer to fix!
Noteworthy details and alterations
- Corrected ride height
- Rebuilt front tow ropes
- Replaced front dust flaps
- TC’s .30cal butt replaced with a mounting point
- Scratch-built cupola MG mount
- Ammo box stencil decals
- EMP3D printed aerial mounts
- Coaxial .50cal detailed with remote mechanism
- Storage box strap
Well, we all have kits to build and places to be, right? So, until the next time, thanks very much for reading and may your builds be more stress-free than some of mine. 😆


Comments
add your commentP.B.
That's really nicely weathered, Ade. I love the mix of dust colors.
Ade
In reply to That's really nicely… by P.B.
Thanks very much!