
As promised in my earlier article, this is a step-by-step guide to how to lengthen Eduard’s 1/48th MERs to accept a load of Rockeyes in tandem. My possibly slightly convoluted money-saving hack is to perform a cut-and-shut with plastic shims, so here goes…
Where to begin
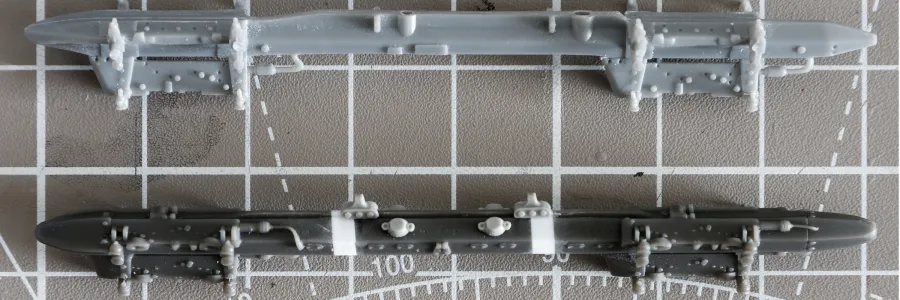
Well, the middle is out! Looking closely at the MER, I can see a lot of equally spaced surface details along its length, including some around the centre. I don’t want to erase this detail or break the symmetry by adding my shim off-centre. However, there is enough room to make two cuts between the pairs of oval rings, at roughly a third of the length. Of course, two cuts mean twice the work and more room for error to creep in, so this will need extra care. But I may as well do a proper job.
I’m not keen on using cyanoacrylate glue on the crucial join because of the need for exact alignment. So I’m going to use two pieces of plastic card of half the required thickness, one on each face of the cut, so that they can be joined with slow-curing plastic cement. I reckon that the length needs to be increased by at least 4mm, so for two cuts, I need to use four bits of 1mm card. I’ll complete one cut and join at a time because it should be easier to align them that way.
The box contains three MERs — not sure why it’s an odd number — and I only need one for an asymmetric load on my A-6, but I’m going to fix two of them and use the most successful example. That’s my rule of thumb for scratch-building, generally: make at least two and use the better one.
Tools and materials
- Razor saw (I use a JLC)
- Chisel blade and curved scalpel blade
- Plastic card of 1mm (good for 1/48th scale)
- A jig or block to aid cutting and alignment
- Slow curing styrene cement
- Medium to thin cyanoacrylate glue
- CA debonder might be handy
How to do it
- I cut four squares of good quality Maquette plastic card, slightly larger than the cross-section of the MER. Each face gets a brief rub on a sanding stick to provide a key.
- With a MER rested on my jig, I make the first cut. It needs to go through straight because the faces must be flat and correspond perfectly.
- I attach one piece of styrene to each of the cut faces. Thin CA can easily wick and make a mess, so I mix thin and medium.
- I join the plastic card faces with slow curing cement while carefully checking the alignment all around.
- Finally, I trim the cured plastic inserts until they match the cross-section of the MER.
- And then just do this over again three more times!
Tips
I didn’t trim the plastic shims until each join was finished. Trying to match the complex shape of the MER at any earlier point would have been more difficult.
I used a JLC mitre jig to hold the MER while cutting. When cementing the plastic faces, I rested the MER with four of its six mounts on the cutting mat, up against the edge of the jig, steadied on the other side with blue tack.
I avoided adding any of the small components before the whole process was complete.
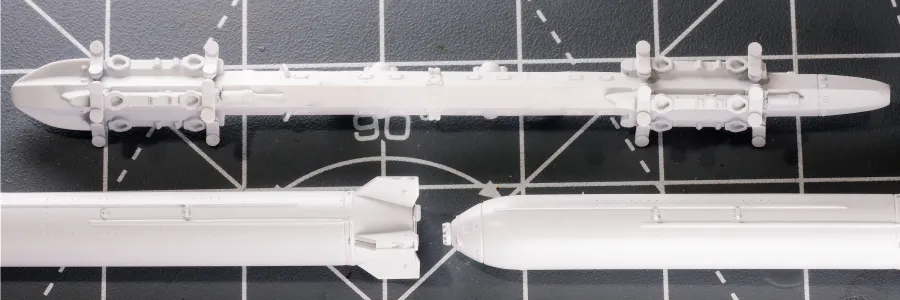
Job done
As you can see, it worked. You can probably spot my Heath-Robinson handiwork if you look closely enough, but I think that it passes inspection and it represents a welcome saving on an expensive project.


Add your comments