
I was asked a while back how I get everything in focus in my gallery photos: focus stacks, that’s how. If you’d like to know more about my method, or just what the heck I’m on about, this guide is for you.
Updated in November 2025: This article was written with Affinity Photo 2 in mind, but the new all-in-one Affinity suite still has the focus merge feature and this guide is still applicable if you're using this new version or either of the older versions of Affinity Photo.
What, why?
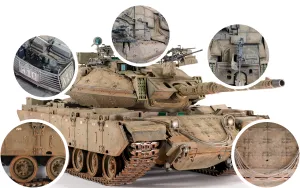
Macro photography has a unique combination of challenges. You want sharp and in-focus photos, but you can’t get close enough to fill the frame and keep the entire subject in focus.
An example, using my own camera gear: an APS-C SLR with a 105mm lens at f/22 and a subject distance of 60cm will provide a depth of field of just 23mm!
Even the smallest aperture may not provide enough depth of field (DoF), as you can see from my example. That’s because the range between the nearest and furthest distances in focus drops off sharply (pun intended) as you get closer to the subject.
The problem is not helped by the diffraction limited aperture (DLA) effect. Every camera sensor has a corresponding aperture size, or f-stop, below which the image begins to get softer as diffraction increases. Your lens may go as narrow as f/32, but it's not ideal if what you gained in depth of field is being traded for a noticeable loss of sharpness.
The answer is a focus stack. This uses software to align and merge multiple frames taken at different focus distances into one image, by blending the sharpest areas from each frame. If your source images contain enough data about every part of your composition, i.e. every part of the subject is in sharp focus in at least one frame, the stacked image should be entirely in focus.
Advantages
- Everything is sharp and in focus, obviously!
- May be the only way to get enough depth of field to cover the subject
- Avoids the smallest apertures, which may reduce image quality
- Avoids long exposure times or high ISO in insufficient light
Should I always use this?
It depends on your camera equipment, your composition, and your expectation. You’re the final arbiter. But scale models are challenging subjects and this the only way that I know of to get the entire model sharp and in focus.
And I think it actually makes them look just a bit more real, which is cool.
Automation?
A few high-end cameras have focus merge and/or bracketing modes. The automation varies: some can merge the frames in-camera, while others only automate the focus steps. I have no experience of either system, but other photographers seem to be equivocal about its effectiveness.
Technology is welcome, but it hasn’t yet rendered manual control entirely obsolete.
One big advantage of merging in software is that it presents the only opportunity to fix flaws using the source images, as I’ll explain later.
What you need
Hardware
- Any digital interchangeable-lens camera (ILC) with fully manual control
- A macro lens, preferably prime (fixed focal length)
- A sturdy tripod
- A remote trigger (cable release, wireless remote, tethered computer, or phone app)
If you use an ILC, you need some kind of macro or close-focus lens to photograph your models, and I don’t believe that there’s any real substitute for a prime macro. It will be sharper, easier to focus manually, and will get you closer than comparable general purpose zooms, even ones with “macro” in the name. And, generally speaking, the two types are designed for different tasks and produce their best sharpness at different distances.
Software
A raw converter with batch processing capability is not necessary here, but it’s nice to have if you’re using a raw file format. It makes it quick and easy to produce the consistent output which focus stacking needs.
Last but not least, you need a focus stacking application. Your options amount to:
- Buying a specialised app which does nothing else
- Subscribing to Adobe
- Putting up with a free open-source app which feels like the last century
- Downloading Affinity
And obviously, I’m going to recommend the last option because that’s what this article is partly about. I use the Affinity 2 apps for my work and the photo editor is genuinely capable with an amazing focus stacking feature. All of my display case photos are edited with Affinity and most of them are focus stacked. Best of all, the new version of Affinity, released in October 2025, is now an all-in-one app and is free to use. So no excuses for not trying it.
Method
Preparation
Consistency matters. Set up your lighting for your composition and use the same shutter speed, f-stop, ISO, and white balance for each stack. SLR users may want to switch on mirror lock. And, most importantly, don’t forget to turn off the auto-focus… 😳
If you’re new to this, a focus-stacking calculator website or app, or a DoF calculator such as PhotoPills, can help you to find the most suitable aperture and decide how close the steps should be. But with a little practice, you can use your own judgment.
I've never had a focus merge fail because of too many images, only from too few.
I’ve found that taking a lot more images at f/8 is more effective than fewer images at f/16 or smaller. It makes sense: each image will be sharper, while more images equal more data.
Next, find the furthest focus distance by focusing on the most distant part of the subject; remember it, then find the nearest focus distance and you’re ready to start from this point. Using live view with magnification makes this easy to see. I recommend leaving a little margin for error because taking a few extra shots is preferable to taking too few.
Process
If your camera can’t automate the focus steps, here’s how to do it manually.
Use a remote release (see my list above). If you don’t have one, you’ll need to use the self timer, even though it will slow you down. But with a remote and some practice, you can get into a rhythm and work quickly. Just be sure to leave a moment for the camera to settle after each turn of the focus ring.
I find it helpful to use the grip pattern on the focus ring to judge how far I’m turning it. It’s easier than judging by the focus scale alone.
The more data, the better the result, so aim for very small increments between shots. I go up through the focus range in the smallest possible steps and back down in slightly bigger steps to try to cover any gaps. I’m aiming for some overlap in the usable areas of each image because that seems to produce the best result.
The number of images will vary. I typically get sets of anything from twenty to sixty, which may seem a lot, but the only practical difference is a little more capture time.
If the framing changes as you change focus… don't worry about it. It’s common for the focal length of a lens to appear to change through its focus range and it tends to be most obvious at the shortest focus distances. Focus stacking software will correct for it by aligning the images. You can allow for it by framing a little less tightly than you actually want, knowing that you can always crop later.
Image editing
Raw or JPEG? The raw format will allow you to adjust the images for consistency and export them in a lossless format (e.g. TIFF or JPEG XL). If your raw files don’t need any adjustment, you can add them directly into Affinity’s Focus Merge and it will apply the same default colour rendering and tone curve as it does when developing raw files.
Don’t bother processing a stack of raw files individually in Affinity, though. It will take ages and it's hard to ensure consistent output.
I like to make a few basic corrections in DxO Photolab first, but I have tried skipping that step by merging the raw files and this also worked very well for me. Some adjustments can be done equally easily in either app without any problems, so it's up to you.
Editing raw files
As processing your raw files is not technically required, you could skip this part and try using them in the focus merge.
But if you do want to optimise them first, the ability to batch process with identical adjustments is a major time saver. In apps such as Photolab, you can select multiple images and adjust them simultaneously or edit one and copy/paste some or all of those changes to other images.
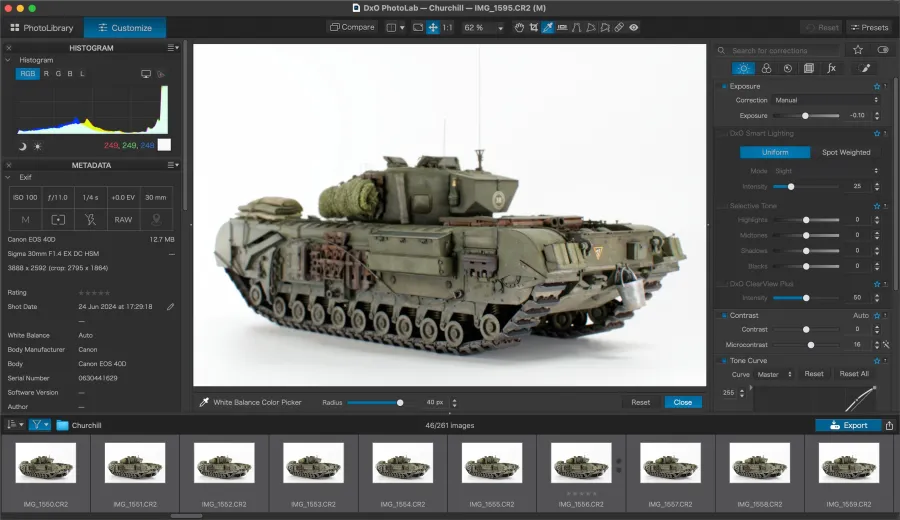
I start by selecting the whole group of identical images and making any adjustments which should be applied to all of them.
I've saved a custom profile which removes some automated corrections such as optical sharpness, aberration, and smart lighting, and adds a few others, such as the rendering profile and micro-contrast. Then I’ll check two fundamental variables: exposure and white balance.
If you forgot to set the white balance manually in camera, it may be a little off. If so, pick and apply the same WB values to all images. In any case, ensure that all images have the same neutral WB measured from the background or a grey card if you used one.
Next, I like to ensure that the white point is consistent when using a white background; likewise, for a black background, I’ll tweak the black point. Once in a while, some images may show slightly different brightness, in which case I correct those individually.
Lastly, I may add contrast with a tone curve or the selective tone sliders and fine-tune the colour if needed; though with the right rendering profile, colour and contrast are usually OK.
Making the focus stack
These steps were written with Affinity Photo 2 in mind, but are still relevant if you use the new Affinity suite app.
Open Affinity, choose New Focus Merge from the File menu, and use the Add button to choose your sources. In a few seconds, you have a finished focus stack. Or almost finished. You’ll have noticed that a Sources window has appeared and the clone tool is active.
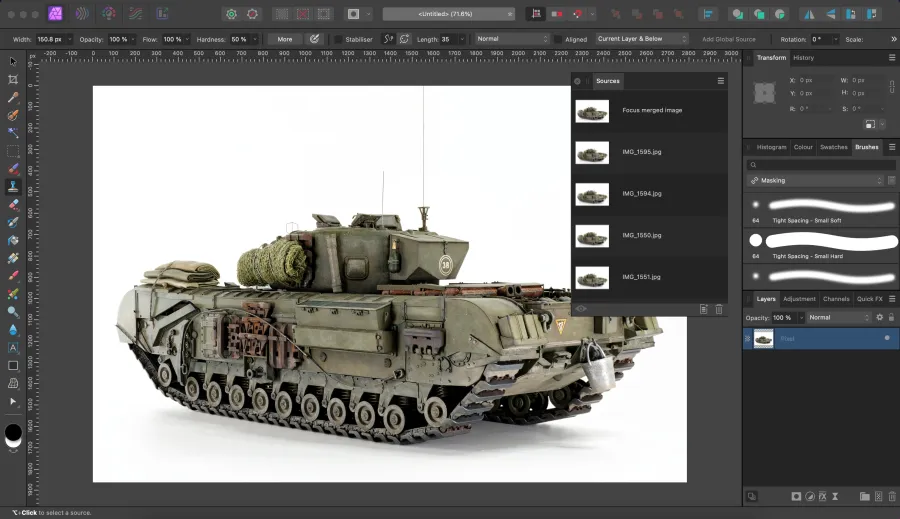
Look carefully for any blurry spots. You may find none, but you may find a few if your subject is a complex shape (like a model), has specular highlights, or has some adjacent foreground and background areas.
It's important to fix any flaws before you close the document. Even if you save it as a layer file, the sources can’t be accessed later. If the sources were saved, the file size would be huge!
When you find a blurry area, click the eye icon at the bottom left of the Sources window, select each thumbnail in turn, and watch the blurry spot until it becomes sharp. Click the eye again, check that you have a suitable brush selected, and use the clone brush to remove the flaw. I use a basic brush and set the edge hardness to between 50 and 80%. You can quickly adjust the brush size using the left and right square bracket keys.
There's a video of Affinity’s Focus Merge feature on its official YouTube channel which includes a demo of how to clone out flaws using sources.
Once you’re happy, make whatever edits you want and export it as usual.
Wrapping up
That was quite a long article, I know! It took a lot of time and effort to write it, too, so I really appreciate your reading this far. I couldn’t cover everything about this subject and I'm bound to have overlooked something, so if you have any questions at all, please leave a comment and I’ll try my best to answer.


Add your comments